You are here: Start » Programming Reference » Offline Mode
Offline Mode
- Introduction
- Workflow Example
- Online-Only Filters
- Accessing the Offline Data
- Offline Data Structure
- Workspace and Dataset Assignment
- Modifying the Offline Data
- Activation and Appearance
- See Also
Introduction
There is a group of filters that require external devices to work correctly, e.g., a camera to grab the images from. The Offline Mode helps to develop vision algorithms without having an access to the real device infrastructure. The ReadFilmstrip makes it possible without even knowing the target device infrastructure and still be able to work on real data.
This article briefly describes what the Offline Mode is, what the Offline Data is and how to access this data and modify it.
For more details on the topic, please refer to the video tutorial on our YouTube channel:
Workflow Example
- Prepare a simple application to collect data directly from the production line using Aurora Vision Studio or import data sets from images stored on the disk.
- Develop a project using previously prepared data accessing the recorded images with the ReadFilmstrip filter.
- Replace the ReadFilmstrip filter with the production filter that capture images from the cameras. Replacement is possible with a simple click-and-replace operation.
- Use of a ready program on the production line. Software is ready to work with real devices (online mode) and with recorded data (offline mode).
At any time during the work, the system maintainer can collect new datasets that can be used to tune the finished system. During the system development developer can playback updated datasets. Algorithms can be tested without any modification of the project's code.
All the data for offline mode is stored in easy to share format. Offline mode is the preferred way to work with big projects with bigger development team.
Online-Only Filters
The filters that require connected external devices can only operate while being connected, thus they are online-only. Great examples of such a filters are:
All Online-Only filters are either  I/O Function filters or
 I/O Loop Generator filters.
The Offline Mode is designed to make the Online-Only filters behave as if they were connected even without the actual connection. For that can happen, the user need to provide the offline data the filter will serve when executed in the Offline Mode.
Although all the Online-Only are I/O filters, the opposite is not always true, i.e. there are I/O filters that can operate in the Offline Mode using their default logic. In most cases this refers to the filters that access the local system resources, e.g.:
Only Online-Only filters can have their outputs bound to the Dataset Channels. Other filters always execute their default logic.
Accessing the Offline Data
Binding Online-Only Filter Outputs
In Offline Mode, the Online-Only filters are marked OFFLINE and are skipped during the execution in the Offline Mode. However, it is possible to make the Online-Only filters execute in the Offline Mode. It is done by binding at least one of their outputs to the Filmstrip channel. The only requirement is that the filter must be inserted into the ACQUIRE section of any Worker Task Macrofilter. The output can then be bound either through the Bind with Filmstrip command in the output's context menu or by dragging the channel from the Filmstrip control onto the filter output.
Once the output is bound to the Filmstrip channel, the filter can be executed in the Offline Mode and it's default logic is replaced with loading the data from the disk and forwarding it to the outputs.
All outputs that are not bound, do not provide any data and all connected filters will be skipped during the execution. All macrofilters which contains such filters will be skipped too.
The ReadFilmstrip Filter
Apart from binding the Online-Only filter outputs, the Offline Data may also be accessed with the ReadFilmstrip filter. In that case the Offline Data is exposed by the ReadFilmstrip filter's output, which name corresponds to the assigned Channel name.
The ReadFilmstrip can only be inserted into the ACQUIRE section of the worker macrofilter.
Just like any other filter, the ReadFilmstrip can be inserted into the program with the standard filter lookup and insert facilities like dragging the filter from the Toolbox. Apart from that, the ReadFilmstrip filter can be inserted by drag-and-drop the channel from the Filmstrip control onto the empty space within the Program Editor. This way the inserted filter already assigned to Dataset Channel of choice.
Once the target device infrastructure is known, the filter can be easily replaced with the production-ready, Online-Only filter with the "Replace..." command. All the existing connections are reconnected to preserve the current algorithm consistent. All outputs in the replaced filter that are found corresponding to the replaced ReadFilmstrip outputs are bound to the same Dataset Channel, the replaced ReadFilmstrip filter was assigned to.
If the filter ReadFilmstrip was not replaced with an existing I/O filter the execution of this filter will be skipped in Online mode.
Offline Data Structure
The offline data is organized in the Workspace-Dataset-Channel-Data tree structure:
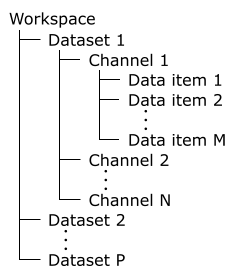
Workspace structure.
The data items from all channels at the particular index make up the Sample. Sample represents a single moment in time in which data was saved.In the Filmstrip rows represent the channels within the current Dataset, whereas columns represent the Samples. In the following screenshot the selected Sample is made up from an image from the Image channel and the value "1" from the Index channel:

Sample.
At the single iteration of the Worker Task macrofilter, there is one Sample available.
Workspace and Dataset Assignment
Each time an Aurora Vision Studio project is opened or created there is always some Workspace available to that project. It is either the Default Workspace that is created for the user at first application start up or some user-defined Workspace assigned to that project.
There are several rules about the assigning workspace elements to the project elements:
- Single project may have assigned zero or one Workspace.
- One Worker Task may have assigned zero or one Dataset.
- The assignment of the Workspace to the project is performed once any Dataset is used in any Worker Task.
- The assignment of the Dataset to the Worker Task is performed once any Channel is bound to an output or assigned to the ReadFilmstrip filter within that Worker Task.
In the fresh Aurora Vision Studio installation there is the Default Workspace available for all new projects and for those projects that have not explicitly selected any other Workspace.
Modifying the Offline Data
In general the Offline Data may be considered as some content (the channel items) grouped by the workspace, dataset and channel (the structure). Similarly, the Offline Data modifications may be split into two kinds: structural and content.
Structural Modifications
In the workspace structure figure can be seen, that Workspaces, Datasets and Channels are simply collections. Adding and removing workspaces, datasets and channels may be considered as structure modifications. All these operations are available in the Workspaces Window. However, operations common for the current workspace (adding/removing datasets and channels) are also available in the Filmstrip Control so there is no need to jump between controls to perform workspace-related tasks.
By default Aurora Vision Studio starts up with the default Workspace. Initially the default workspace contains a single Dataset with
an empty channel of type Image. Similarly each new Dataset created in any workspace also contains an empty channel of type Image.
Content Modifications
As the Offline content is actually the data that can be used in the filter outputs, specifically the channel items,
the easiest way to add a new data is through the big "+" button in the last Filmstrip control's column.
The new data editor depends from the type, e.g. for the Image type the image files are selected from the disk and the geometrical data,
as well as the basic data, is defined through either the appropriate dialog or an inline editor.
It is also possible to append online data directly to the bound channel. This can be achieved through the Save icon at the Filmstrip controls's toolbar:
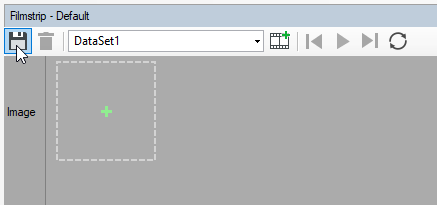
Saving the sample.
The fundamental types and simple structures are serialized directly in the parent Dataset metadata file (*.dataset). On the other hand, when the acquired online data requires saving to the disk, the channel's storage directory is used and only the path is saved in the *.dataset file. By default the storage directory is the one of the subdirectories within the parent Workspace directory. Though, the user may change the storage directory at any time with the channel's Edit dialog that is available in the Workspaces Window.
Existing channel items can be modified with the edit button that shows up on hovering the item. The button, once clicked, makes the default editor for the item type opened.:
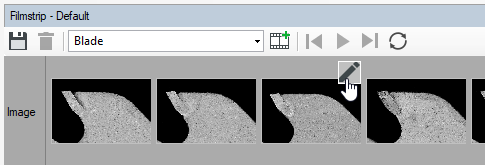
Editing the channel item.
Activation and Appearance
Main Window
The Aurora Vision Studio main window contains several indicators that signal the current Offline mode and execution state:
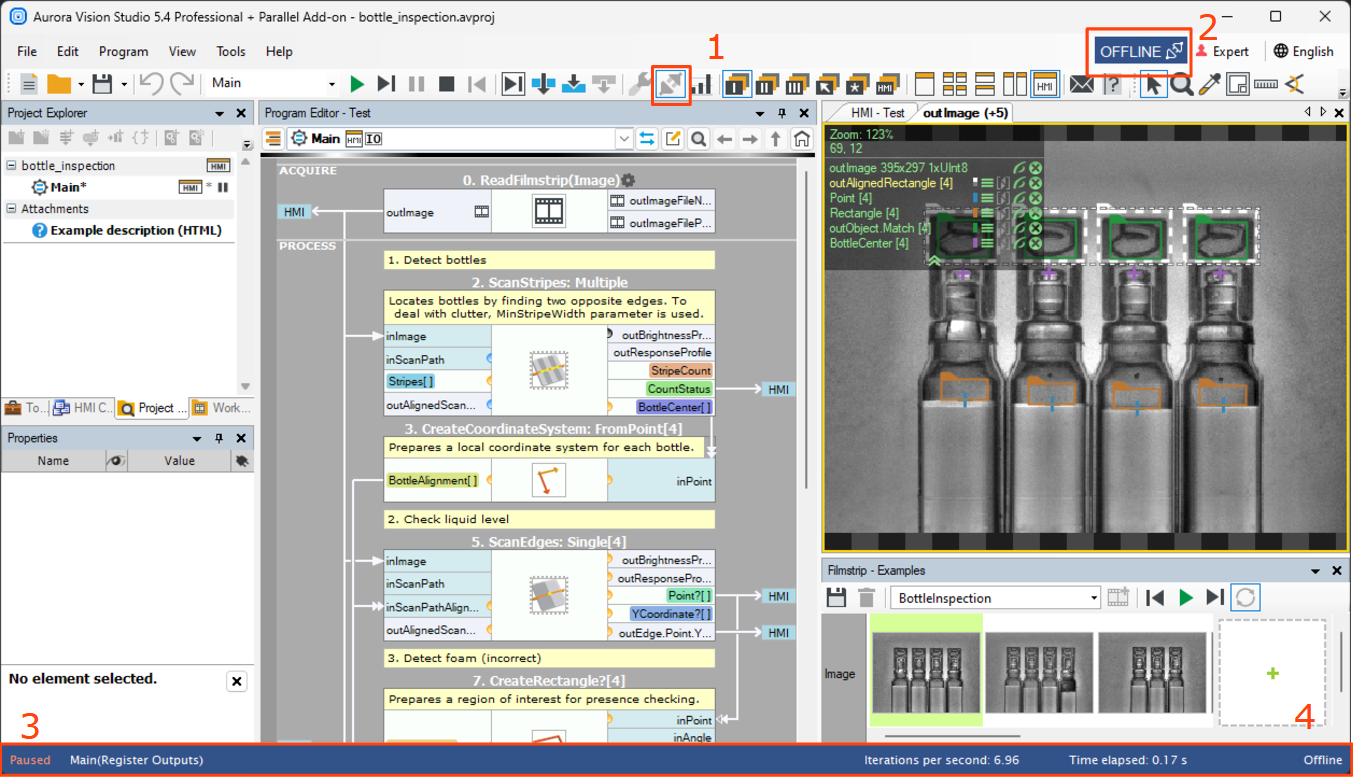
Aurora Vision Studio Main Window with marked the Offline mode and execution indicators.
- The Offline mode button
 at the main toolbar. If selected, the Offline mode is active,
 - The button at the top-right corner which visually represents the Mode and Execution:
Offline Mode Online Mode Idle 

Executing 

- Execution status and the status bar background color. If the program is currently in the execution or paused state, the background color corresponds to the indication button (2) background color,
- If the Offline mode is active, there is additional Offline label at the bottom-right corner of the the window.
Program Editor
The Online-Only filters, unless bound with the Filmstrip channel, are disabled in the Offline mode. It is marked with the OFFLINE label over the filter:
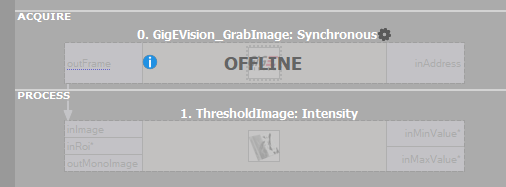
Unbound Online-Only filter that is disabled in the Offline mode.
The ReadFilmstrip on the other hand, is disabled in the Online mode and marked with the NOT IN ONLINE label:
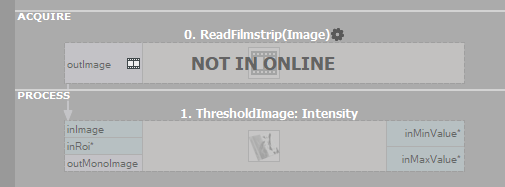
The ReadFilmstrip filter disabled in the Online mode.
See Also
- Managing Workspaces - extensive description how to manage dataset workspaces in Aurora Vision Studio.
- Using Filmstrip Control - tool for recording and restoring data from datasets in Aurora Vision Studio.
| Previous: Error Handling | Next: Summary: Common Terms that Everyone Should Understand |

