
You are here: Start » Getting Started » Acquiring Images
Acquiring Images
Acquiring Images from Files
Adaptive Vision Studio is not limited to any fixed number of image sources. Instead, image acquisition is a regular part of the library of filters(tools). In particular, to load an image from a file, the user needs to create a program with an instance of the LoadImage filter.
Four steps are required to get the result ready:
- Add a LoadImage filter to the Program Editor:
- Either by choosing it from the Image Acquisition section of the Toolbox (recommended).
- Or by dragging and dropping it from the Image :: Image IO category of the Filter Catalog.
- Select the new filter instance and click on "..." by the inFile port in the Properties window. Then select a PNG, JPG, BMP or TIFF file.
- Run the program.
- Drag and drop the outImage port to the Data Previews panel.
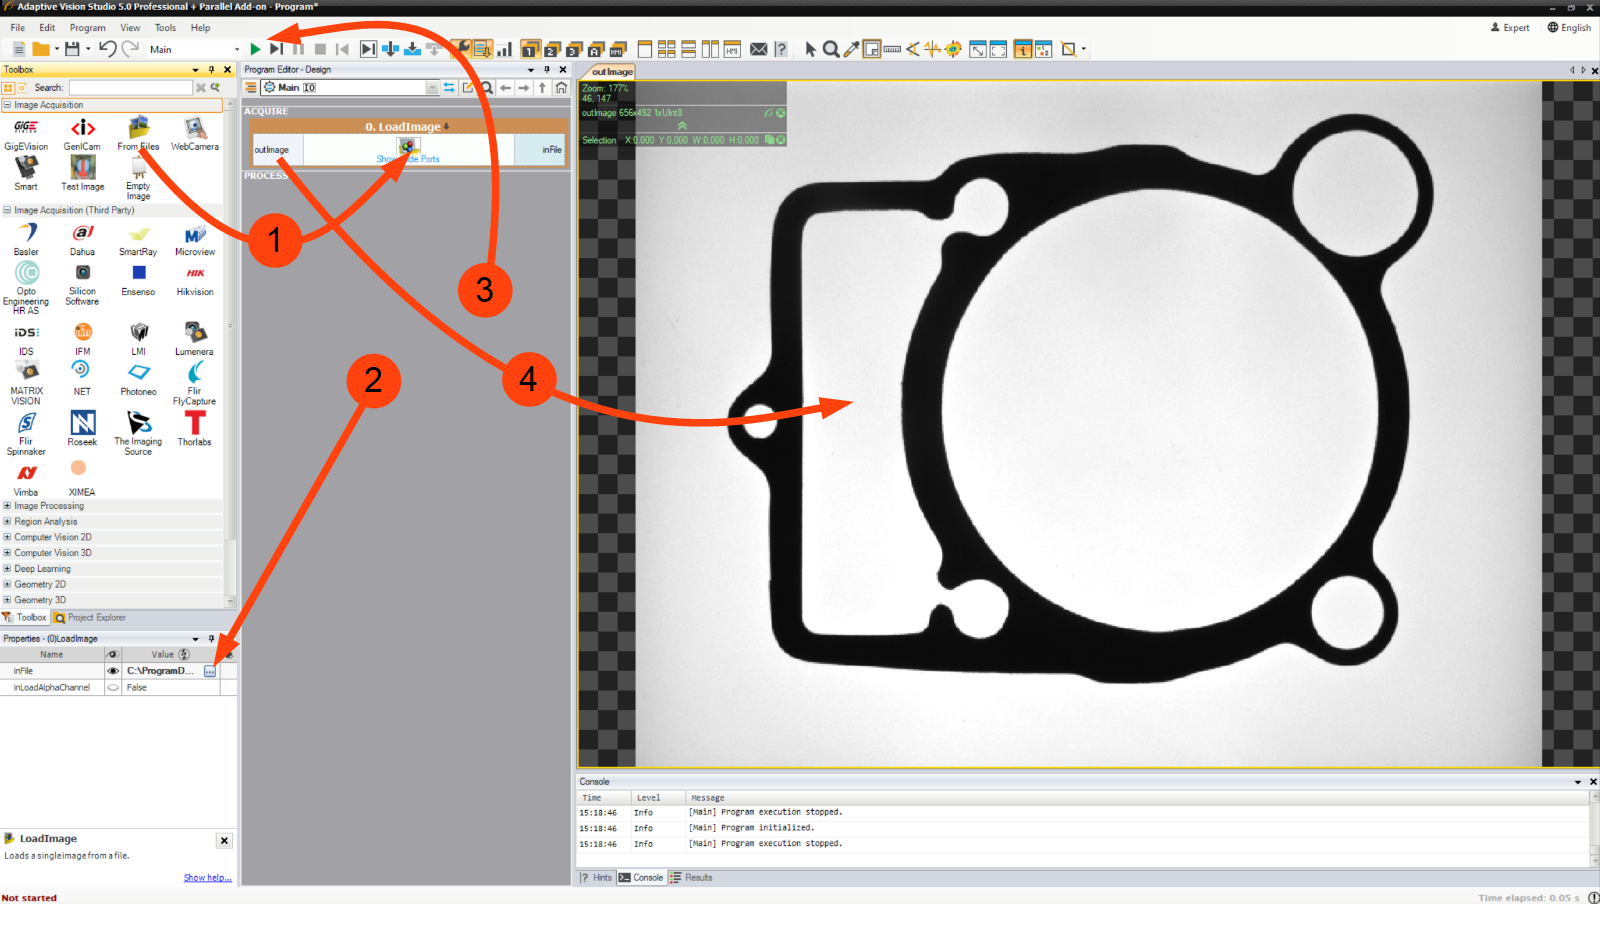
Creating a program that loads an image from a file.
Enumerating Images from a Directory
If you have multiple images, e.g. recorded from a camera, and you want to simulate that camera with the files, you can use the EnumerateImages filter(tool). It will make your program work in a loop until all images are read from the directory specified with the inDirectory parameter.
Acquiring Images from Cameras
For acquiring images from cameras and frame grabbers there are filters(tools) in several different categories:
-
GigE Vision
Provides an interface to all GigE Vision compatible devices. See also Working with GigE Vision Devices. -
GenICam
Provides an interface to all GenICam / GenTL compatible devices. See also Working with GenTL Devices. -
Camera Support
Provides multiple interfaces to drivers provided by individual camera vendors: NET (SynView, ICube), Allied Vision Technologies (Vimba), Basler (Pylon), Kinect, Matrix Vision (mvGenTLAcquire), LMI (Gocator), IFM, PointGrey (FlyCapture, Spinnaker), The Imaging Source (Imaging Control), XIMEA (m3api). -
Camera Support :: Web Camera
Provides an interface to DirectShow based cameras, e.g. to standard web cameras. -
User Filters
Non-standard cameras can be connected by writing User Filters in C++. A sample implementation for cameras from IDS is available.
It is advisable to use the general GigE Vision or GenICam interfaces in the first place as they provide the most complete feature set and the most comprehensive support in the graphical interface of Adaptive Vision Studio. Vendor specific interfaces are required for older and non-standard camera models.
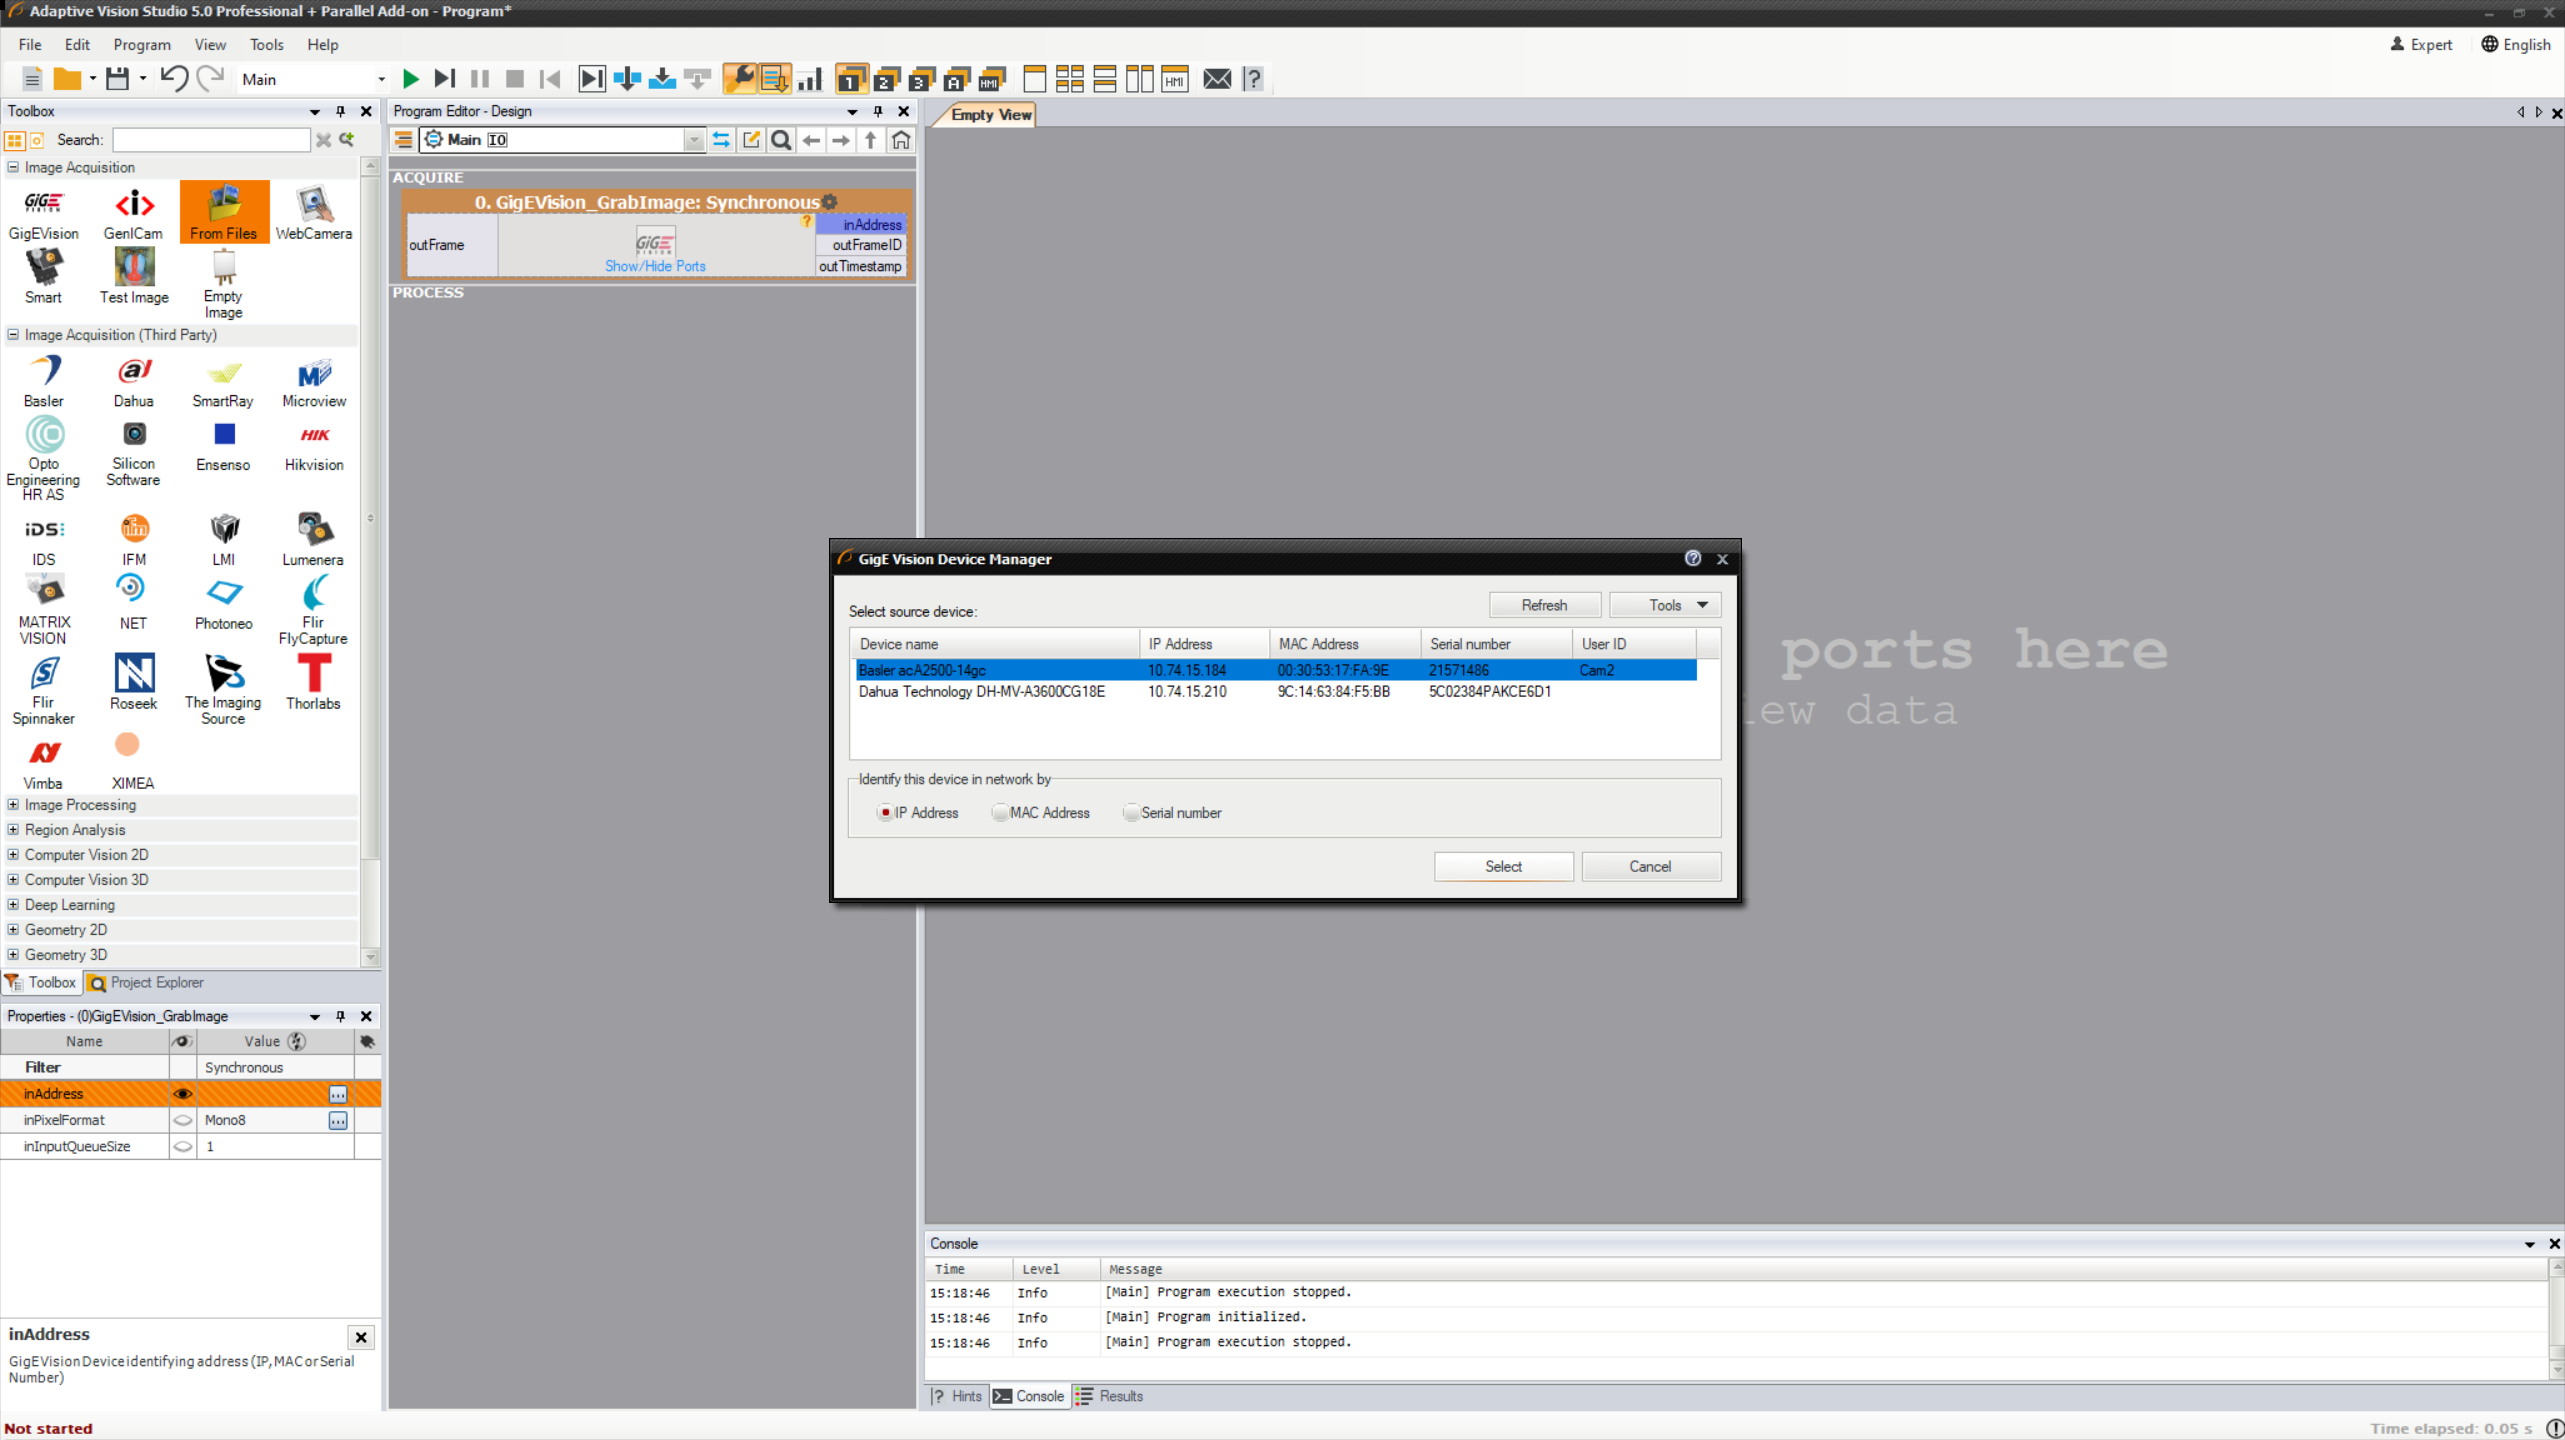
Connecting to a GigE Vision compatible camera.
| Previous: Running and Analysing Programs | Next: Preview and Data Presenting |