
You are here: Start » Web HMI » Designing WebHMI
Designing WebHMI
Introduction
Aurora Vision Studio, apart from the classic desktop HMI, allows users to create an interactive webpage version of the HMI which can be displayed in any web browser. The webpage is created within Aurora Vision Studio IDE in the WYSIWYG-like editor by manipulating the WebHMI controls on the page.
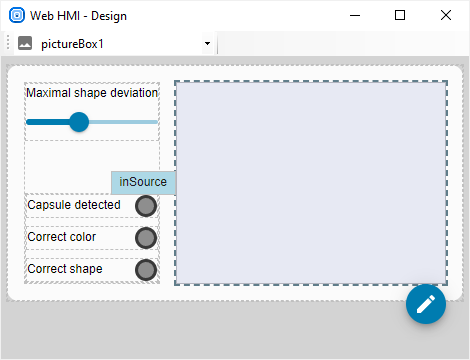
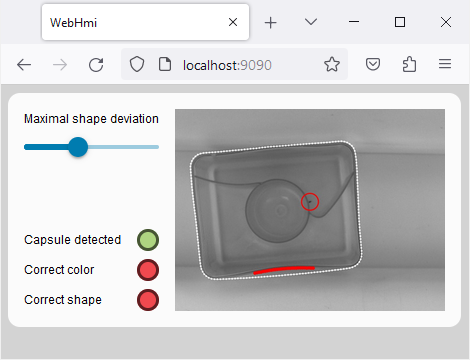
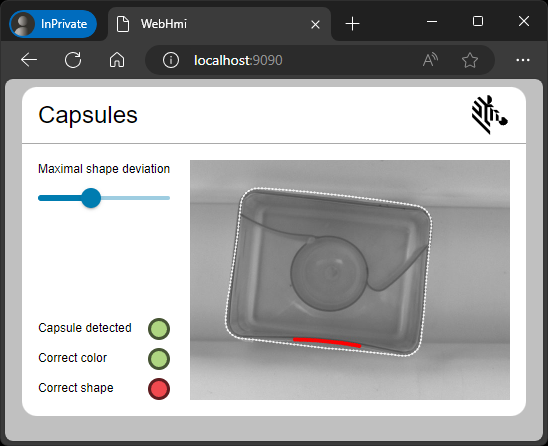
A simple WebHMI example: at the design time (left) and at run time displayed in the browser (right).
The WebHMI page is composed from the WebHMI controls. Some of the controls may contain other controls to build the hierarchy, e.g., the StackPanel and the TablePanel provide specific layout types, whereas the TabControl allows to arrange controls in different tab pages. At the top of the control hierarchy is the Window control, which may contain any single control.
The appearance of controls can be modified using the properties listed in the Properties Control when the control is selected and the WebHMI designer tab is active.
Communication with Aurora Vision application is achieved through connections with control ports and control events:
- From a filter's output to a control's input, e.g., for displaying an image or text result.
- From a control's output to a filter's input, as data sources for setting various parameters in a program with e.g., with sliders or checkboxes.
- With a special kind of macrofilters executed in response to some action on the control, e.g., Button.Click.
Adding the WebHMI to the Project
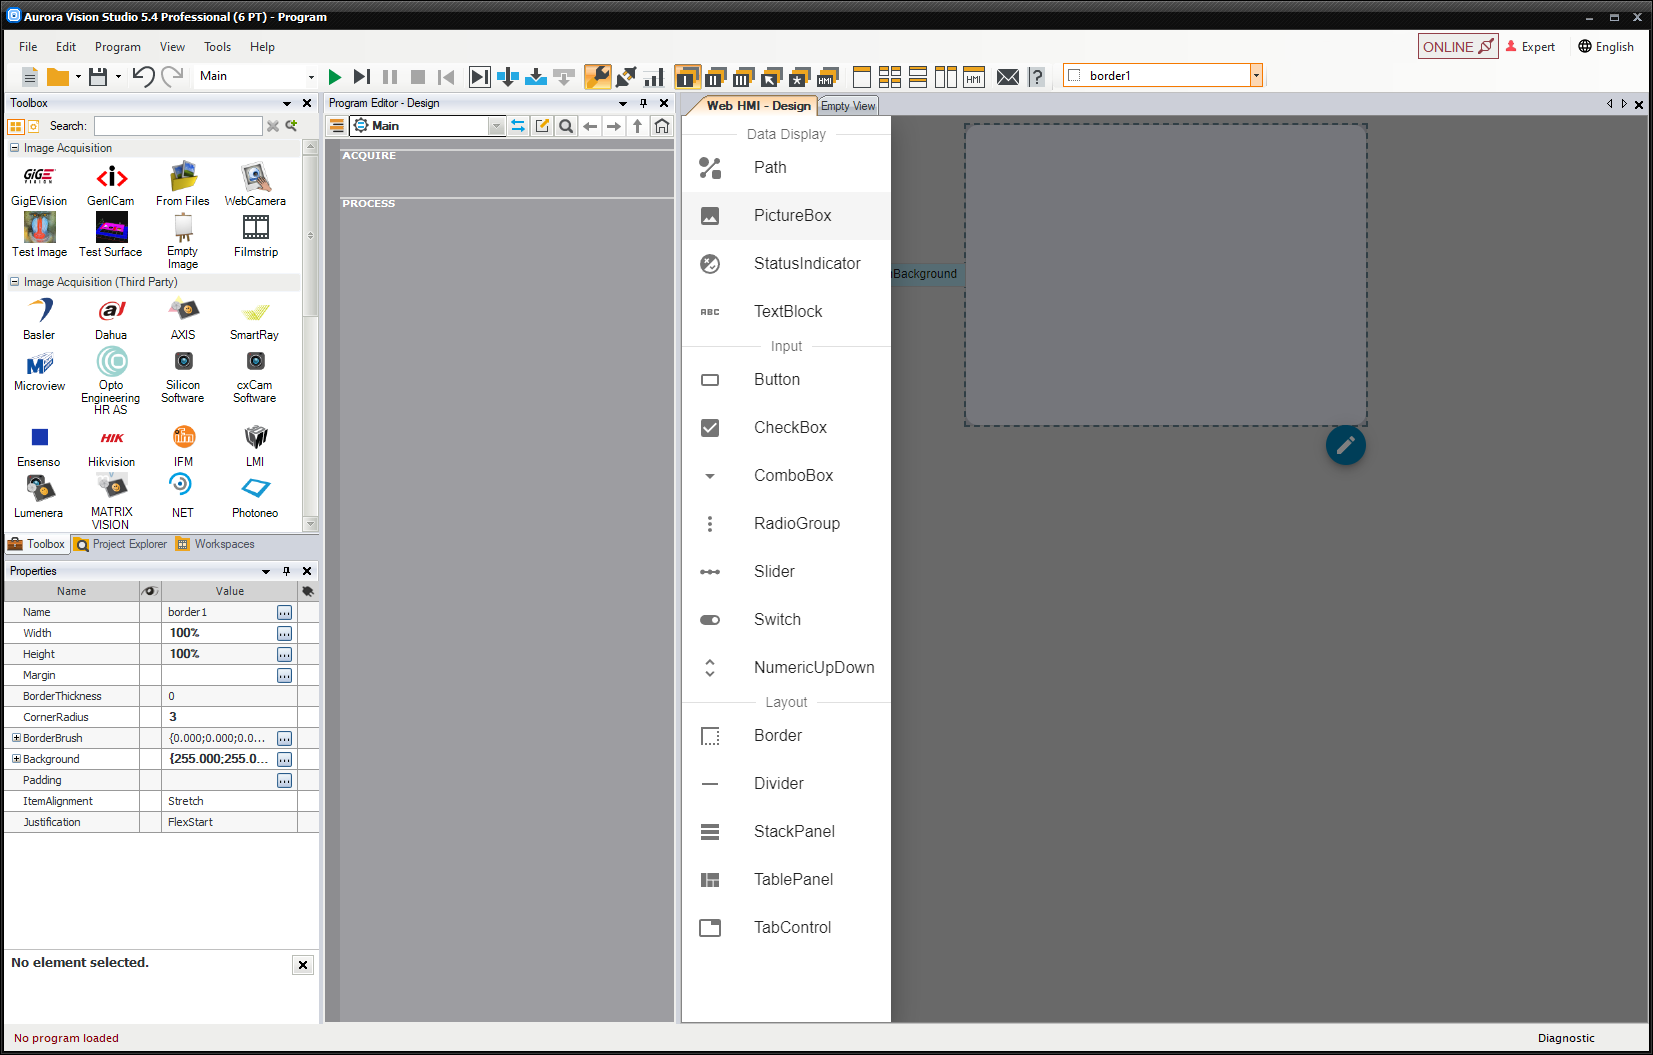
To add a WebHMI subsystem, choose Edit » Add Web HMI... or click the WebHMI button on the Toolbar. Then, select a WebHMI template that fits the target layout or choose the target layout. The template is just a starting point that can be freely modified. Modifications include:
- Adjusting selected control properties in the Properties Control
-
Content modifications through the
 action button,
e.g., adding content, removing selected control, etc.
action button,
e.g., adding content, removing selected control, etc.
In particular, to set a PictureBox content for the Border control:
- Select the Border control,
- Click the action button
- Click the Set Content... command
- Select the PictureBox control from the control list
WebHMI Display
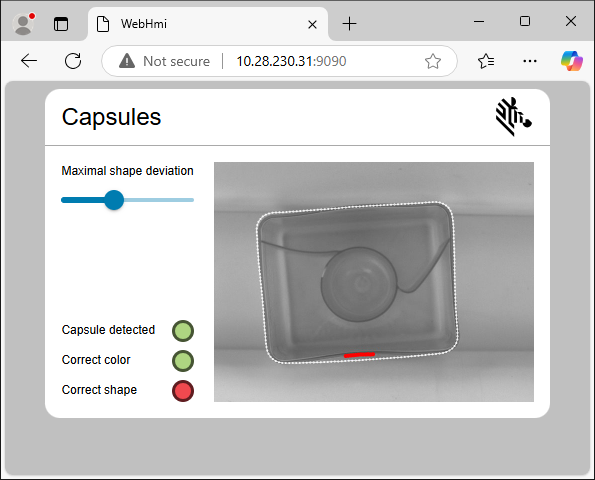
To display the WebHMI, open your web browser and, in the address bar, type the IP address of the PC running the Aurora Vision application, followed by the WebHMI Server Port number.
If you want to display the WebHMI in a web browser on the PC that runs the application, you may type localhost instead of the IP address.
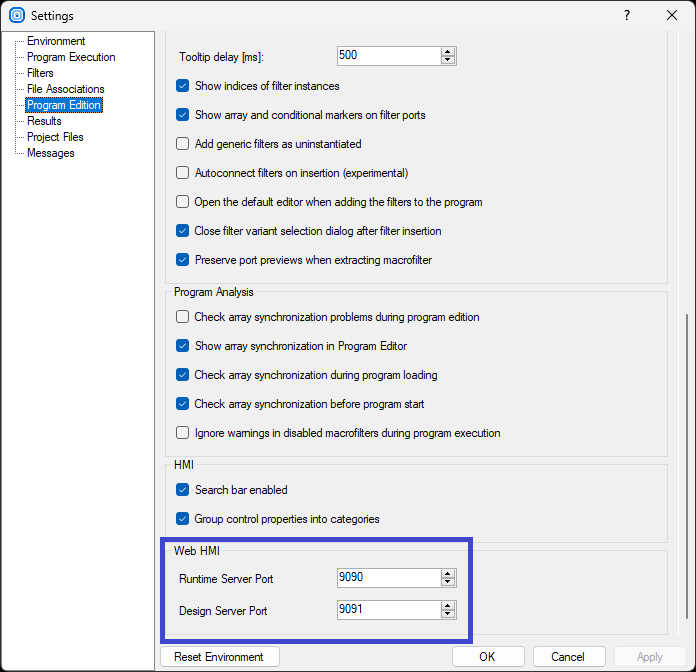
The number of the WebHMI Server Port is available in Tools » Settings » Program Edition » Web HMI section.
The default values are 9090 for the Runtime Server and 9091 for the Design Server.
There are two variants of the WebHMI server: Designing and Runtime.
The Designing server allows the user to access WebHMI design mode via a web browser. The controls can be modified, and it displays the available ports that can be connected to the
program.
The Runtime server presents the WebHMI during program execution. It doesn't allow modification of the WebHMI layout, permitting only the intended interaction with the controls
during runtime.
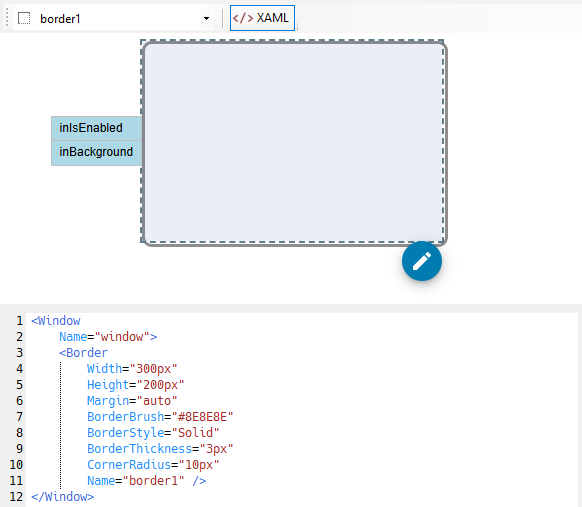
WebHMI Code view
You can modify the WebHMI view and its controls directly in its code, not only in the Properties window.
To show the code, click on the XAML button on the Toolbar.
Removing the WebHMI
The WebHMI subsystem can be removed from the project with the Edit » Remove Web HMI command.
Video Tutorials
Please have a look at these videos presenting the WebHMI possibilities.
| Previous: WebHMI | Next: Standard WebHMI Controls |