
You are here: Start » User Interface » Finding Filters
Finding Filters
Introduction
There are many hundreds of ready-for-use filters(tools) in Adaptive Vision Studio implementing common image processing algorithms, planar geometry, specialized machine vision tools as well as things like basic arithmetics or operating system functions. On the one hand, it means that you get instant access to results of tens of thousands of programmers' work hours, but it also means that there are quite a lot of various libraries and filter categories that you need to know. This article advises you how to cope with that multitude and how to find filters that you need.
The most important thing to know is that there are two different catalogs of filters, designed for different types of users:
Toolbox (for typical applications) |
Filter Catalog (for advanced users) |
The Toolbox is designed for use in typical machine vision applications. It is task-oriented, most filters are grouped into tools and they are supported with intuitive illustrations. This makes it easy to find the filters you need the most. It does not, however, contain all the advanced filters, which might be required in more challenging applications. To access the complete list of filters, you should use the Filter Catalog. This catalog is organized in libraries, categories and subcategories. Due to its comprehensiveness, it usually takes more time to find what you need, but there is also an advanced text-based search engine, which is very useful if you can guess a part of the filter name.
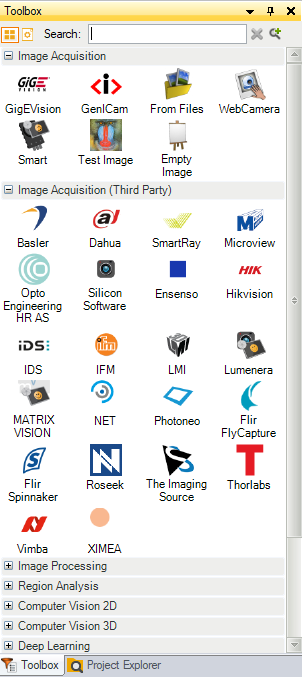
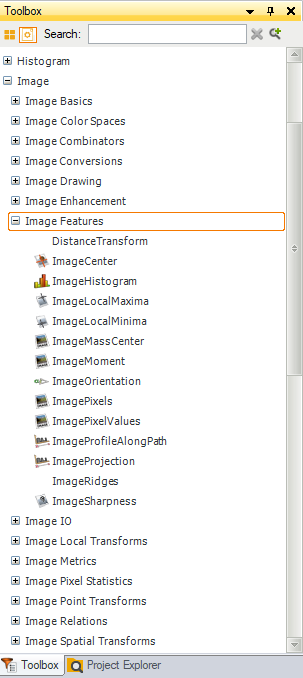
Toolbox
Sections
When you use the Toolbox, the general idea is that you will most probably start with a filter(tool) from the first section, Image Acquisition, and then follow with filters from consecutive sections:
-
Image Acquisition
– Acquiring images from cameras, frame grabbers or files. -
Image Acquisition (Third Party)
– Acquiring images from third-party cameras. -
Image Processing
– Image conversions, enhancements, transformations etc. -
Region Analysis
– Operations on pixel sets representing foreground objects (blobs). -
Computer Vision 2D
– Specialized tools for high-level image analysis and measurements. -
Computer Vision 3D
– Specialized tools for analysis of 3D point clouds. -
Deep Learning
– Self-learning tools based on deep neural networks. -
Geometry 2D
– Filters for constructing, transforming and analysing primitives of 2D geometry. -
Geometry 3D
– Filters for constructing, transforming and analysing primitives of 3D geometry. -
Logic & Math
– Numerical calculations, arrays and conditional data processing. -
Program Structure
– Category contains the basic program structure elements. -
File System
– Filters for working with files on disk. -
Program I/O
– Filters for communication with external devices.
Choosing Filter from Tools
A tool is a collection of related filters. The process of selecting a filter from the Toolbox thus consists of two steps:
- First you select a tool in the Toolbox, e.g. "Fit Shape".
- Then you select a filter from the tool in the "Choose Filter of Group" window.
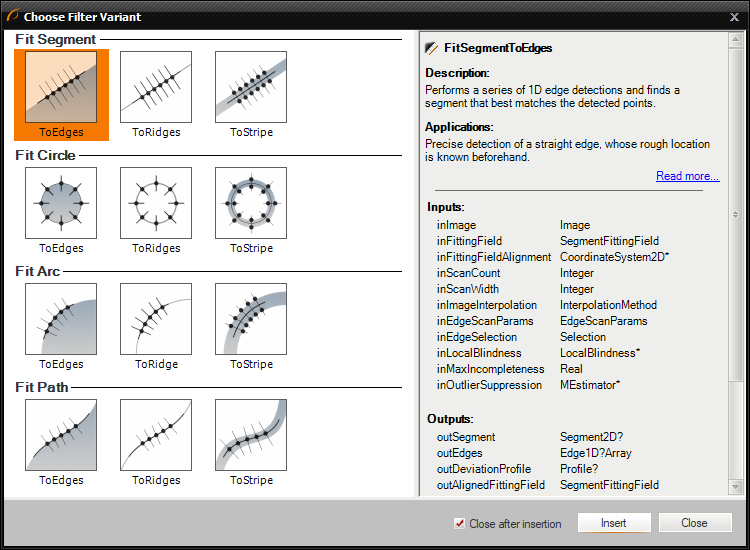
Choosing a filter from a tool (Toolbox).
This dialog can have several sections (e.g. "Fit Segment", "Fit Circle" etc.)
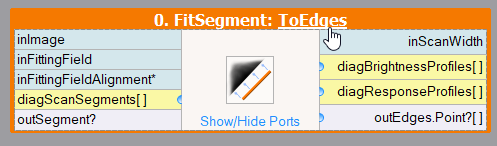
Changing filter variant.
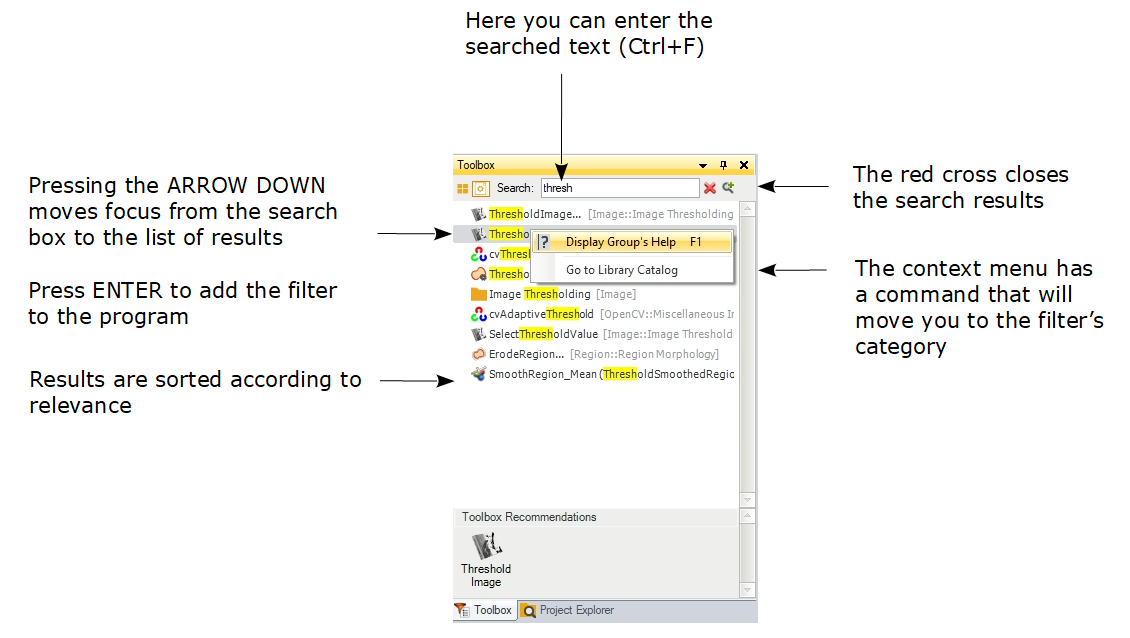
The Search Box
If you know a part of the name of the filter(tool) that you need, or if you can guess it, the Filter Search Box will make your work much more efficient. Just enter the searched text there and you will get a list of filters with most relevant matches at the top:
The Search Box and search results in the Filter Catalog.
If you can not guess the filter name, but you know what you expect on the inputs and outputs, you can use special queries with "in:" and "out:" operators as the image below depicts:
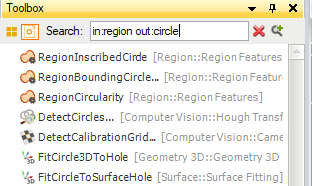
Advanced search with expected inputs and outputs.
As a matter of fact, some advanced users of Adaptive Vision Studio stop browsing the categories and just type the filter names in the Search Box to have them quickly added to the program.
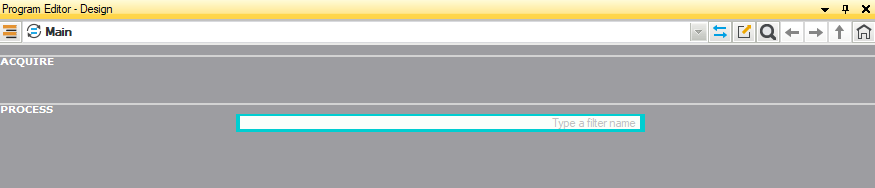
Program Editor
Ctrl+Space / Ctrl+T
When you know the name of a filter, which you would like to add into your program, you can use a keyboard shortcut Ctrl+Space or Ctrl+T to find it straightaway in the Program Editor, without having to open the Filter Catalog. After applying this shortcut, you are prompted to type a filter name:
Advanced search using CTRL+SPACE shortcut.
Let us assume that you need to perform simple thresholding on your input image. You already know that there is a ThresholdToRegion filter in our library, which you have utilized many times so far. Instead of time-consuming searching in either Toolbox or Filter Catalog, you can quickly access the desired function by typing its name:
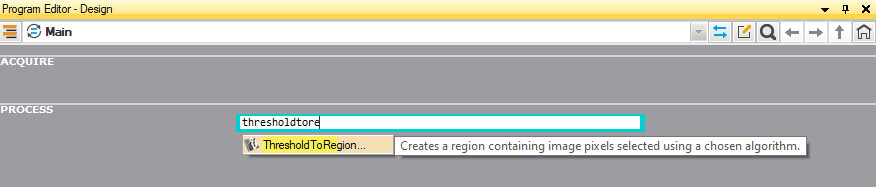
Browsing for a particular filter.
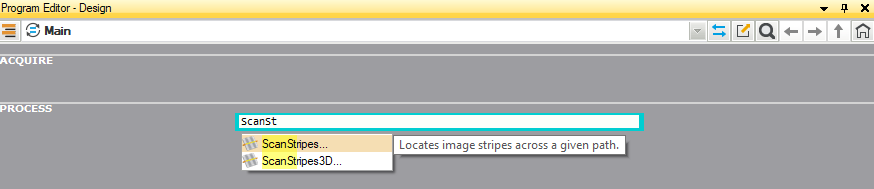
If you do not remember well the name of a filter, you can track it as well by typing only a part of it:
Searching a filter without its full name.
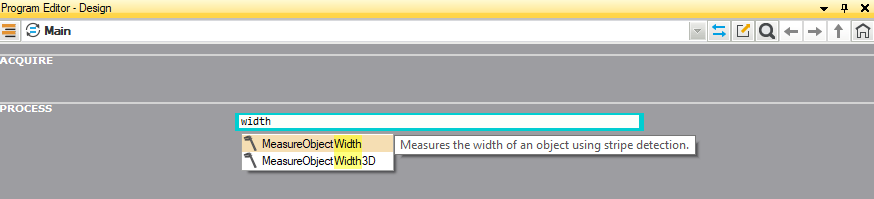
The search engine in the Program Editor also allows you to display the description of a filter in case you want to make sure or remind yourself what the filter is for:
The description of a filter.
Search Window
Ctrl+F
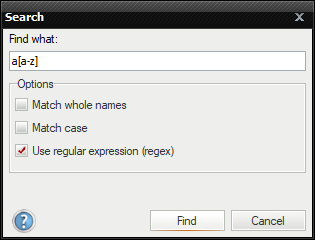
Creating a large program in Adaptive Vision Studio may require finding elements in it's structure. Using Search Window is the best way to find Filters(tools), Macrofilters, Variants and Global parameters which already exist in the project. To open the search window find a Magnifier button in Program Editor or press Ctrl+F. In the search window insert the name of an element you want to find or a part you remember. Press 'Find' button and results of search will appear in the new window. You may also pick some search options like using case sensitivity, matching whole names or regular expression which can narrow your search.
Browsing for elements in project.
In Search Results window you may select element on the list to indicate an object in project. It is possible to filter results with buttons on panel on the top of the window. Additionally if there are too many results they can be filtered with keyword given in the box on top-right.
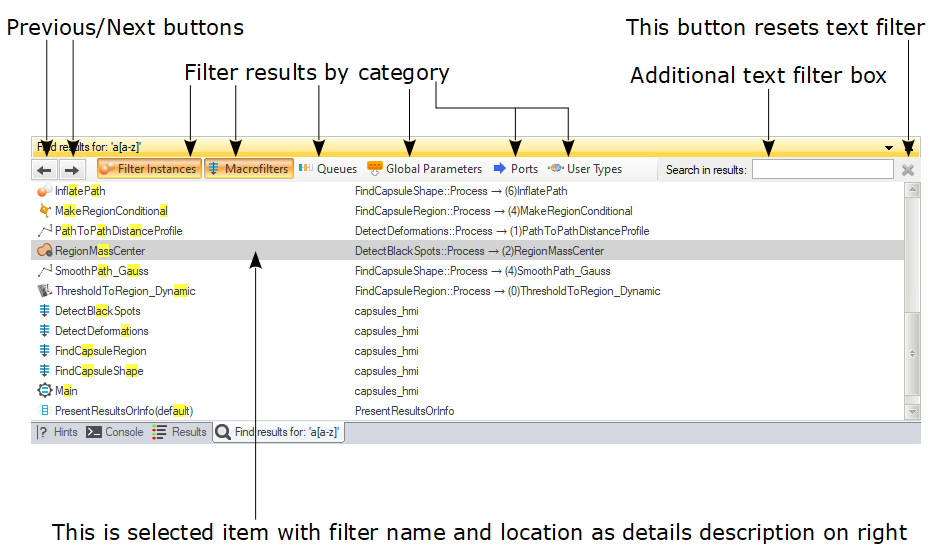
Managing search results.
Rules
Entering a search phrase also allows to pre-filter data with some keywords. When your project is large it might be useful to use Rules in the search phrase. Here are some examples of using Rules in Search Window.
| Name | Syntax | Example | Constraint |
|---|---|---|---|
| Parent | parent:<MacrofilterName> | rectangle parent:Initialize | Must have an instance in Macrofilter <MacrofilterName>. |
| Input | in:<Name> | load in:File | Must contain an input which either name or type contains phrase <Name>. |
| Output | out:<Name> | load out:Integer | Must contain an output which either name, type or Data Source Label contains phrase <Name>. |
| Previous: Complexity Levels | Next: Connecting and Configuring Filters |