
You are here: Start » User Interface » Creating Macrofilters
Creating Macrofilters
Introduction
Macrofilters play an important role in developing bigger programs. They are subprograms providing a means to isolate sequences of filters and re-use them in other places of the program. After creating a macrofilter, you can create its instances. From outside an instance looks like a regular filter, but by double-clicking on it, you navigate inside and can see its internal structure.
When you create a new project, it contains exactly one macrofilter, which is named "Main". This is the top level macrofilter from which the program execution will start. Further macrofilters can be added by extracting them from existing filters or by creating them in the Project Explorer window.
Extracting Macrofilters (The Quick Way)
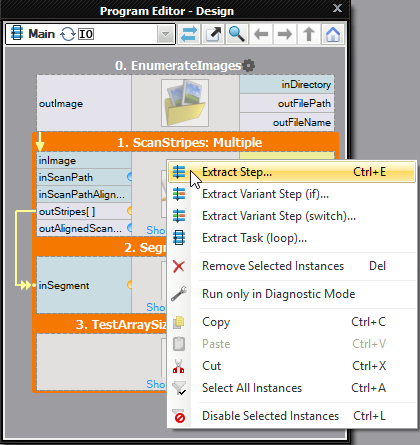
The most straightforward way of creating a macrofilter is by extracting it from several filters contained in an existing macrofilter. This is done by selecting several filters in the Program Editor and choosing the Extract Step... command from the context menu, as depicted in the picture below:
|
|
|
Extracting a macrofilter from three existing filters.
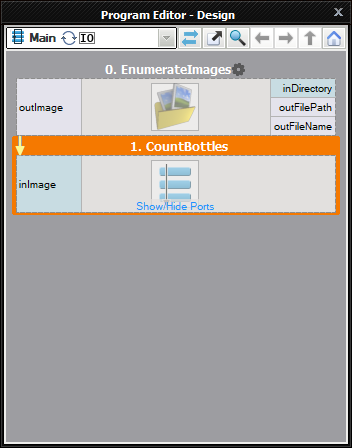
After completing this operation, a new macrofilter class is created and the previously selected filters are replaced with an instance of this macrofilter. Now, additional inputs and outputs of the new macrofilter can be created by dragging and dropping connections over the new macrofilter instance.
Remark: The "Extract Task (loop)..." command creates a new Task macrofilter which should be used only in special cases. Execution of the Task macrofilter is more complex than execution of the Step macrofilter. Usage of the Task macrofilter for reducing macrofilter complexity may be inappropriate. For more details please read section about Task macrofilters.
Defining the Interface
Being inside of a macrofilter other than "Main" you can see two special blocks: the Macrofilter Inputs and the Macrofilter Outputs. The context menus of these blocks allow to add new inputs or outputs. Another method of adding them is by dragging connections and dropping them over these blocks.
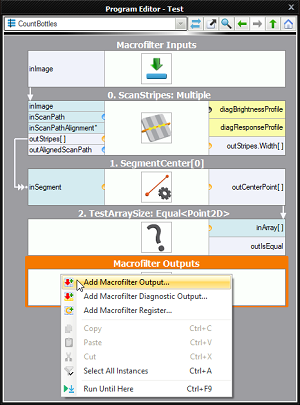
Adding a new output using the context menu of the Macrofilter Outputs block. |
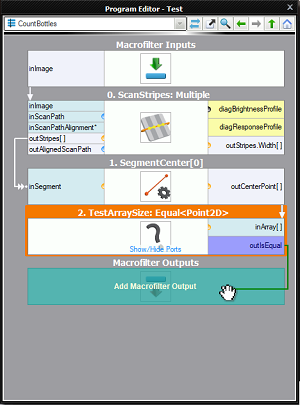
Adding a new output by dragging and dropping a connection. |
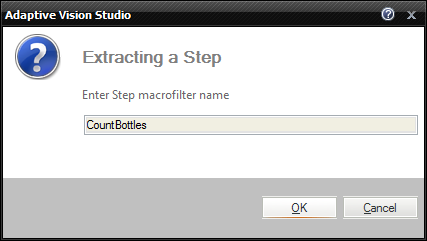
Before the new port is created you need to provide at least its name and type:
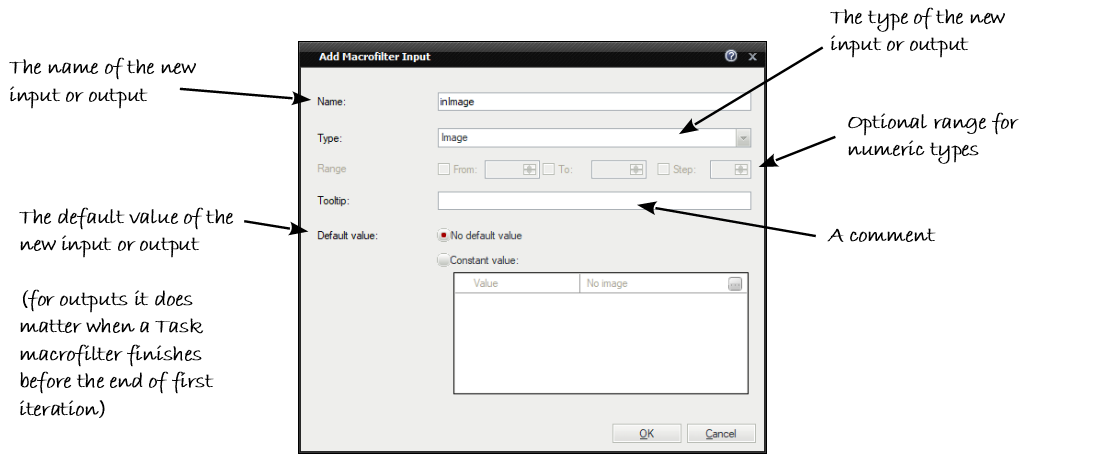
Defining a port of a macrofilter.
NOTE: Names of macrofilter inputs and outputs should be clear and meaningful. Names of inputs always start with "in", while names of outputs always start with "out".
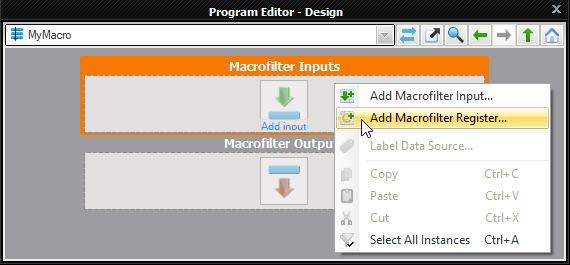
Adding Registers
The context menus of macrofilter input and output blocks also contain a command for adding macrofilter registers, Add Macrofilter Register...:
Creating Macrofilters in the Project Explorer
All macrofilter classes that are contained in the current project can be displayed in the Project Explorer window (by default it is behind the Toolbox on a tab page). Using this control, the user can create or edit macrofilters, but it also acts as a filter catalog from which instances can be created by dragging and dropping the items into the Program Editor.
To create a new macrofilter in the Project Explorer click the Create New Macrofilter...
 button.
Then a new window will appear, when you will be able to select the name and the
structure
of the new macrofilter.
button.
Then a new window will appear, when you will be able to select the name and the
structure
of the new macrofilter.
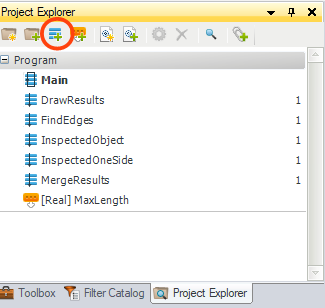
Macrofilters in the Project Explorer. |
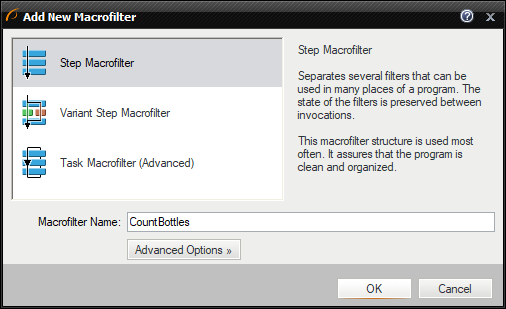
Selecting the name and the structure of a new macrofilter. |
The StartUp Program
It is sometimes useful to have several programs in a single project. The most common scenarios are:
- When some more complex data, e.g. custom OCR models or calibrated reference images, need to be prepared in a separate program.
- When it is convenient to have multiple versions of a single program customized for different installations.
- When the highest reliability is important and sets of automated tests need to be performed on recorded images.
In Adaptive Vision Studio a program can be any Task macrofilter that does not have any inputs and outputs. The list of all macrofilters fulfilling this criterion can be seen in the StartUp Macrofilter combo box on the Application Toolbar. This control makes it possible to choose the program that will be run. The related macrofilter will be displayed in the Project Explorer with the bold font.
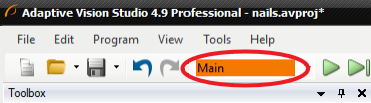
The StartUp Program Combo Box.
Macrofilter Guidelines
Macrofilters organize big projects, but it is responsibility of the user to make this organization clean and effective. When a project grows, especially under the pressure of time, it is easy to forget this and create programs that are difficult to understand and maintain. To avoid this, please follow the following guidelines:
- Macrofilters should not be too big. For program clarity they should typically consist of 3-12 filters. If you macrofilters have more than 20, it is certainly going to be cause trouble.
- Each macrofilter should have a clear and single function well reflected in its name. It is recommended to create macrofilters as tools that could possibly be used in many different projects.
- Macrofilter names do not affect the program execution, but they are very important for effective maintenance. Choose precise and unambiguous English names. Follow the verb + noun naming convention whenever possible and avoid abbreviations (this applies also to names of macrofilter ports).
- Do not mix data analysis with things like communication or visualization in a single macrofilter. These should be separated. If data visualization is needed for HMI, compute results in one macrofilter and then prepare the visualization in another. This will make the data flow more clear.
- During project development it is very common that the initial program structure becomes inappropriate for what has been added during development, or that it becomes too complicated and unclear. This is when you should consider REFACTORING, i.e. redesigning the program structure, boundaries of macrofilters and revising any complicated sequences of filters. We strongly recommend considering refactoring as a routine part of the job.
| Previous: Connecting and Configuring Filters | Next: Creating Models for Template Matching |