
You are here: Start » Program Examples » HMI Recorder
HMI Recorder
Aim:
This example shows how to record images using different camera interfaces.
Program overview
The program allows acquiring and saving images from cameras with different interfaces. The chosen camera can be changed while the program is running. The user can trigger acquisition manually or set it to recording mode, where an image is acquired at every given interval.
The program takes care of naming new image files to be saved on the disk. It has a built-in mechanism to avoid overwriting previous files. While using the program, the user can see a live image preview.
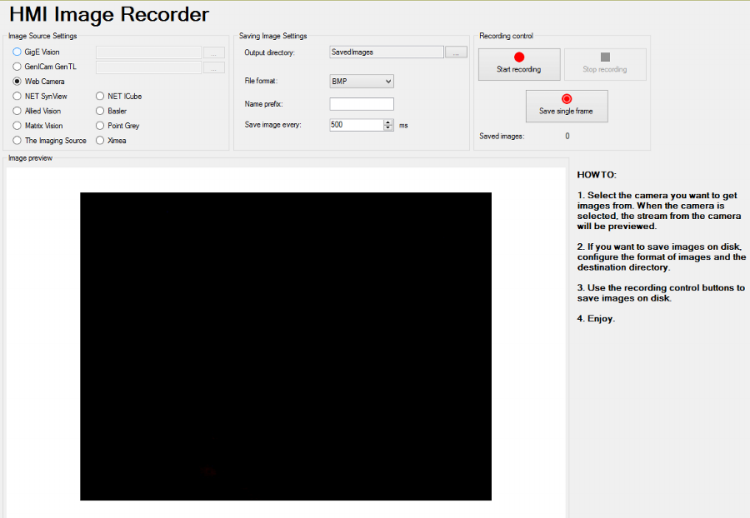
The interface consists of five panes. The Image Source Settings pane lists all possible image sources and allows the user to choose one of them. Only one source can be active at a time. Choosing a source that requires specifying a device address enables the "..." button next to it (as seen next to GigE Vision and GenICam GenTL). Clicking it opens a dialog where the user can choose the device.
In the next pane, Saving image Settings, the user can specify where the images will be saved, the file format, and the name prefix. There are four available formats to choose from: BMP, JPEG, PNG and TIFF. Additionally, the user can set the period between consecutive images to be saved in recording mode.
The third pane allows the user to start and stop recording or save only a single frame. It additionally shows the number of images saved during the current session.
The fourth pane is an image preview. The user can see a live feed of the camera.
The last pane has instructions on how to use the program. Below that, some of the error messages are displayed.
View of the HMI
Points of Interest
Due to its complexity, the program requires more than basic knowledge of the software to comprehend. Among other things, the program utilizes:
- multiple task macrofilters,
- error handlers ,
- registers ,
- loop generators,
- conditional execution and using conditional variables of filters.
These will be explained in more detail in the following part.
Program structure
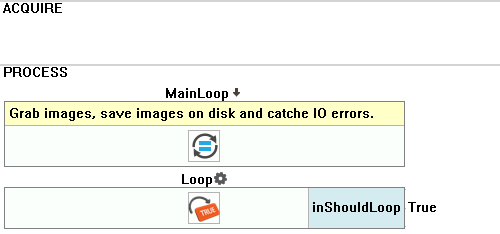
The main part of the program is inside a task macrofilter MainLoop. The root of the program contains one MainLoop macrofilter and a Loop filter. This enables error handling and prevents the program from closing after encountering an error.
Error handling
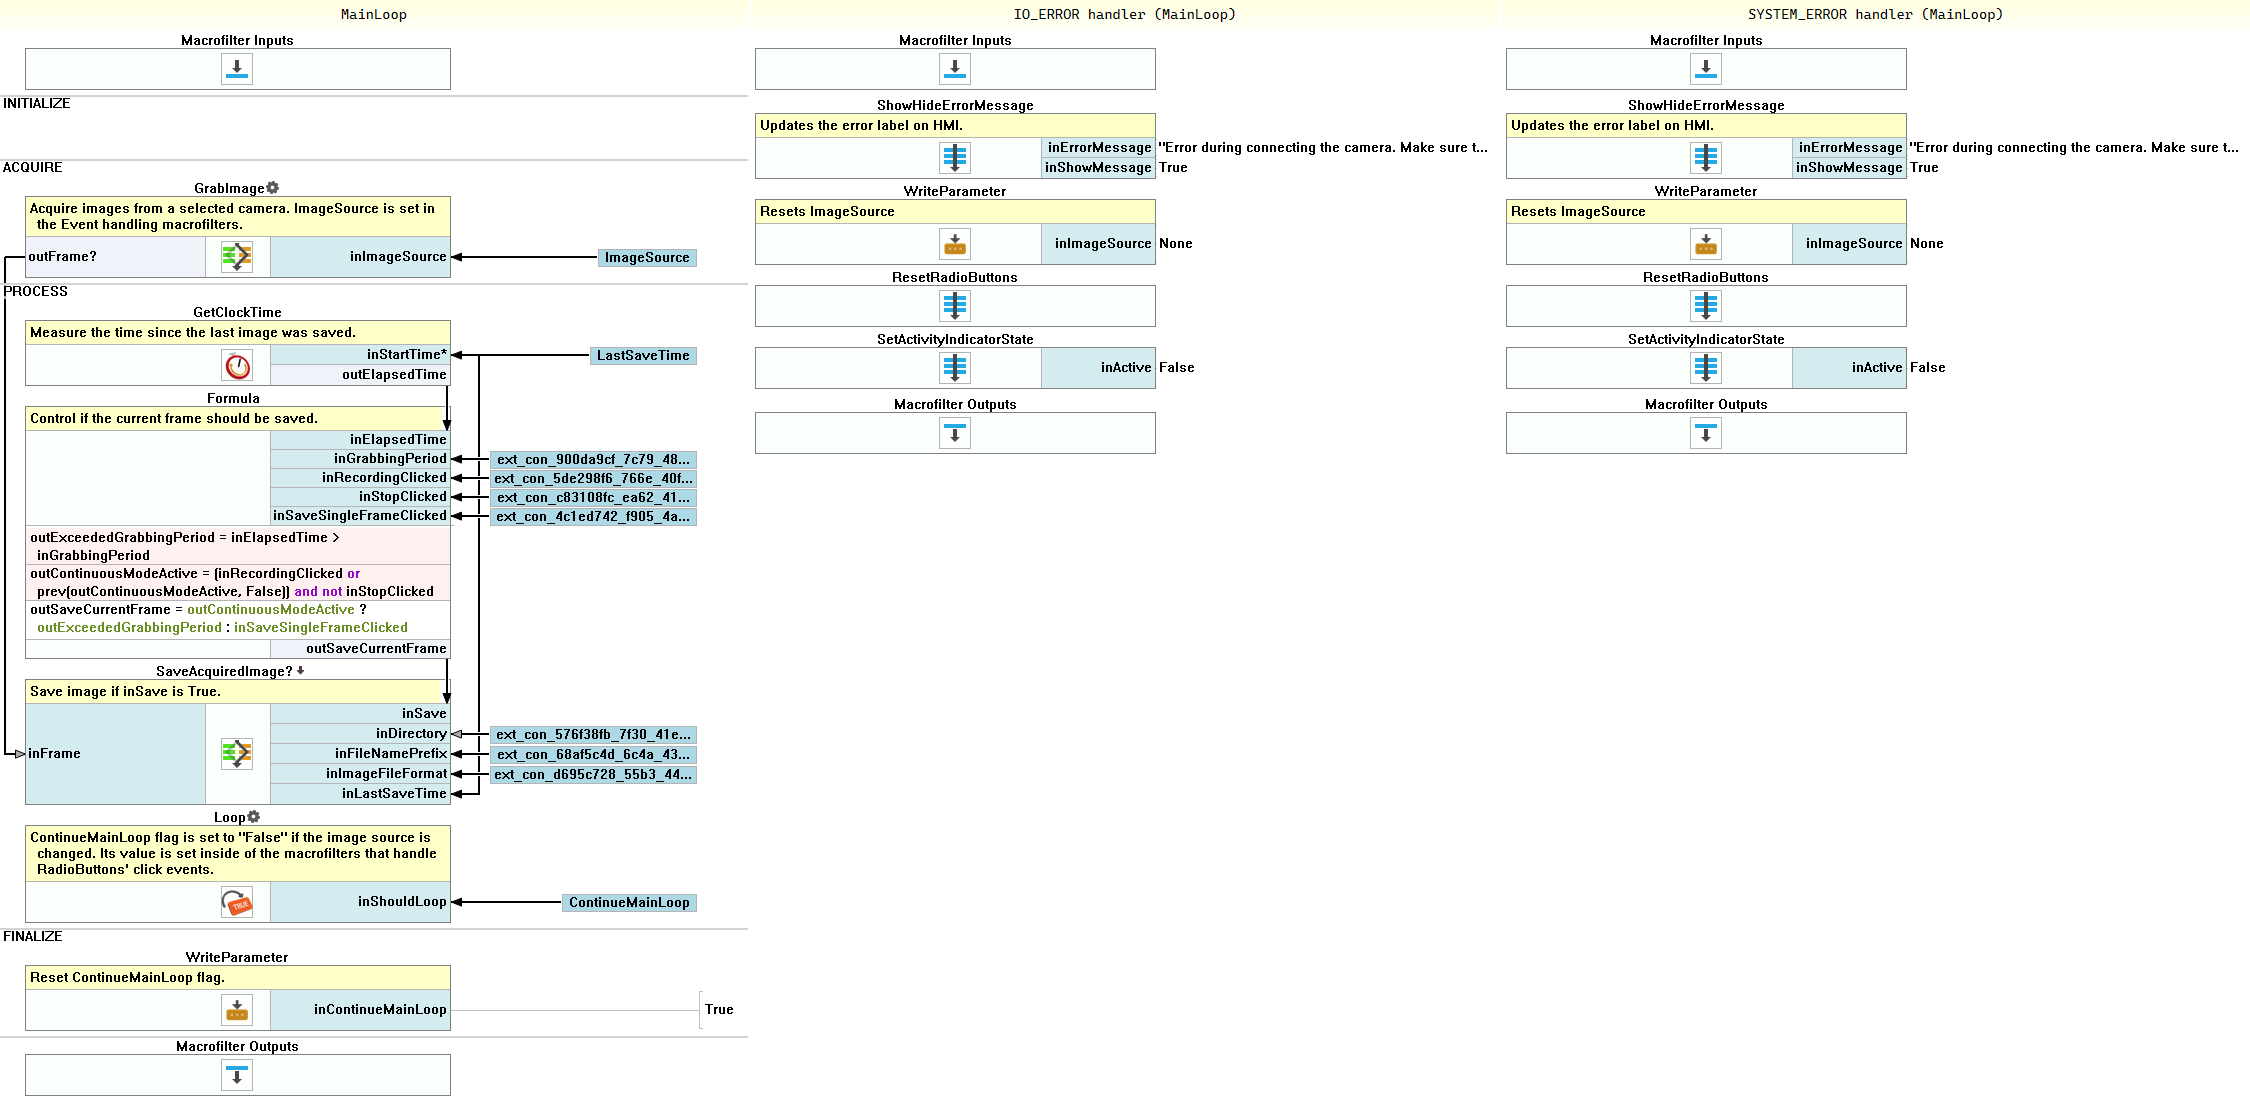
As previously mentioned, one of the reasons for putting most of the program into a task macrofilter MainLoop was to allow error handling. This prevents the application from crashing after encountering an error. Information about error handlers and creating them is available in the Error Handling tutorial.
In this program, there are 2 error handlers - one for input/output errors and one for system errors. System errors can happen when the computer does not have the appropriate third-party driver installed. IO errors happen when the user tries to connect to a disconnected camera.
Both error handling filters have identical contents. First, an error message is shown in the HMI. The program then waits for one second and resets the state of all the radio buttons.
Macrofilter Main
Macrofilter MainLoop
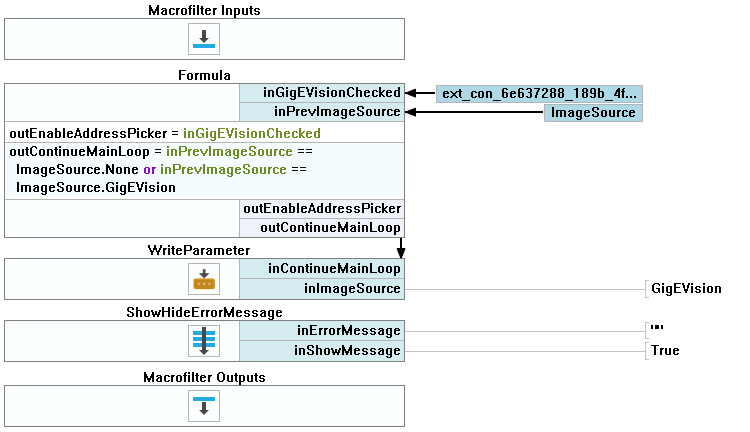
Macrofilter GigEVisionClicked
Further Readings
- Formulas - Detailed information about using formulas.
- Working with Gen TL devices - This article describes the basic concept of working with Gen TL devices.
- Working with GigE Vision Devices - This article describes the basic concept of working with GigE Vision devices.