
You are here: Start » Application Notes » Using Aurora Vision Studio Runtime for Linux with WebHMI
Using Aurora Vision Studio Runtime for Linux with WebHMI
Purpose and requirements
This document describes how to run an application with a WebHMI interface on a Linux based systems using Aurora Vision Studio Runtime for Linux. To connect the host with the target system the SSH connection is used. It allows for data exchange between systems and run commands on the target system remotely (especially useful when the target system does not provide a graphical user interface).
Check if the target system meets requirements listed in Using Library on Linux article.
In this guide iam NET GmbH ARM smart camera is used, but presented steps apply to any linux based device that meets requirements.
Required equipment:
- Aurora Vision Studio 5.4 Professional or later (version 5.4 was used);
- Linux based target device;
- PuTTY executes the SSH connection;
- Xming might be useful to open graphical interface of Linux applications on Windows;
- WinSCP is responsible for data exchange between host and target systems;
- Aurora Vision Studio 5.4 (or later) Runtime for Linux (version 5.4 was used).
Basic program with the WebHMI interface
This paragraph refers to the WebHmi - Runtime for Linux Demo Aurora Vision Studio official example.
Please determine if the smart camera is visible in the GigE Vision Device Manager:

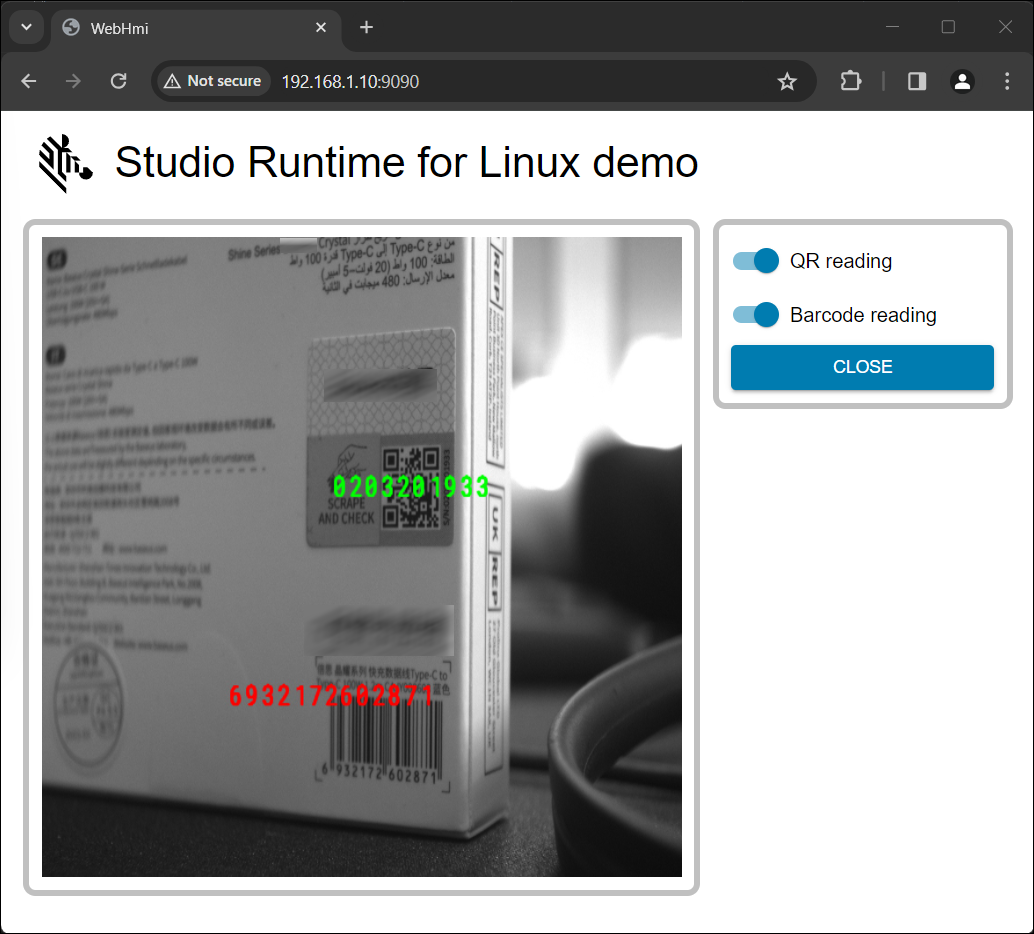
You can run this example on host windows PC and display webhmi in the browser typing localhost:9090 (default port in the settings is 9090). Our goal is to run example on target linux device:
Aurora Vision Studio Runtime for Linux installation
To manage and exchange files on the target system SSH connection is established. For convenience WinSCP and PuTTY are configured following the Getting started with the Windows Host System guide.
Connect to the iam smart camera using WinSCP:
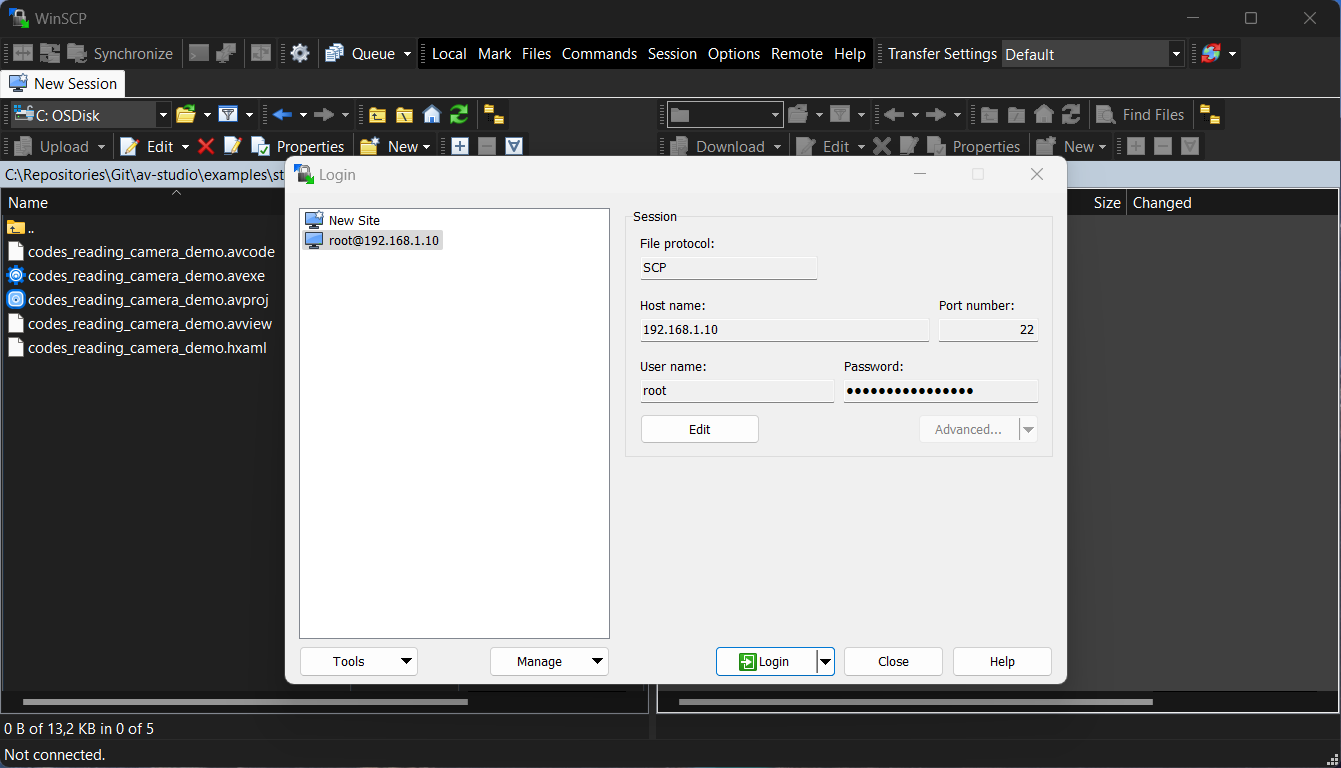 Default credentials:
User: root Password: root
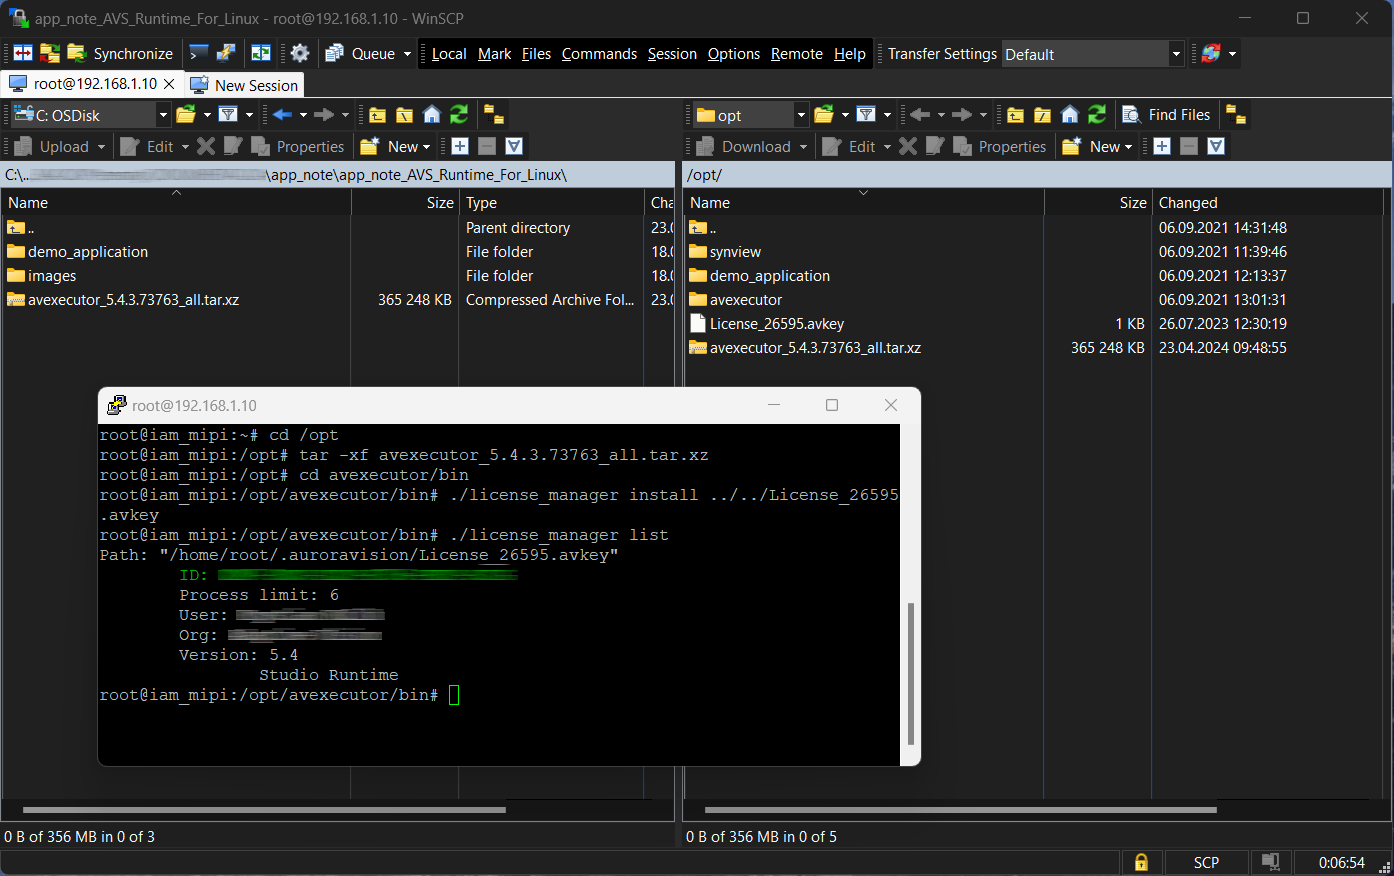
In WinSCP window on the left there is the Windows host file tree, on the right the Linux target tree. In this tutorial we copied executor installer and license to the /opt folder. You can open session with PuTTY using Ctrl + P shortcut or clicking an icon with the bolt on the top toolbar in WinSCP (login with the default credentials). If you begin in the home folder, navigate to the /opt executing:
cd /opt
Then execute following commands:
tar -xf [avexecutor_archive.tar.xz]
cd avexecutor/bin
./license_manager install ../../[License_file.avkey]
./license_manager list
It will install the executor, load the license key and list attached licenses at the end:
Aurora Vision Studio Runtime for Linux solution deployment
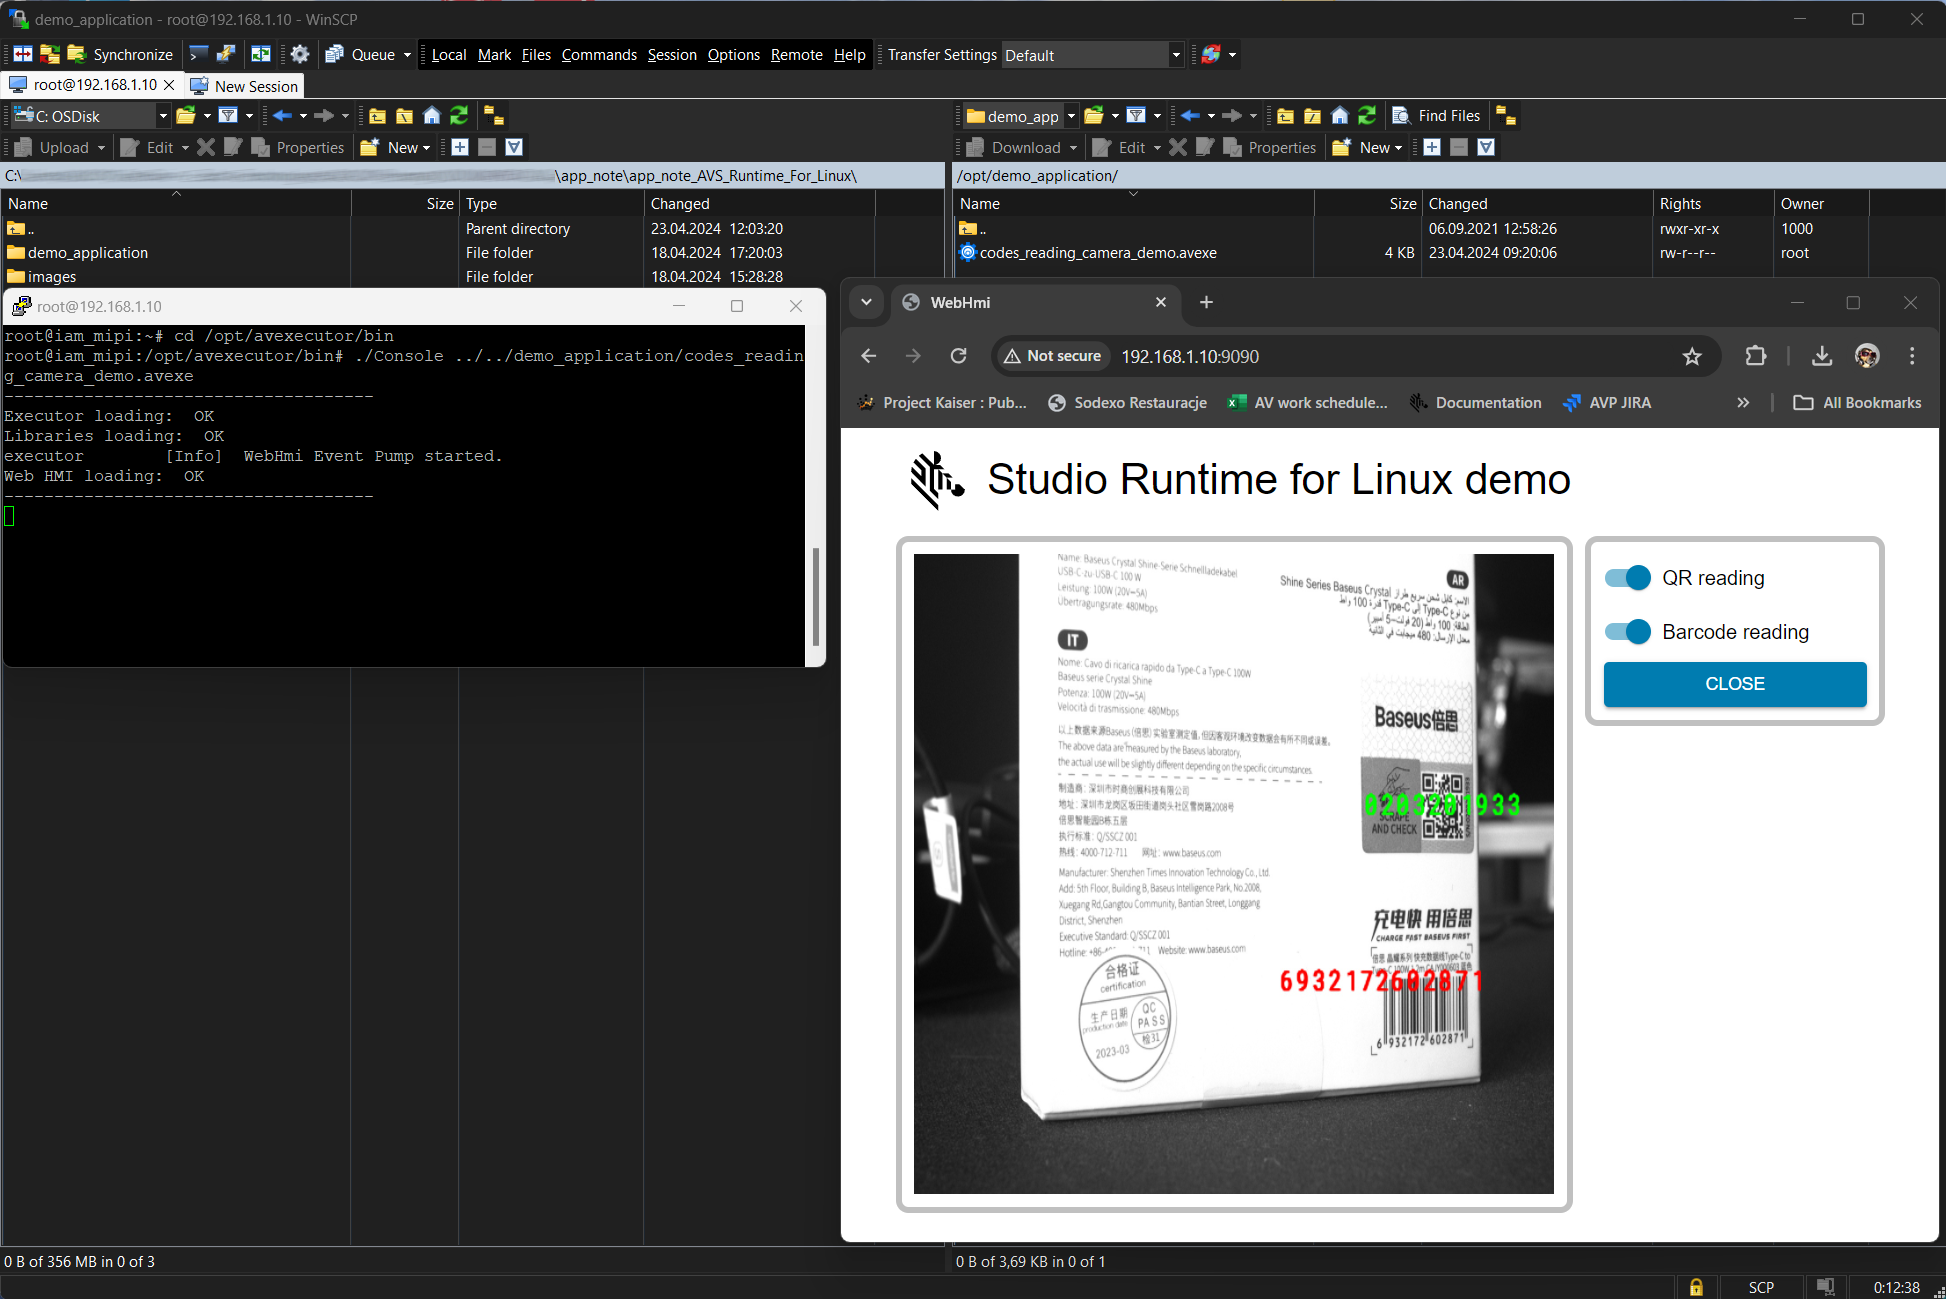
Generate runtime solution in Aurora Vision Studio navigating to File -> Export to Runtime Executable.... In this tutorial .avexe solution is copied to opt/demo_application folder. To deploy solution execute following commands:
cd /opt/avexecutor/bin
./Console ../../demo_application/[Solution.avexe]
To display the WebHMI on the host system, type 192.168.1.10:9090:
Console application allows users to specify parameters others than just the path to the .avexe file. When working on application with WebHMI, it might be especially useful to modify WebHMI port value. This can be done with -webhmi-port<N> parameter where N indicates requested port value (default one is 9090). To list all parameters user just need to run Console without any of them (./Console).