You are here: Start » Application Notes » Interfacing Photoneo to Aurora Vision Studio
Interfacing Photoneo to Aurora Vision Studio
Purpose and requirement
This document explains how to interface a PhoXi 3D Scanner to Aurora Vision Studio.
A PhoXi 3D Scanner is an advanced sensor created by Photoneo. It is purposed for 3D machine vision and processing point clouds. The PhoXi 3D Scanner has many functionalities including:
- Scanning objects and representing them as a point cloud or intensity images,
- Various representations of scans.
Required equipment:
- PhoXi Control v1.2.35 or later
- Aurora Vision Studio 4.11 Professional or later
Getting started with a PhoXi 3D Scanner in Aurora Vision Studio
At the beginning download proper version of PhoXi Control from producer's website and install it.
Follow these steps:
- Connect a PhoXi 3D Scanner to the PC running Aurora Vision Studio Professional.
- Power up the PhoXi 3D Scanner, connect it to the PC via Ethernet interface.
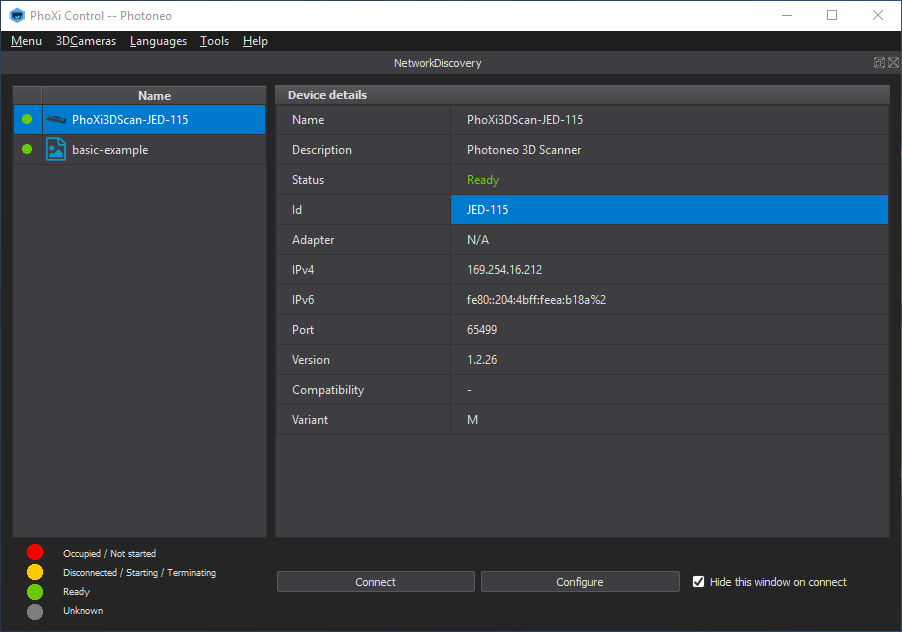
- Open PhoXi Control application.
- Copy ID of the scanner you would like to use in Aurora Vision Studio.
- To use PhoXi 3D Scanner its Status should be "Ready"
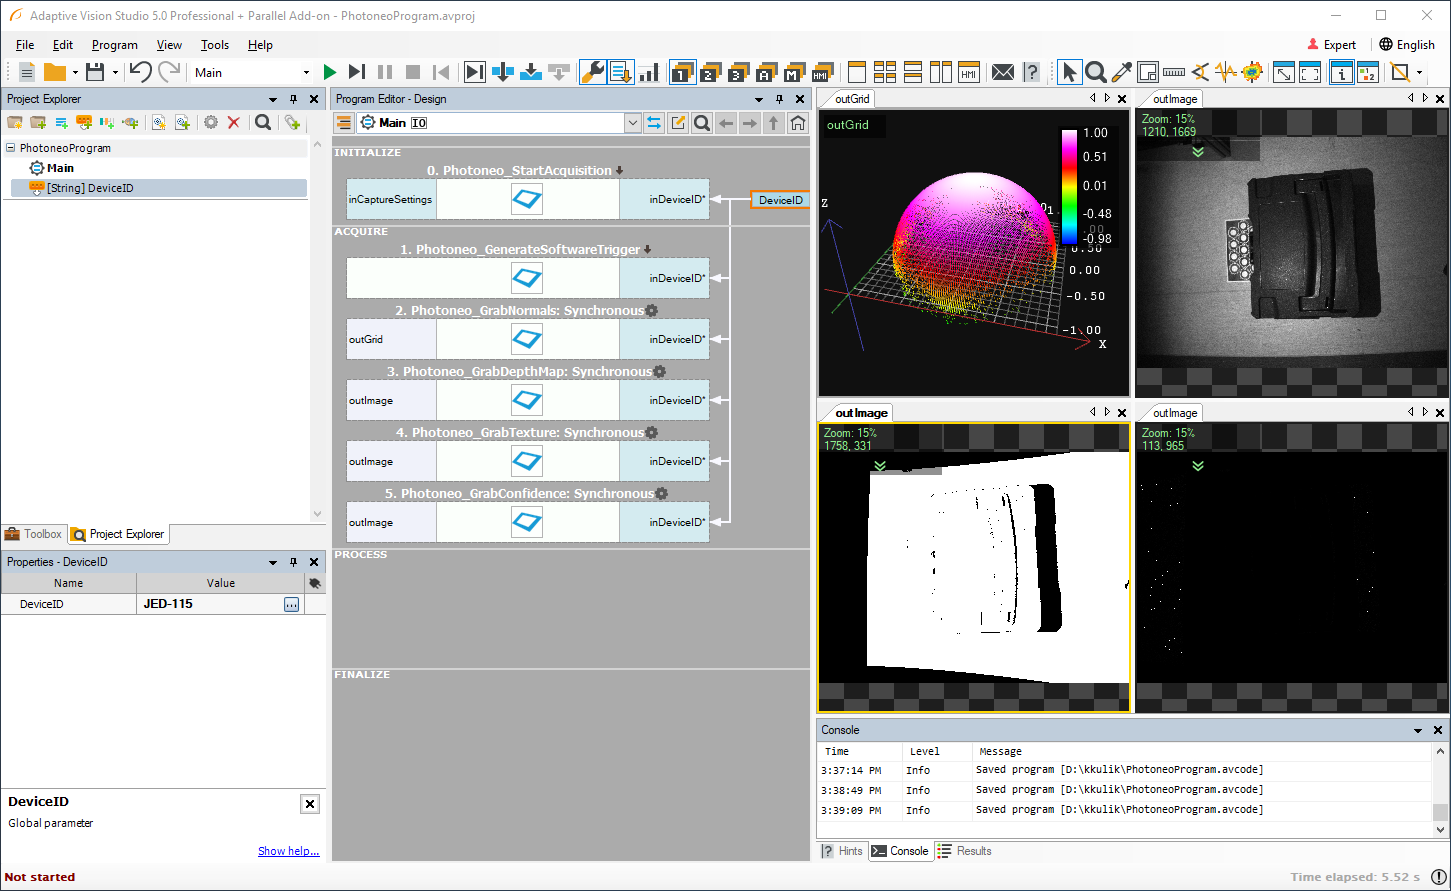
- Full list of filters intended to work with PhoXi 3D Scanner you can find under this link. In this particular example Photoneo_GrabPoint3DGrid filter will be used.
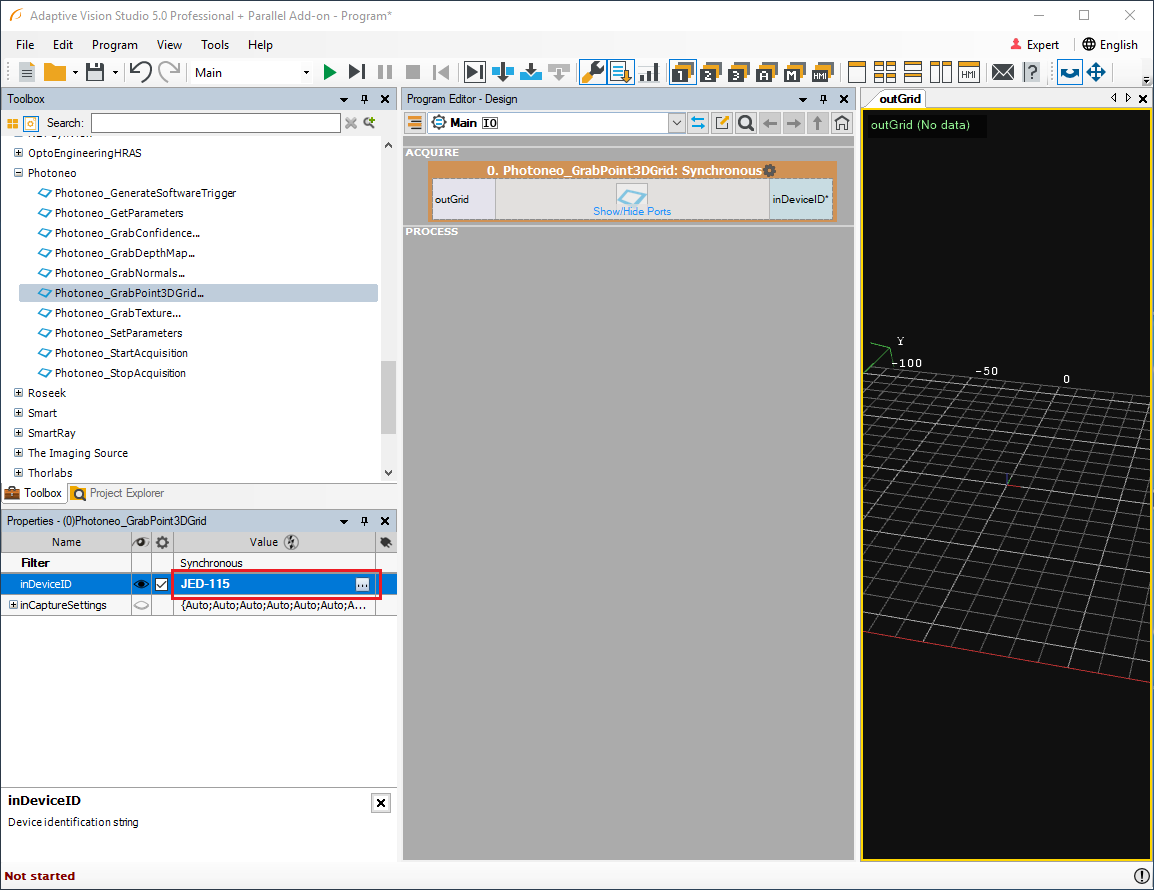
- At the beginning create simple program with Photoneo_GrabPoint3DGrid filter to test the connection. Find Photoneo_GrabPoint3DGrid filter in the Filter Catalog or in the Toolbox (category Image Acquisition (Third Party)), then drag it and drop it to the main program.
- Paste ID (from step 4) into inDevice input. If you do not have access to any Photoneo scanner, but you would like to test the connection between PhoXi Control and Aurora Vision Studio, please enter "InstalledExamples-basic-example" into inDevice input.
- Connect outGrid output to preview window and run program. If everything is done correctly, you should get Point3DGrid with scanned object.
Troubleshooting
If you had any problems during the connection process, you can find some solutions here.
- Make sure you can grab point cloud in PhoXi Control application. If you cannot, please check connection and change the properties of acquisition.
- Make sure you are using proper version of Aurora Vision Studio and PhoXi Control application (from chapter Purpose and requirement)
- Make sure that the device is in running mode. If necessary, unpause the device in PhoXi Control and use Free run, then you should be able to grab Point3DGrid in Aurora Vision Studio.
- You will not be able to change parameters in the PhoXi Control application while a program in Aurora Vision Studio is running and acquiring data from a scanner. You can stop the program by clicking the Stop button or using the Shift + F5 key combination.


If you encounter a problem that has not been mentioned above, please do not hesitate to contact us, so that we could investigate it and add the description of its solution to this section.
Calibration
Point's coordinate system is defined by scanner's camera position and its specific angle depending on PhoXi 3D Scanner type. You can read more about Coordinate spaces of Photoneo scanners in this document
You can align coordinate system position by following this instruction. After completing steps outlined by the manufacturer, the coordinate system will be changed also in case of scans acquired with Aurora Vision Studio.
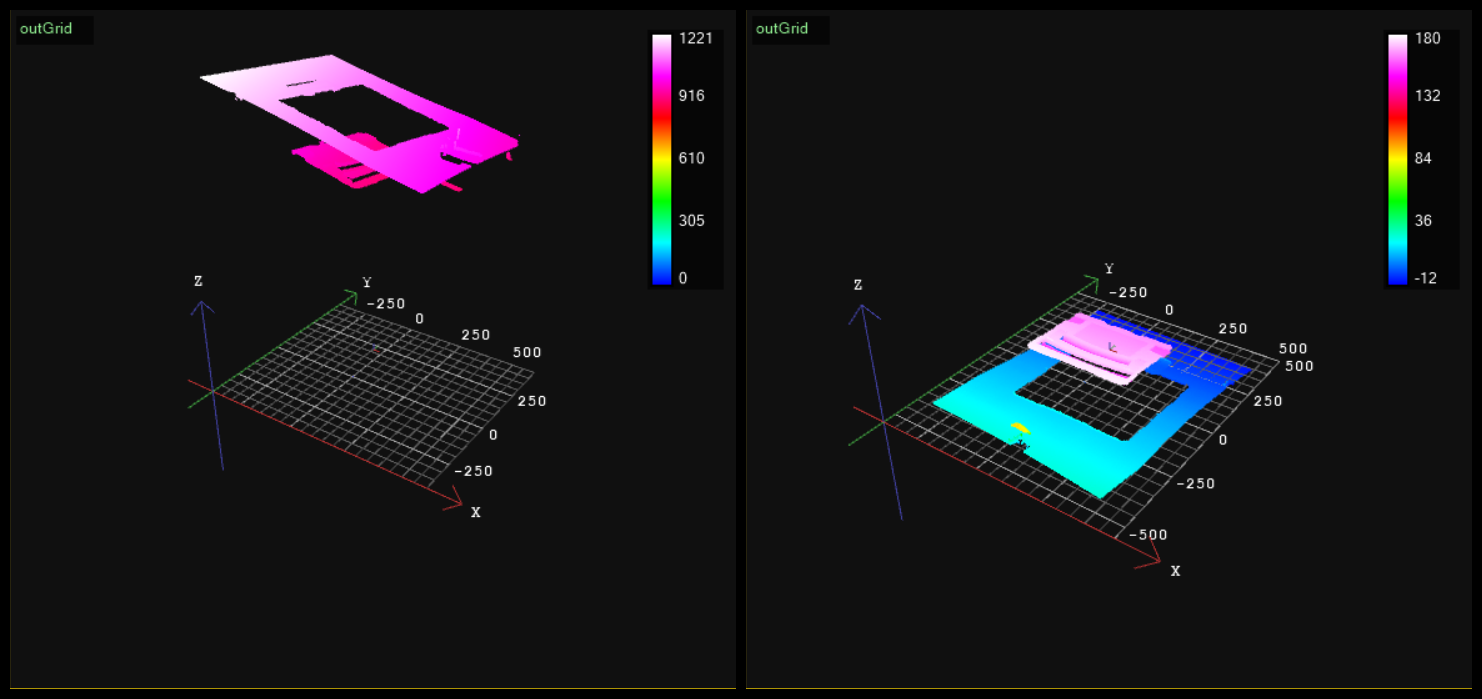
To make an calibration of PhoXi 3D Scanner you have to print calibration board. Then navigate to Properties -> Coordinates Settings -> Marker Scale in PhoXi Control and change parameters to these like on the picture below. Acquire scan of points cloud using Trigger scan and then click Set and Store.
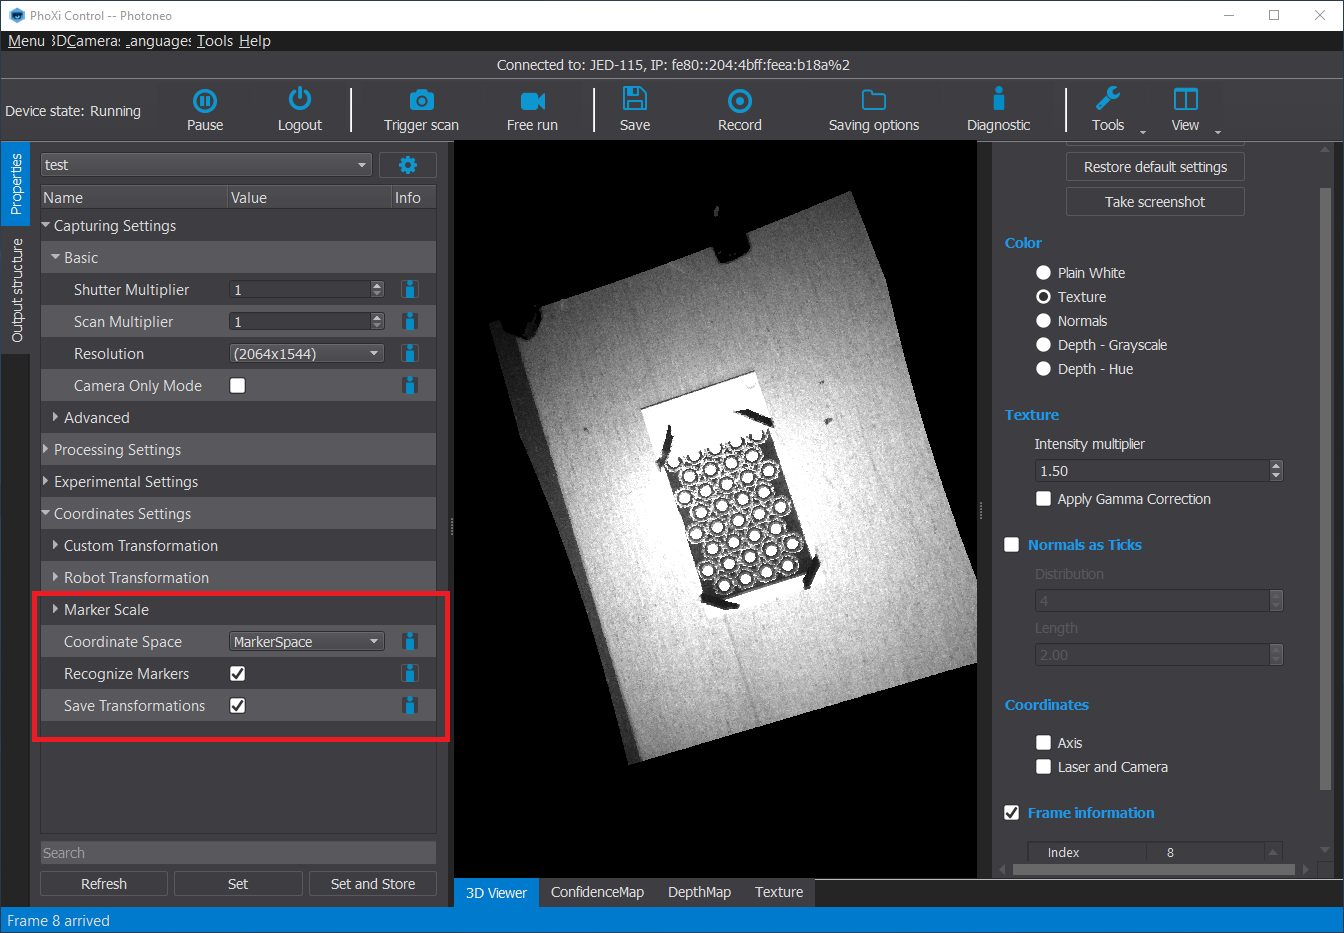
Below picture represents points cloud before and after calibration.
Setting parameters and maps reading
Default parameters of PhoXi 3D Scanner are shown below.

These settings does not allow to send Normal maps, Depth maps, Confidence maps and Textures to Aurora Vision Studio application. You can tick checkboxes in PhoXi Control software or you can set these parameters in Aurora Vision Studio.
To make it possible in Aurora Vision Studio, you need to change the parameters using Photoneo_SetParameters filter, which should be executed at the very beginning of program or between Photoneo_StopAcquisition and Photoneo_StartAcquisition filters.
If parameters, responsible for maps reading, will be set as True, you can use proper filters (Photoneo_GrabNormals, Photoneo_GrabTexture, Photoneo_GrabDepthMap, Photoneo_GrabConfidence) to acquire respective maps to Aurora Vision Studio application.