You are here: Start » Application Notes » Using OPC UA Communication
Using OPC UA Communication
Purpose and equipment
This document describes how to make a practical example of establishing OPC UA communication between the Aurora Vision Studio and an OPC UA server. For more information about possible exchangeable arguments please refer to the Communicating over OPC UA technical issue. List of available filters can be found here: OPC UA filters.
Required equipment:
- OPC UA server simulator, e.g. OPC UA Simulation Server
- Aurora Vision Studio 5.4 Professional or later (version 5.4 was used)
Basic program with OPC UA server simulator
Open the OPC UA Simulation Server and navigate to the Status tab. The Connection Address (UA TCP) will be further needed for the Aurora Vision Studio client:

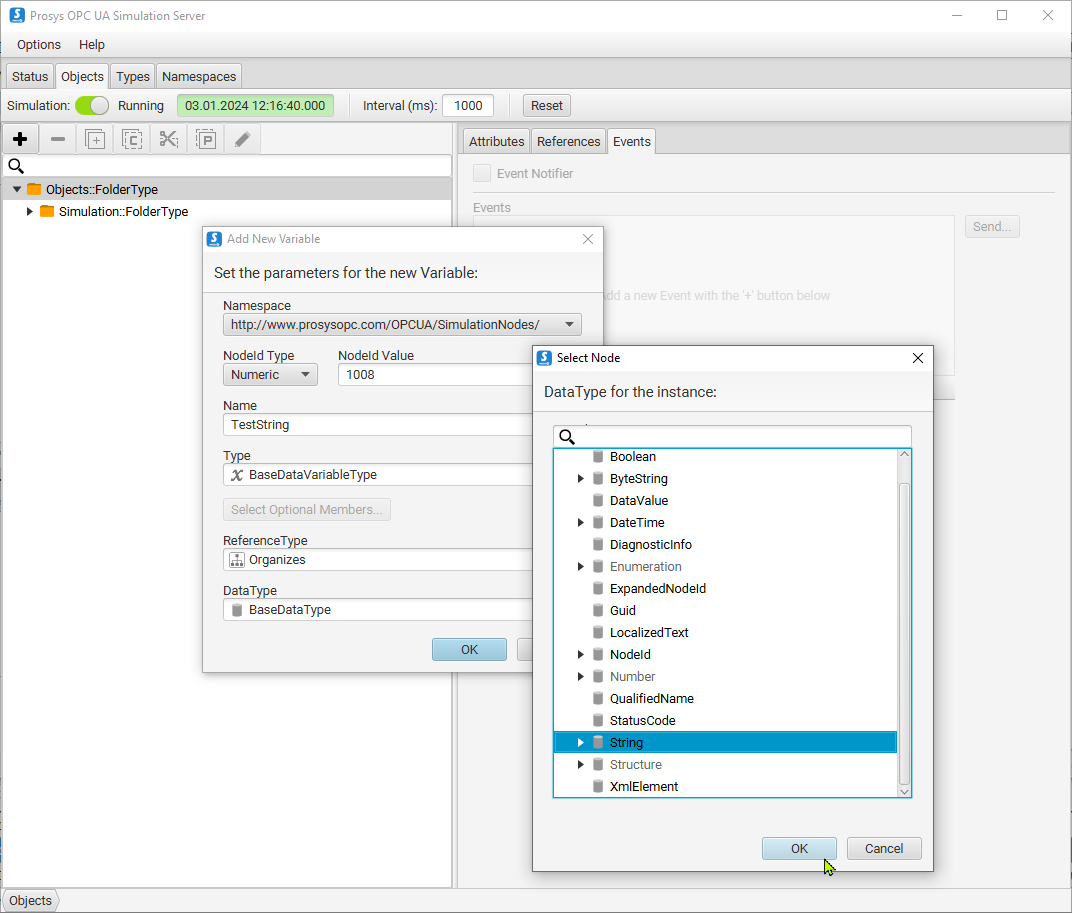
Please navigate to the Objects tab and with the right click expand Add Node -> Add Variable... and click on it:

The Add New Variable should pop out. Change the Name to TestString and go to the DataType record to change from BaseDataType to String. Click OK to save:
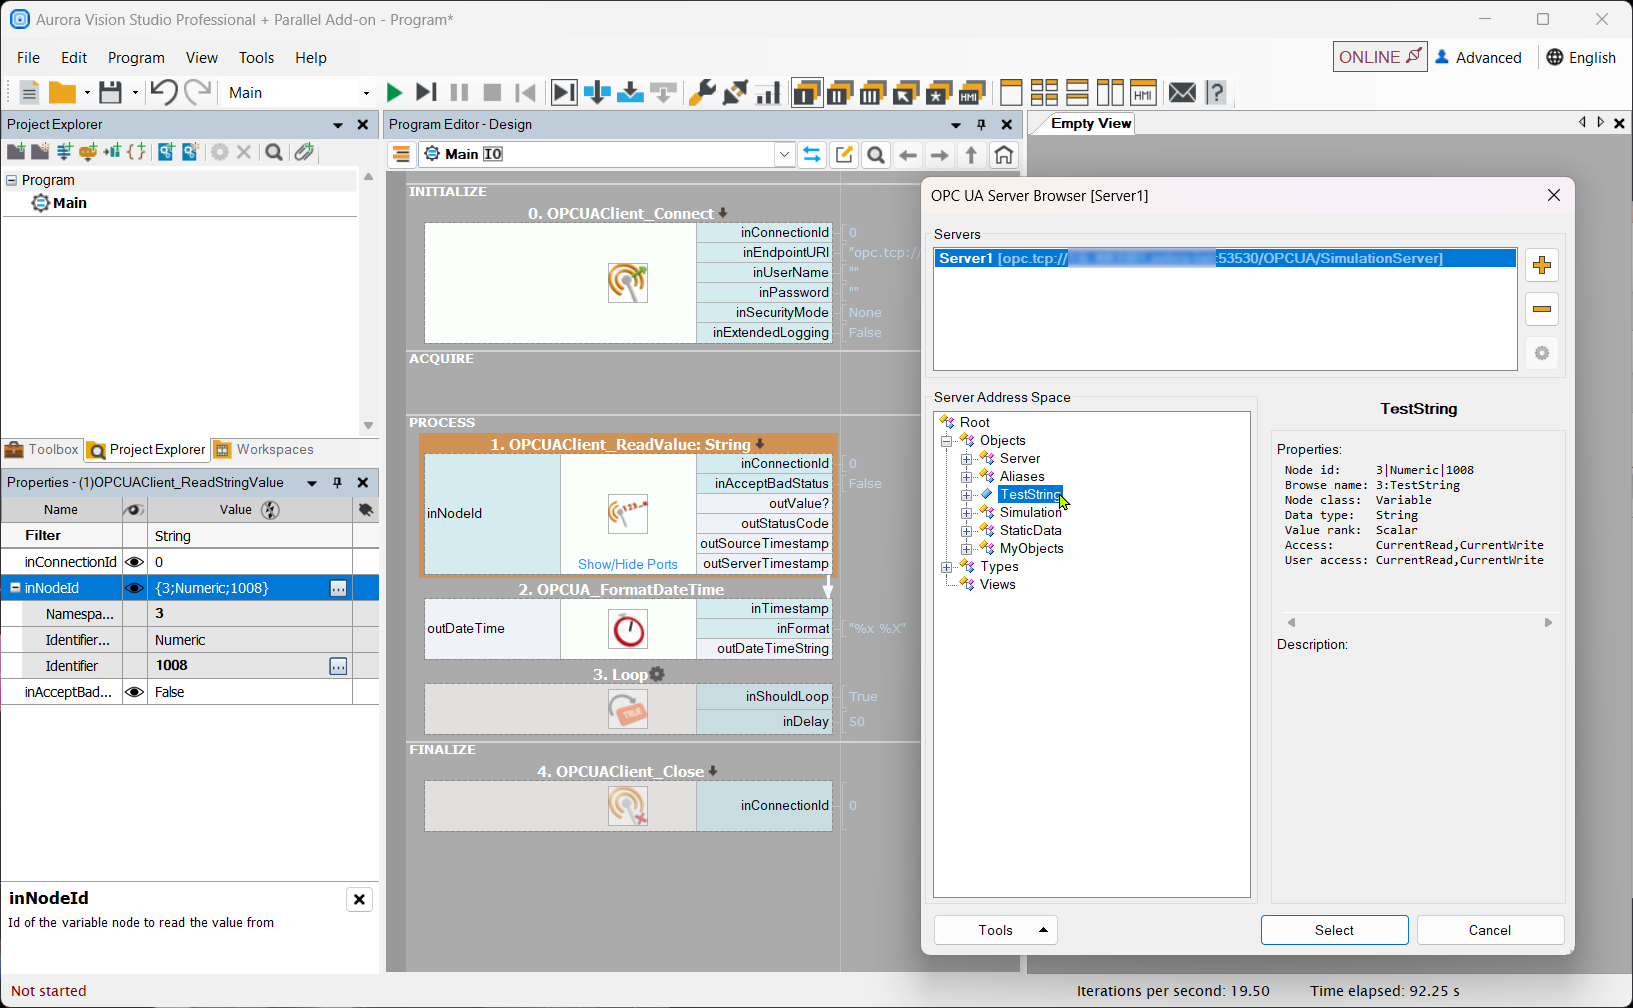
Create a solution in Aurora Vision Studio and place the OPCUAClient_Connect in the INITIALIZE section. Copy the Connection Address (UA TCP) from the server to the inEndpointUrl input of the filter. Place the OPCUAClient_ReadStringValue in the PROCESS section.
There is need to adjust the inNodeId input. You can do it by copying the Node ID from the simulator and pasting it to the inNodeId.Identifier input in Aurora Vision Studio (by expanding inNodeId input). It is also achievable with the click of the "3 dots" icon to open the OPC UA Server Browser:
Add the OPCUA_FormatDateTime and connect the outServerTimestamp with the inTimestamp input as on the screen below:
Advanced program with OPC UA server simulator
This paragraph refers to the "OPCUA_ClientWithServerSimulator" Aurora Vision Studio example which can be found in the examples tree under OPCUA Client To Server Communication directory.
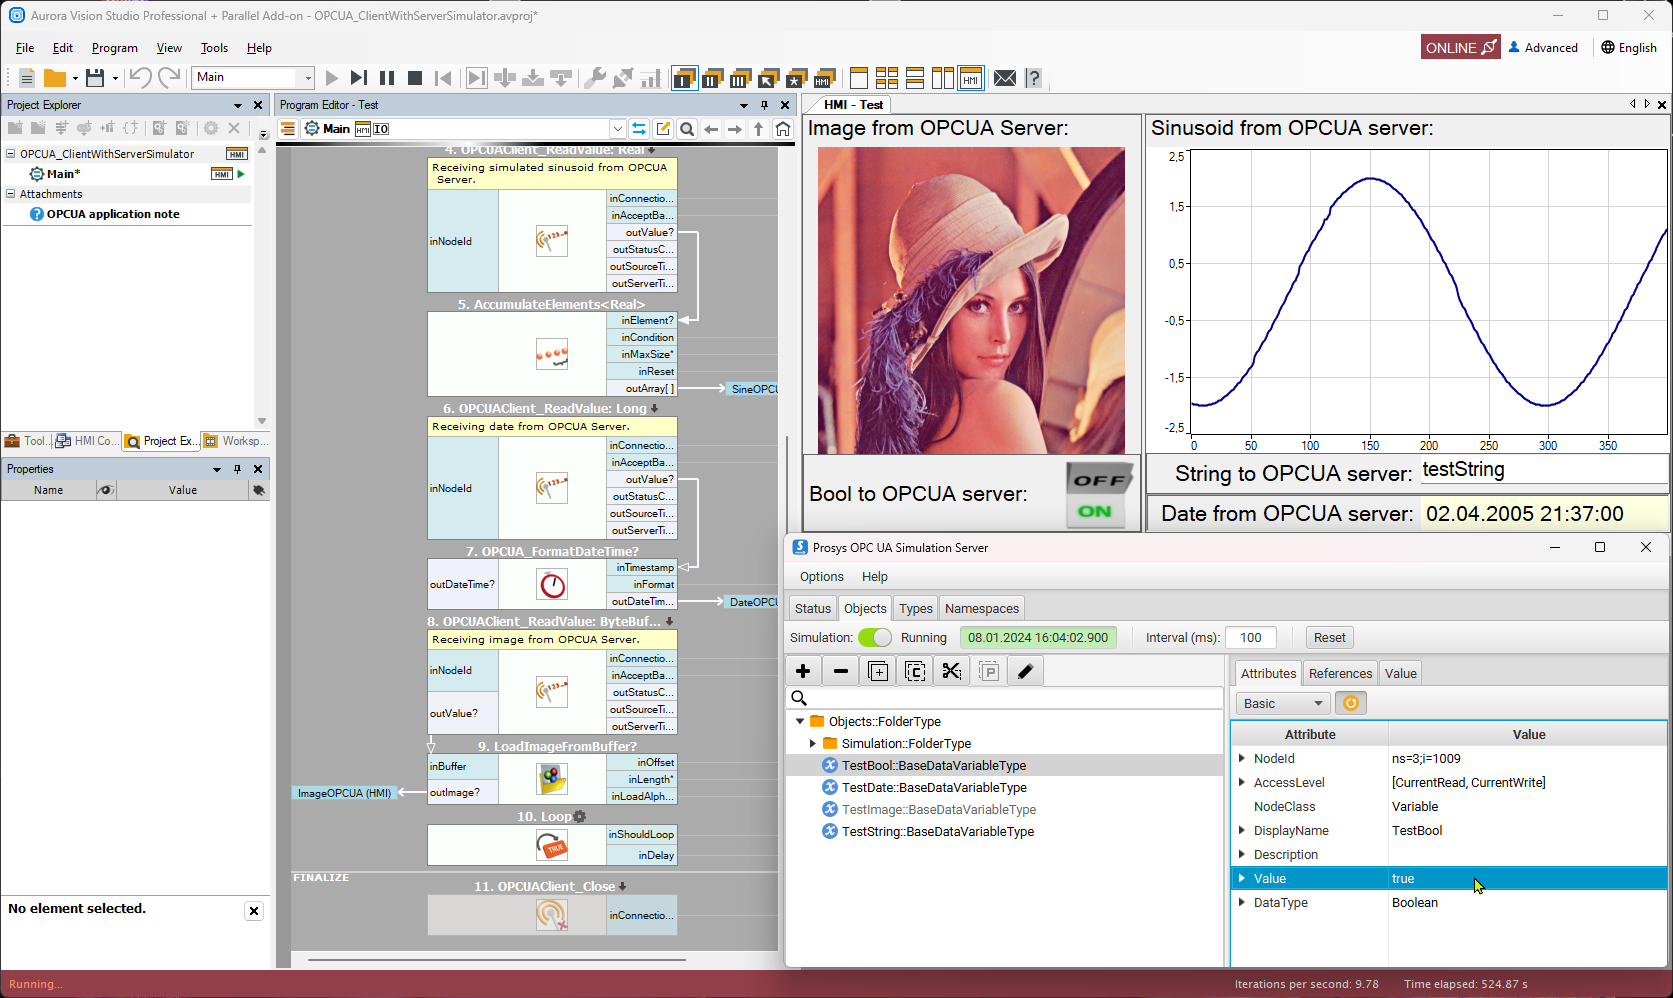
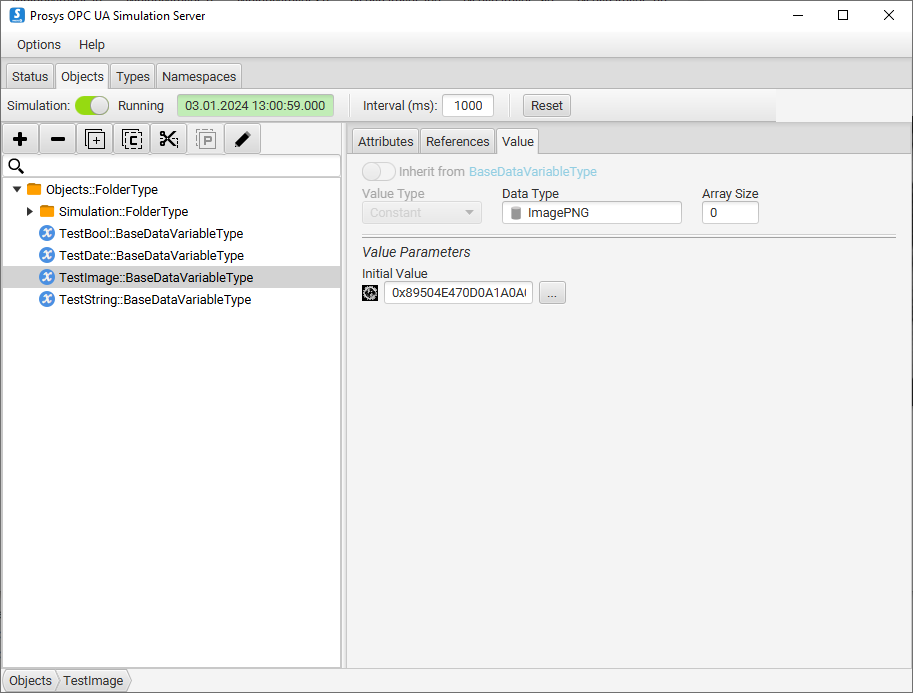
Add to the simulated server 4 nodes of type: Boolean, Date, ImagePNG and String. Change the initial value of the ImagePNG variable to some .png type image under the Value tab for this variable:
Open the "OPCUA Client To Server Communication" example and adjust nodes (if needed) like in the previous paragraph for the basic application. The application uses 5 nodes: 4 created above and one double (the simulated sine which can be found in the Simulation::FolderType in the server simulator).
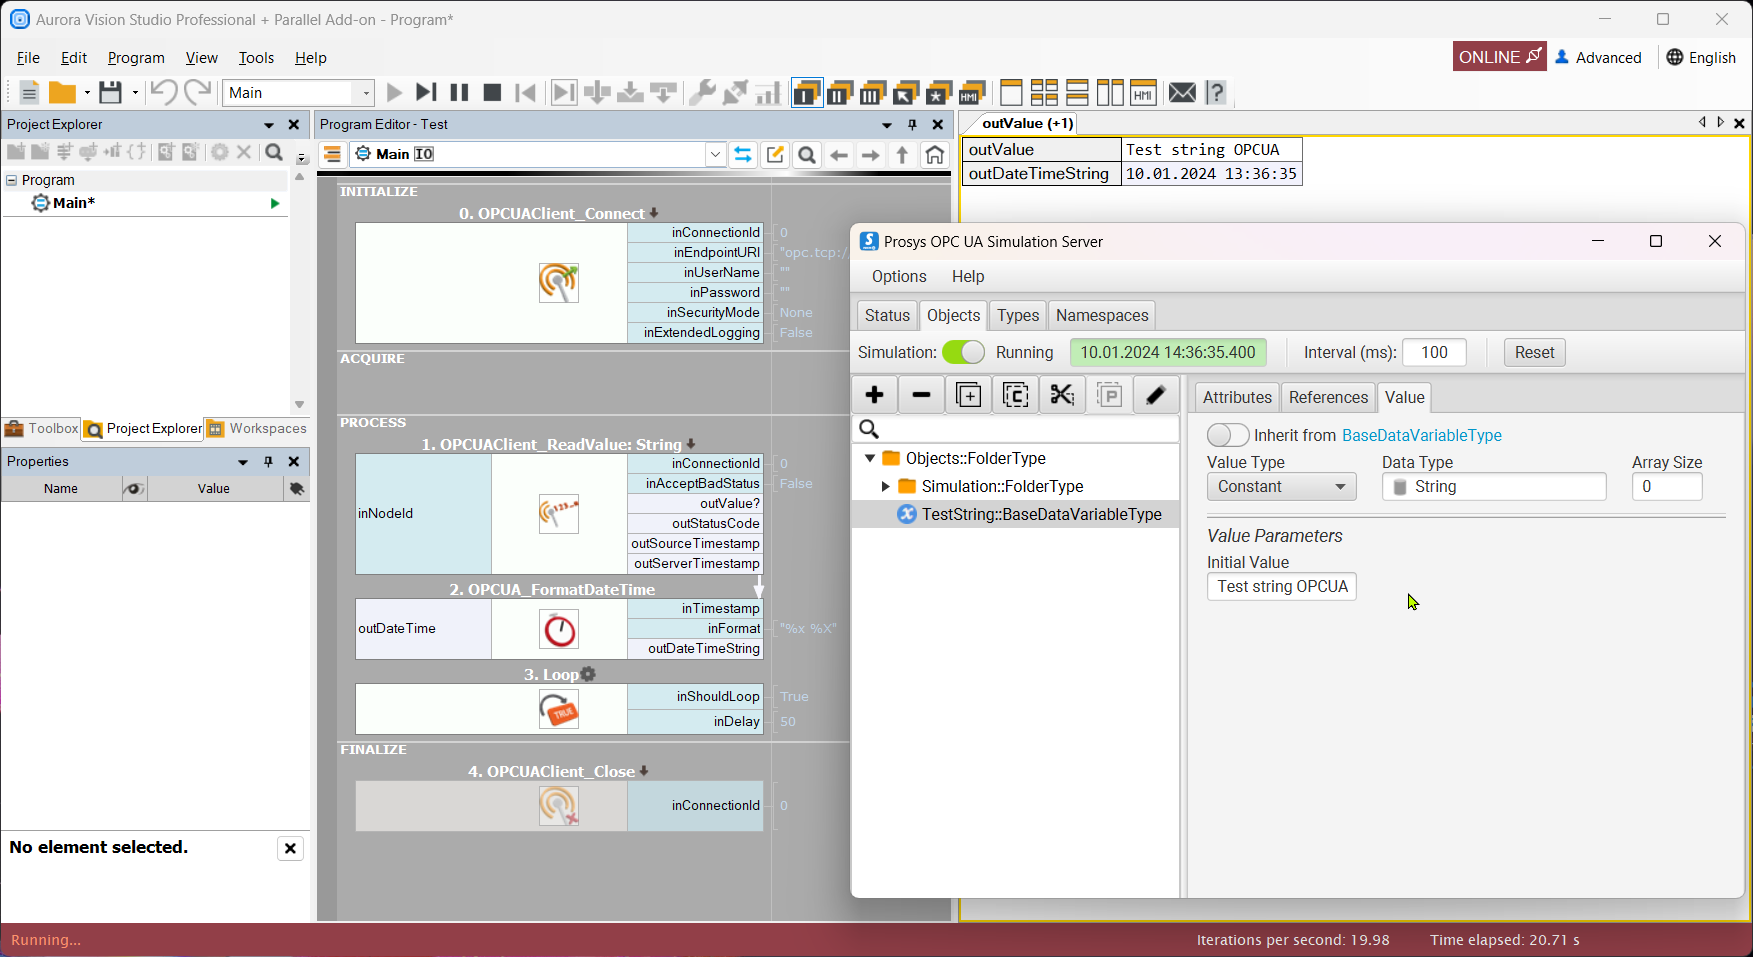
To modify values on the server side navigate to the Value tab. You can see changes in the OPCUA simulated server under the Attributes tab (on the screen attached below inspecting a boolean value):