
You are here: Start » Application Notes » Interfacing Matrox 4Sight computer (Profinet) to Aurora Vision Studio
Interfacing Matrox 4Sight computer (Profinet) to Aurora Vision Studio
Purpose and equipment
This document explains how to configure Profinet PLC with Aurora Vision Studio using Matrox 4Sight EV6 computer.
Required equipment:
- 4Sight computer with Profinet (used 4Sight EV6);
- Siemens S7-1200 PLC;
- Ethernet switch with at least 3 In/Outs might be useful - simplifies configuration;
- TIA Portal (version v15 used);
- Aurora Vision Studio 5.3 or later (version 5.3 used).
Application notes demonstrates configuration steps for specific 4sight model, but it is not obligatory to use this one. If you have different model, please refer to manuals provided by its manufacturer.
Hardware connection
In application notes there is configured one network which uses Ethernet switch. Devices connected to this network have addresses 192.168.250.XXX, where XXX stands for number 1-254 unique for every device/port connected.
In EV6 Matrox Profinet manual it is mentioned that PLC Software should not be installed on EV6. Taking this into account, we have one PLC and two computers in our network:
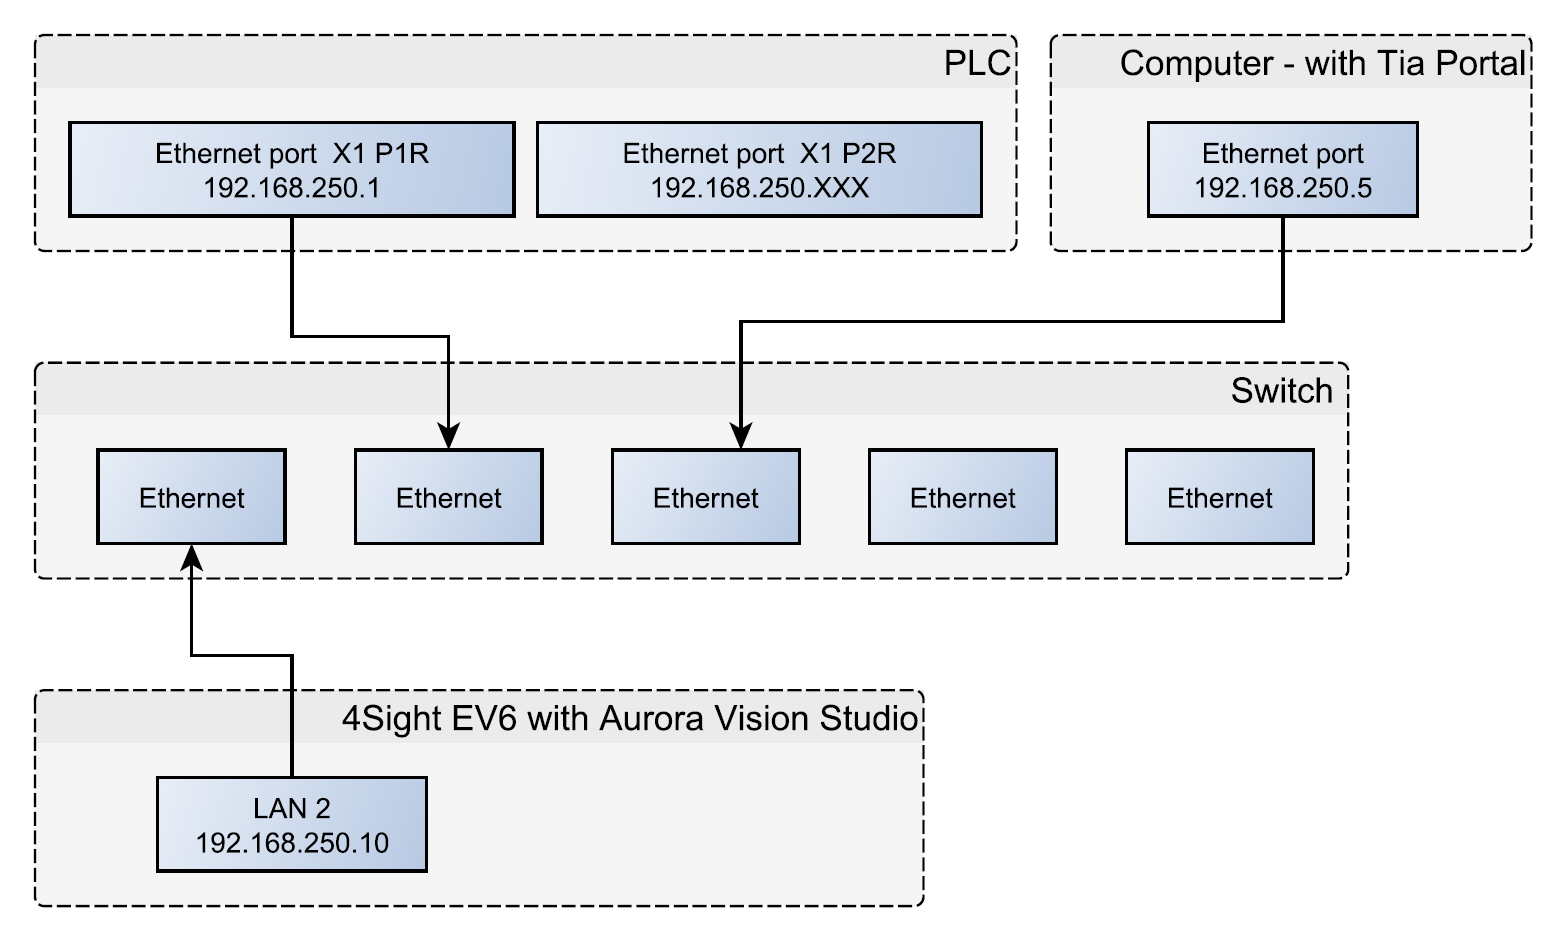 Before proceeding to the further point, make sure that all devices are powered up. Using LAN 2 port for industrial protocols is obligatory.
Configuring setup
-
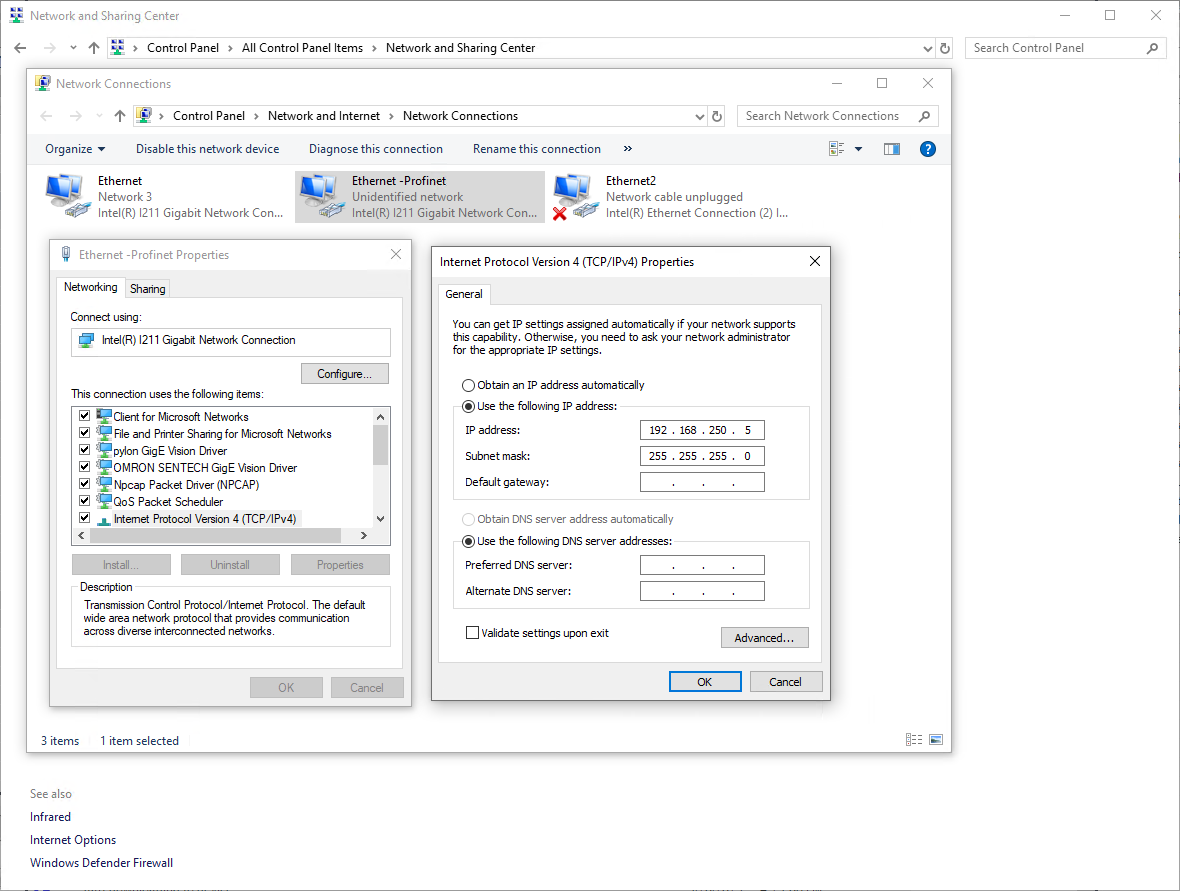
As first configure computer with TIA Portal. Change address of the network card connected to the switch to 192.168.250.5 as shown below:
-
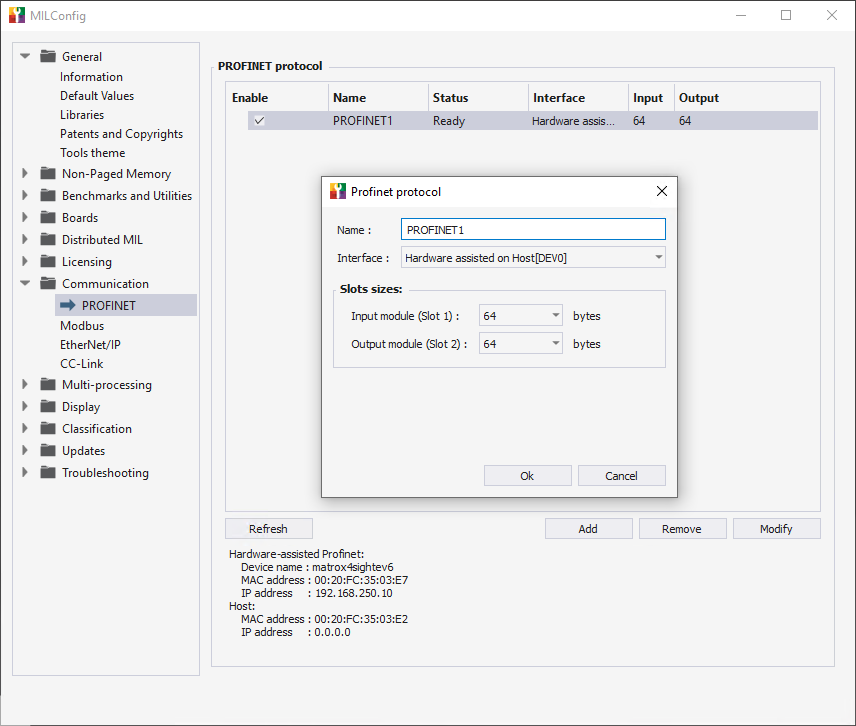
Enable profinet at 4Sight EV6 Computer using MILConfig tool (IP address will not be defined yet):
Configuring 4Sight EV6 in TIA Portal
-
Create TIA Portal project with your PLC. Find GSD file in MIL X directory, you can find it placing this in File Explorer:
%MIL_Path%\..\Config\Profinet
In TIA Portal add GSD file from above mentioned firmware folder using tab menu on the top:
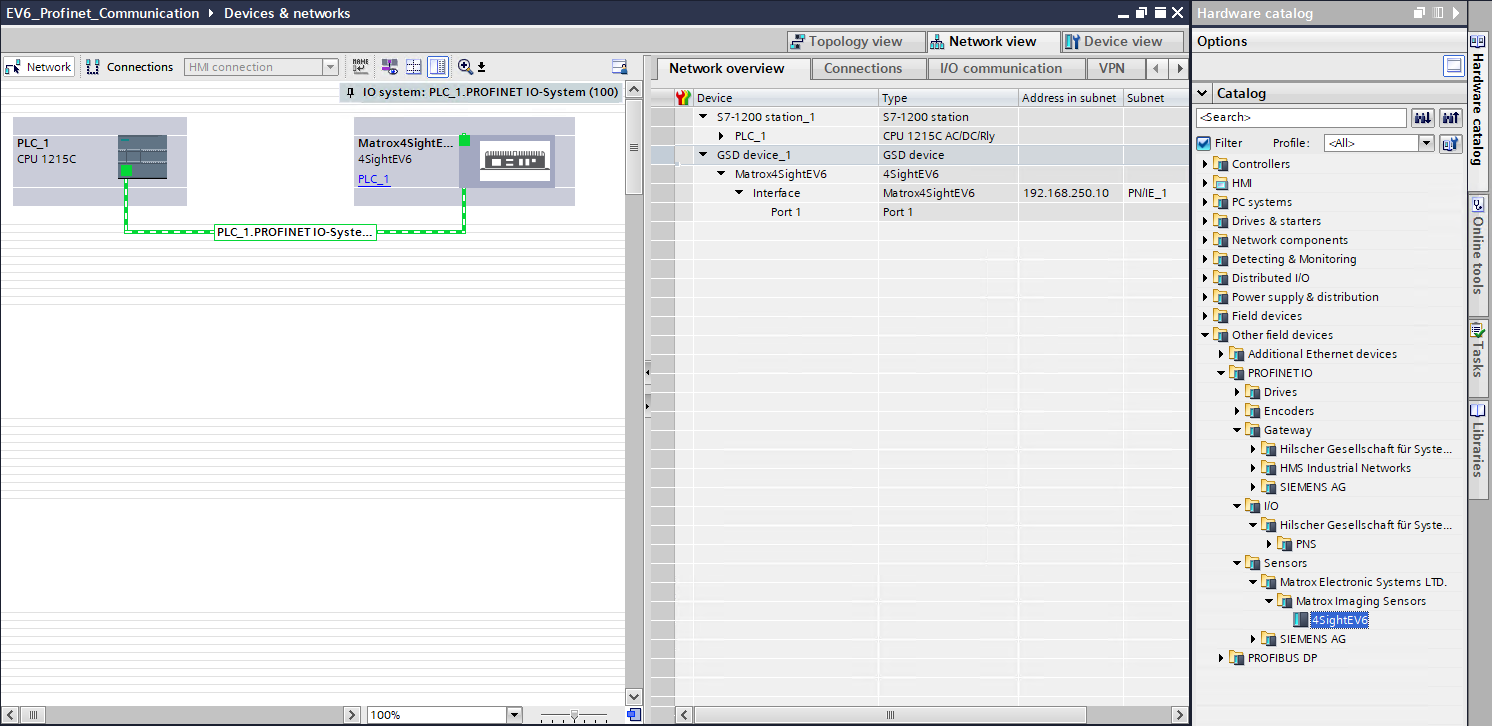
"Options → Manage general station … → Select file → Install".Once you upload GSD, you can find appropriate device in Other field devices -> PROFINET IO → Sensors → Matrox Imaging Sensors. Drag & drop it onto Network view and combine it as on the screen attached below:
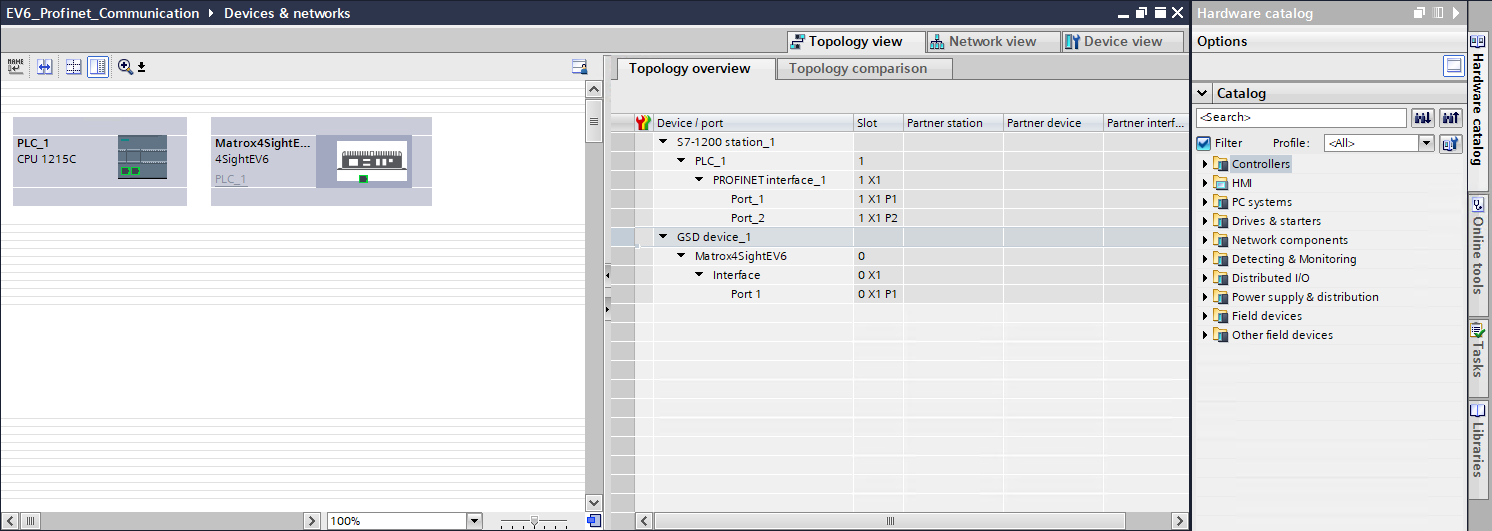
Topology view should be left unchanged:
-
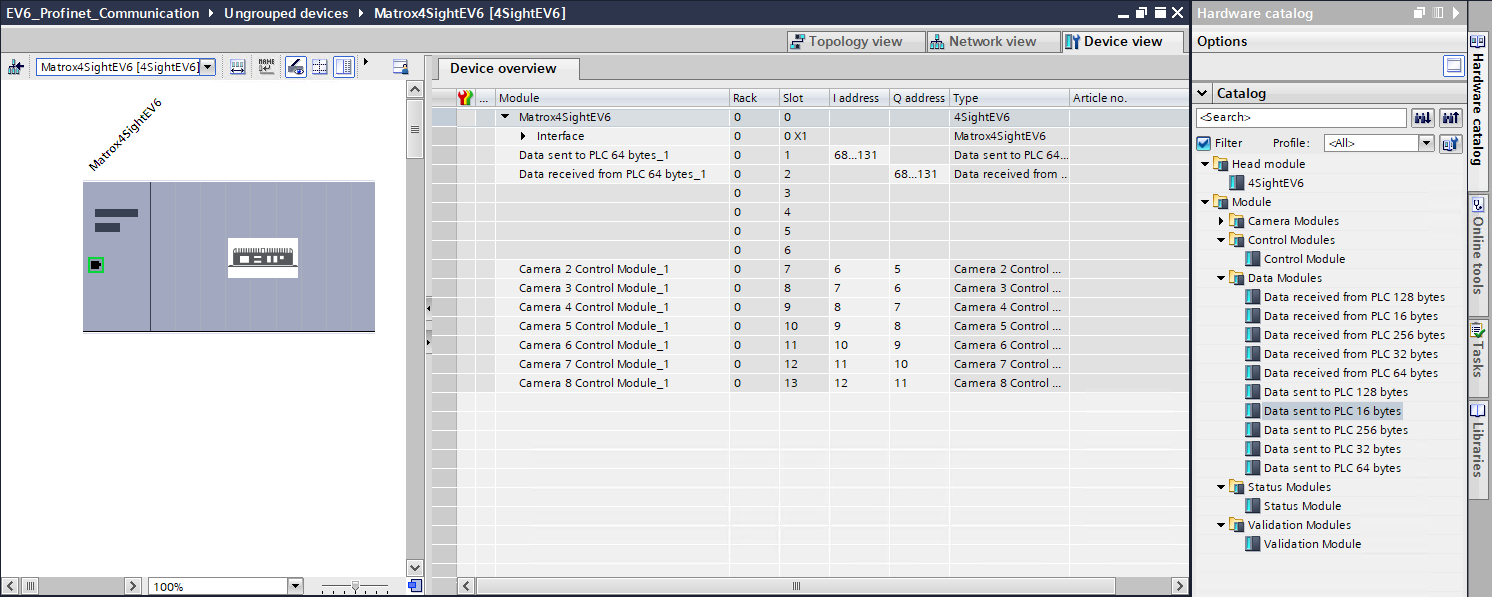
Drag & drop appropriate data modules in Device view tab (in MILConfig 64bytes modules were set):
-
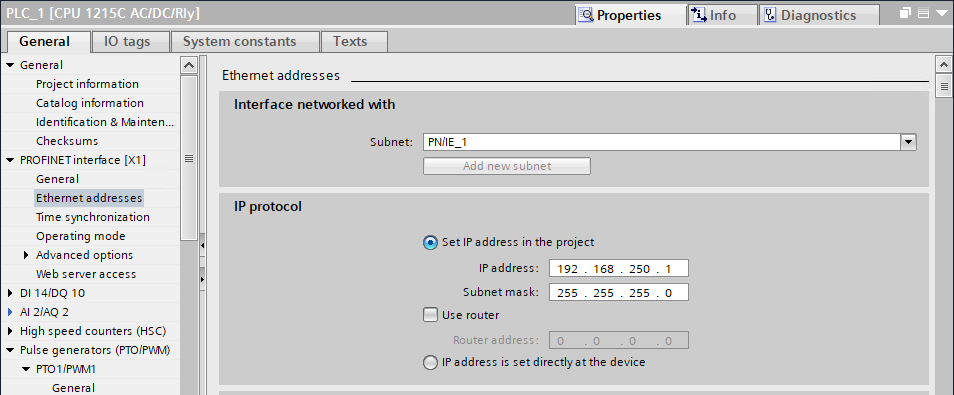
Change PLC's IP to 192.168.250.1:
-
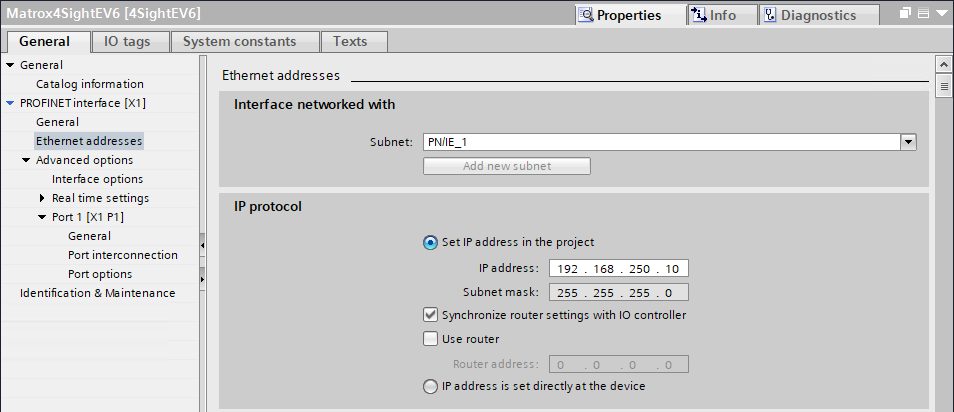
Change 4Sight's IP to 192.168.250.10:
-
If all previous steps have been done correctly, your PLC program is ready. Compile the program and download it to the device. To see current states of variables, turn on Monitoring mode:


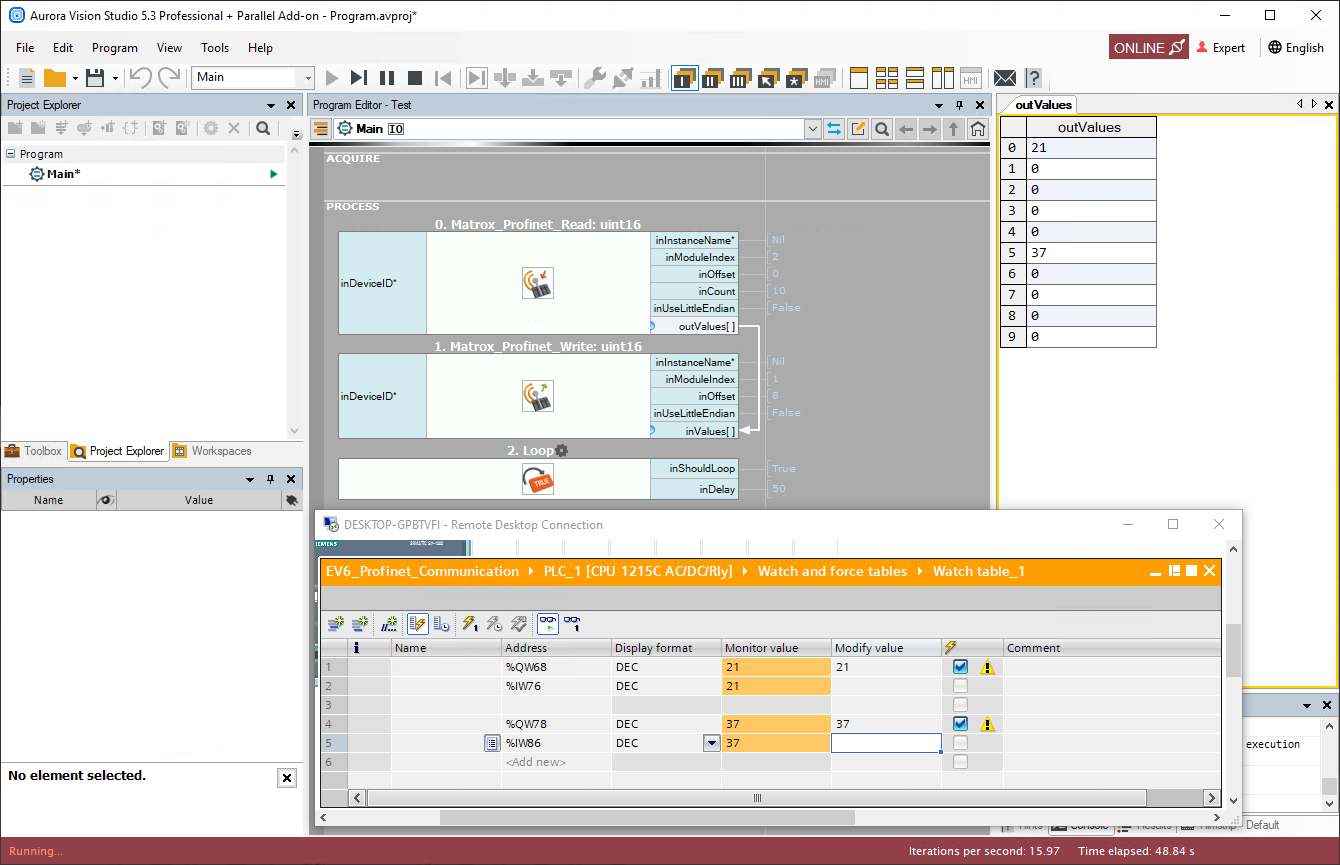
To monitor and easily modify tags please add Watch table in Watch and force tables folder.
Configuring Aurora Vision Studio application
Turn on online mode and monitoring mode in TIA Portal. You can create watch tables to easily modify data in TIA Portal environment:
Troubleshooting
In case of any problem with 4Sight configuration, please refer to the MIL X manuals that could be found under:
%MIL_Path%\..\DOC\help
More detailed information could be found in Matrox Design Assistant help file.