
You are here: Start » Application Notes » Interfacing Matrox 4Sight computer (EtherNet/IP) to Aurora Vision Studio
Interfacing Matrox 4Sight computer (EtherNet/IP) to Aurora Vision Studio
Purpose and equipment
This document explains how to configure EthernetIP PLC with Aurora Vision Studio using Matrox 4Sight EV6 computer.
Required equipment:
- 4Sight computer with EtherNet/IP (used 4Sight EV6);
- EtherNet/IP PLC (used NX1P2-9024DT1);
- Ethernet switch with at least 3 In/Outs might be useful - simplifies configuration;
- Sysmac Studio (software to configure PLC);
- Aurora Vision Studio 5.3 or later (version 5.3 used).
Application note demonstrates configuration steps for specific 4Sight model, but it is not obligatory to use this one. If you have different model, please refer to manuals provided by its manufacturer. Different PLC which supports EtherNet/IP can be also used.
Hardware connection
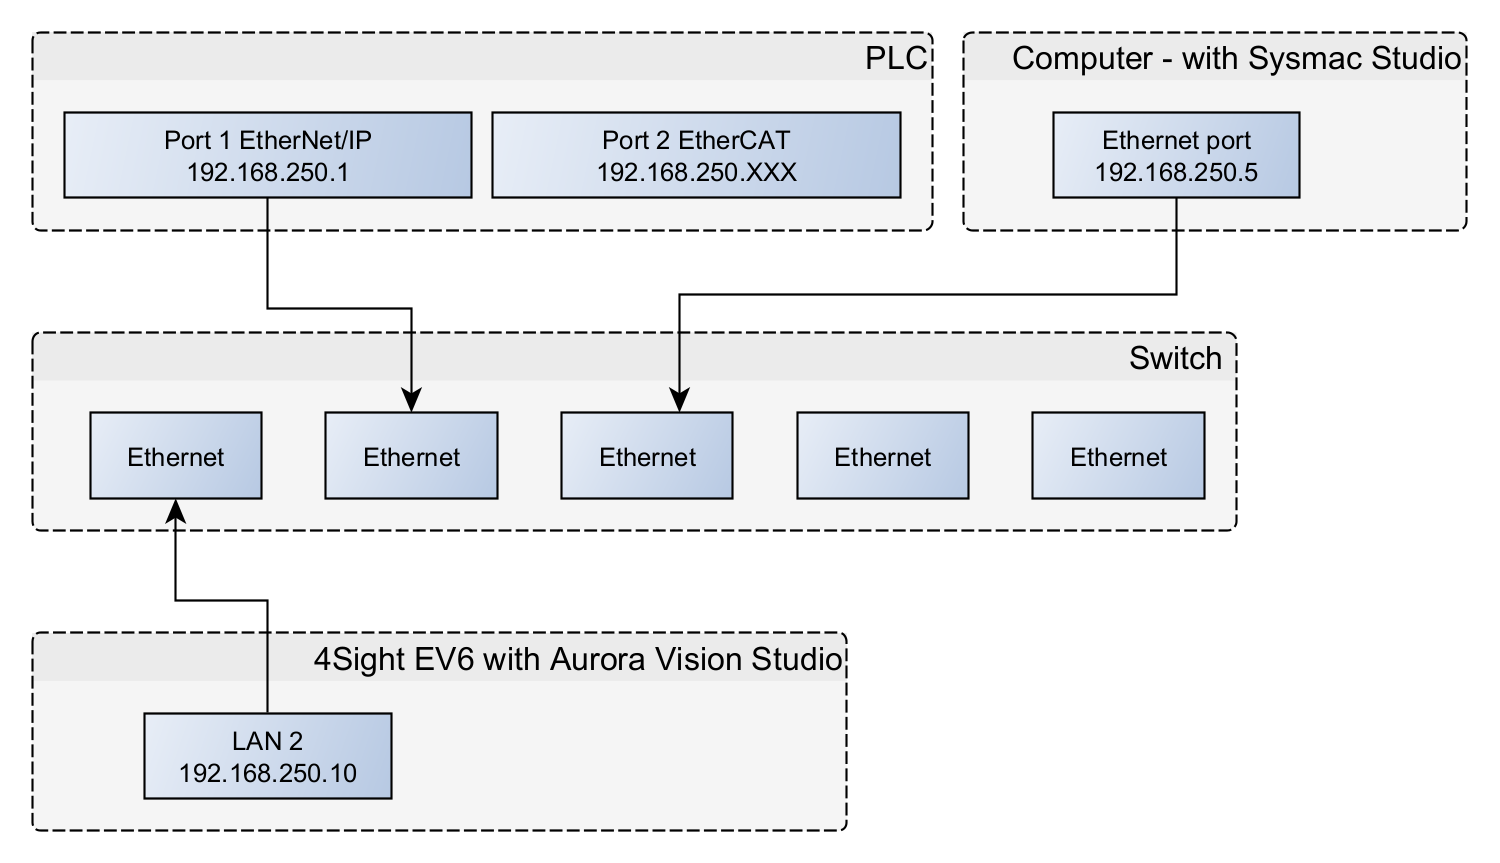
In application notes there is configured one network which uses Ethernet switch. Devices connected to this network have addresses 192.168.250.XXX, where XXX stands for number 1-254 unique for every device/port connected.
In EV6 Matrox EtherNet/IP manual it is mentioned that PLC Software should not be installed on EV6. Taking this into account, we have one PLC and two computers in our network:
 Before proceeding to the further point, make sure that all devices are powered up. Using LAN 2 port for industrial protocols is obligatory.
Configuring setup
-
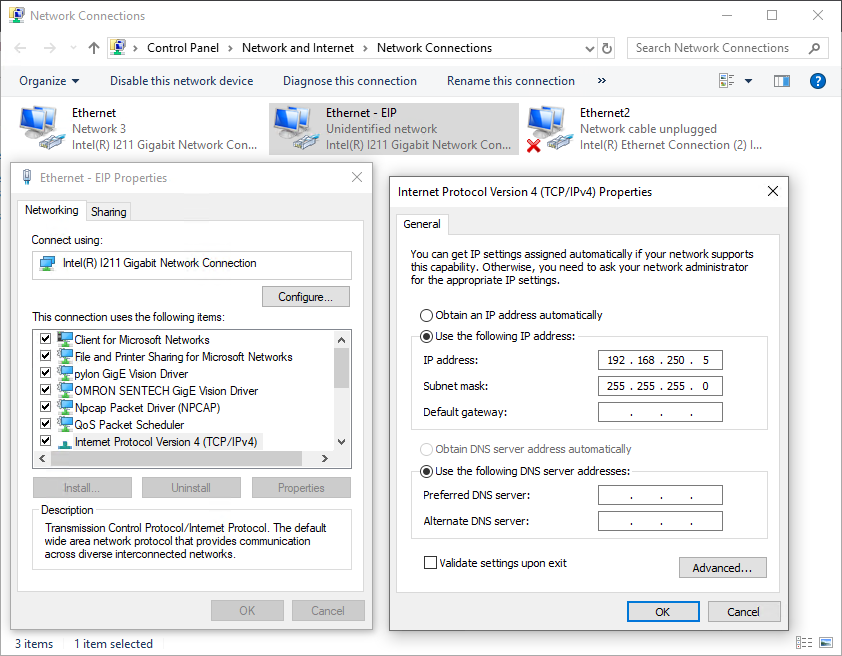
As first configure computer with Sysmac Studio. Change address of the network card connected to the switch to 192.168.250.5 as shown below:
-
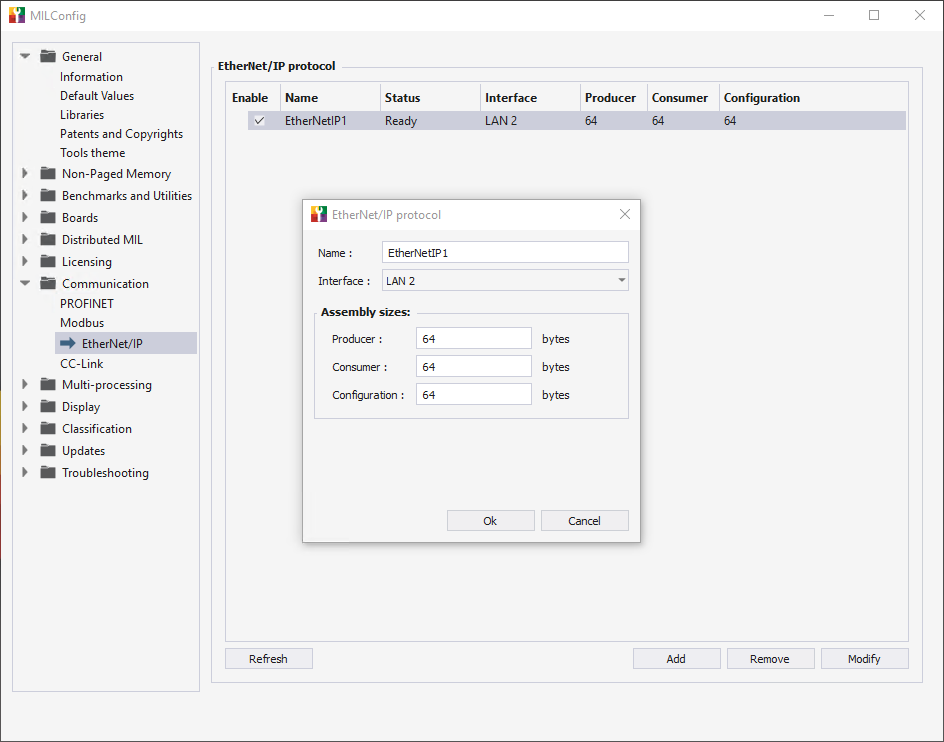
Enable EtherNet/IP at 4Sight EV6 Computer using MILConfig tool:
-
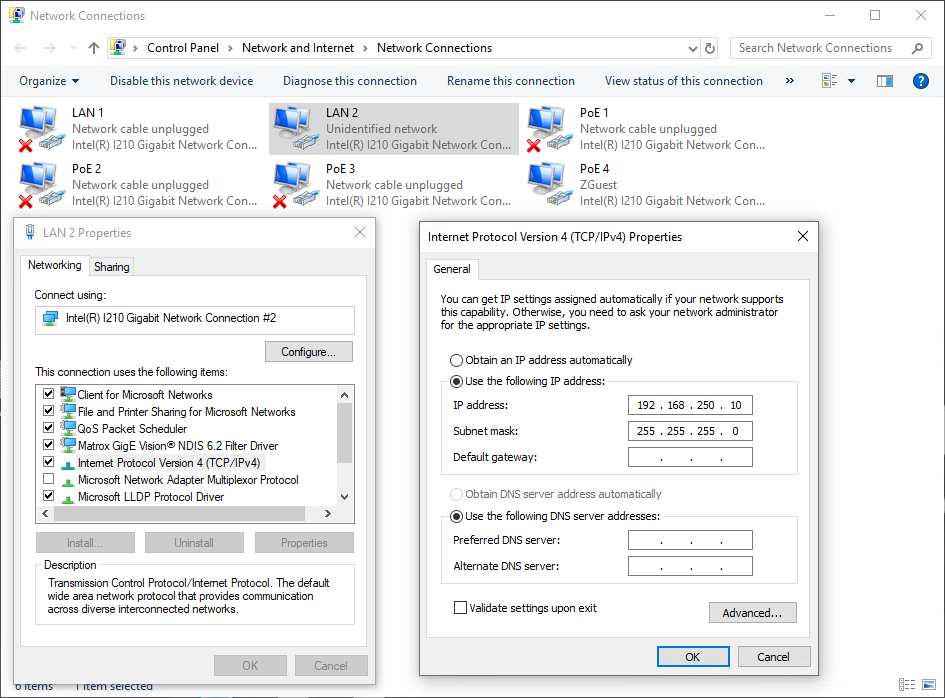
Change address of the network card of 4Sight EV6 computer (LAN 2 port) connected to the switch to 192.168.250.10 as shown below:
Configuring 4Sight EV6 in Sysmac Studio
Below you will find an example configuration process for EtherNet/IP PLC Omron NX1P2-9024DT in Sysmac Studio software.
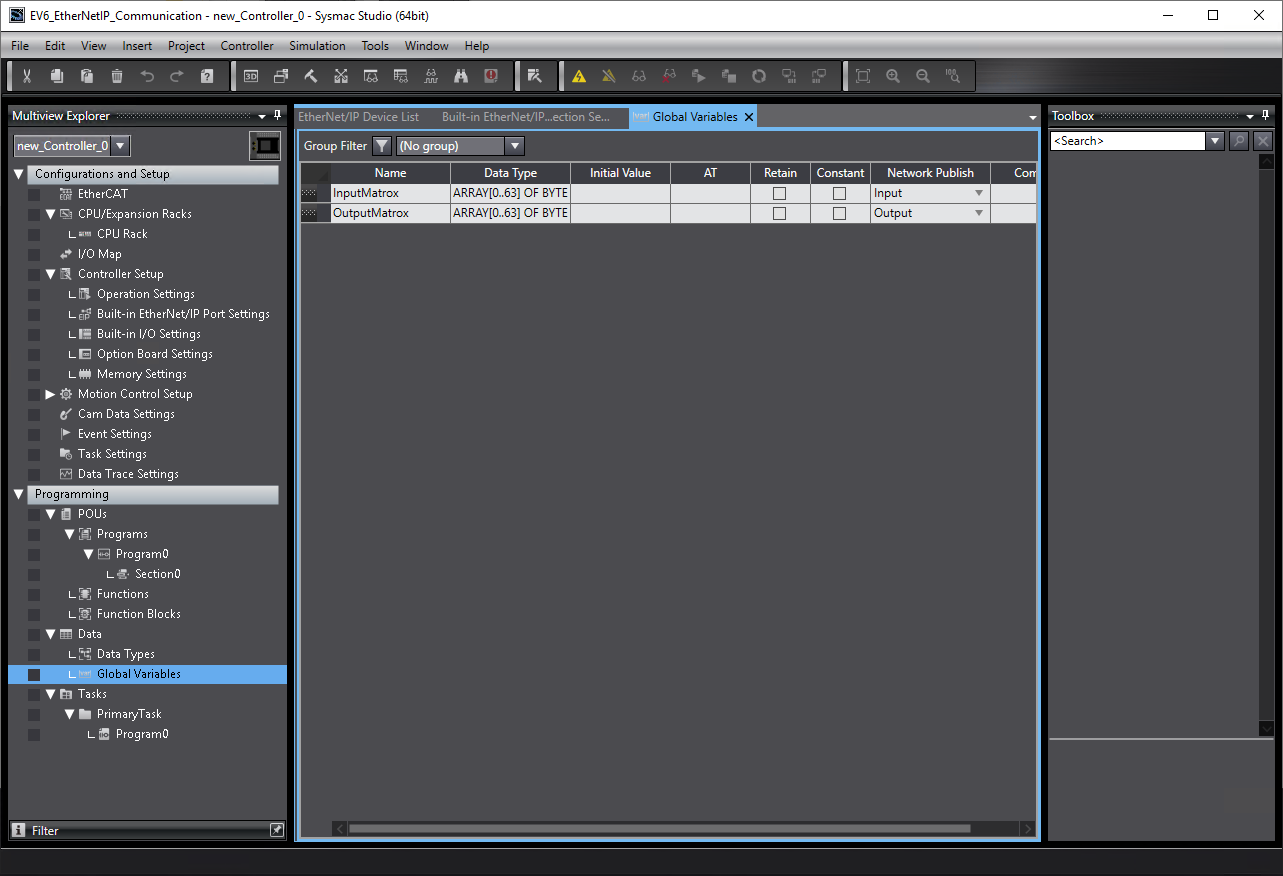
There were created two global variables InputMatrox and OutputMatrox using "ARRAY [0..63] OF BYTE" data type to match configuration set in MILConfig.
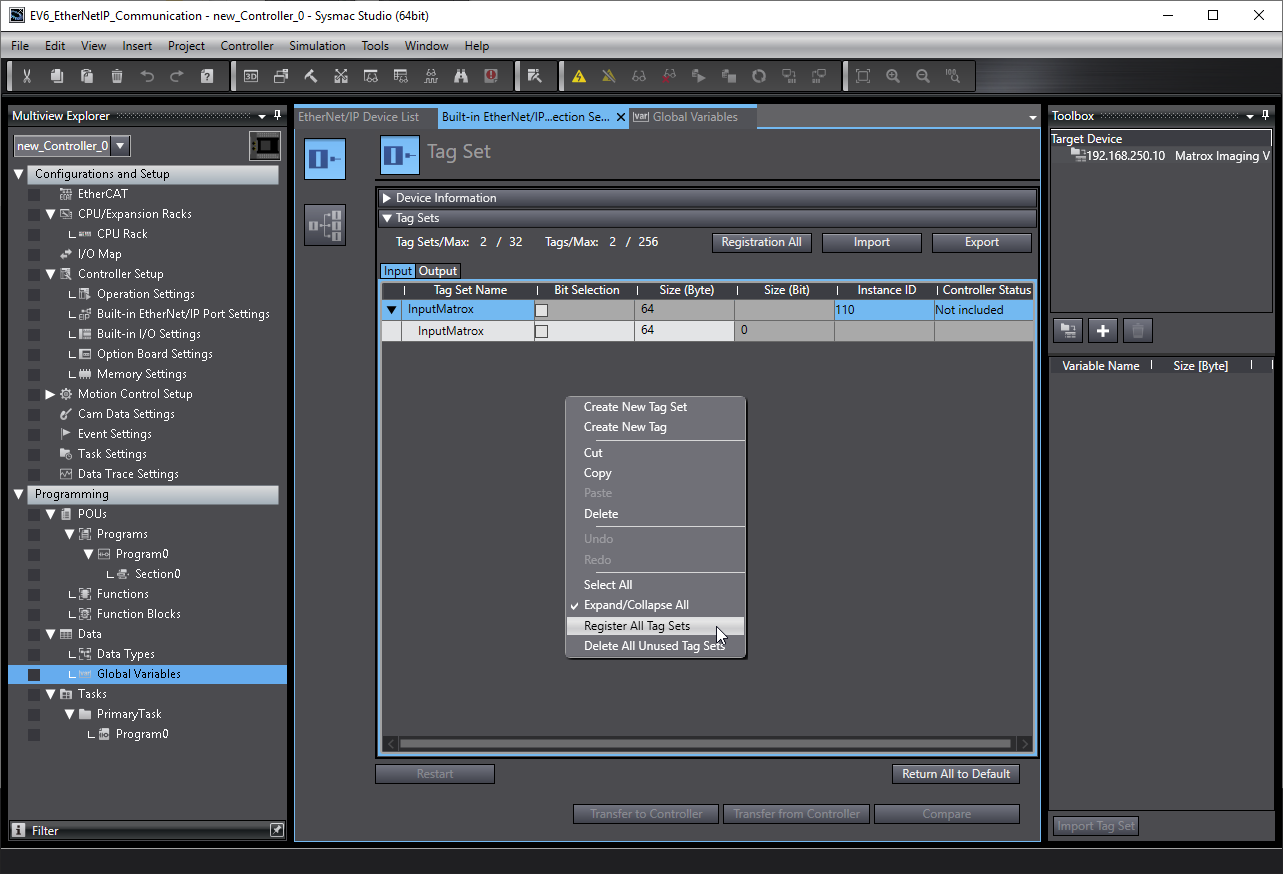
Then navigate to (Tools -> EtherNet/IP Connection Setting) and "Register All Tag Sets".
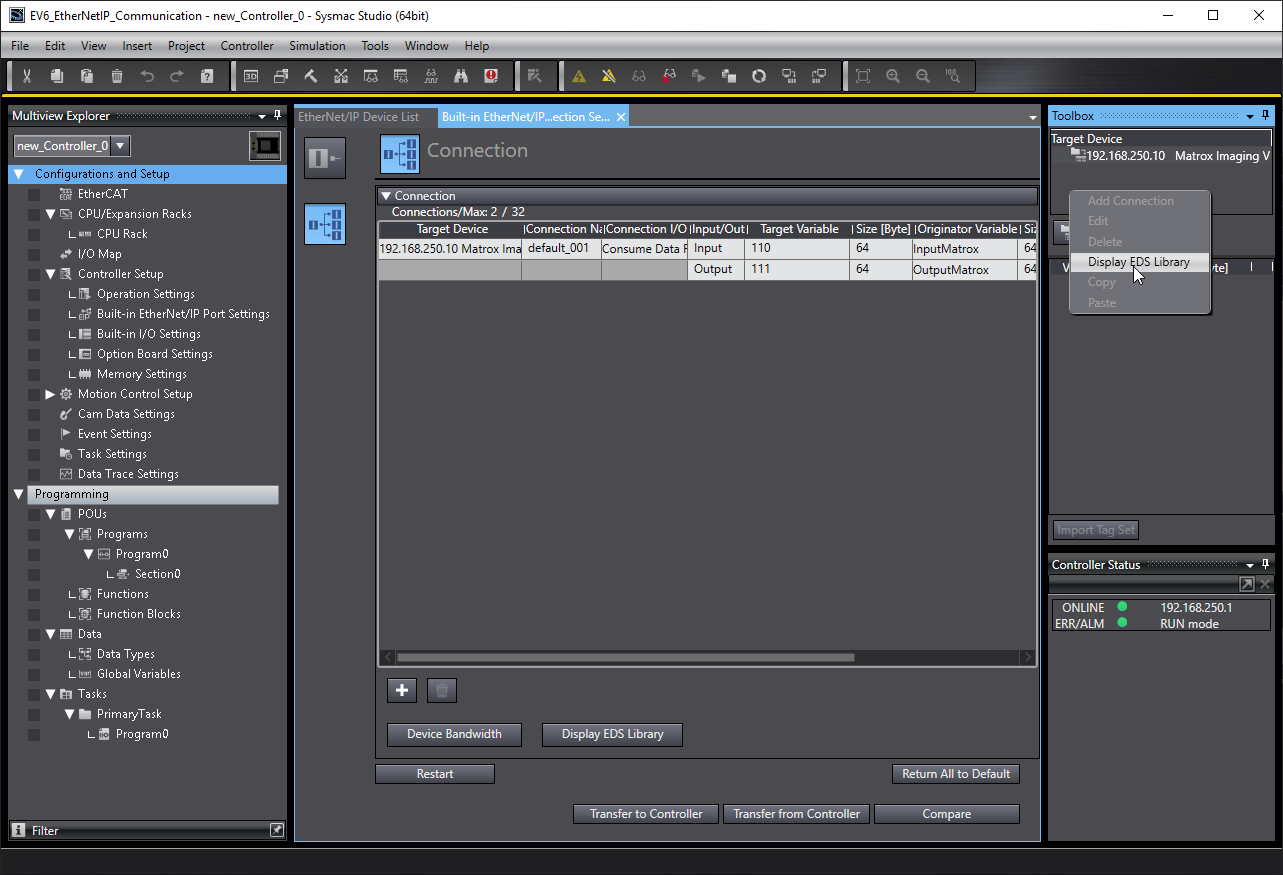
Add support for Matrox 4Sight computer using EDS files that could be found under:
%MIL_Path%\..\Config\EthernetIPThen add "Matrox Imaging Vision System" and configure Input and Output like below:
For this moment it is essential to connect with a PLC device, to do this in Sysmac Studio you need to navigate to "Controller -> Communication Setup...". There might be an error in Ethernet Communication Test if your network card is configured as DHCP (Configuration of the network card section in this tutorial). If communication with PLC is established you will receive "Test OK".
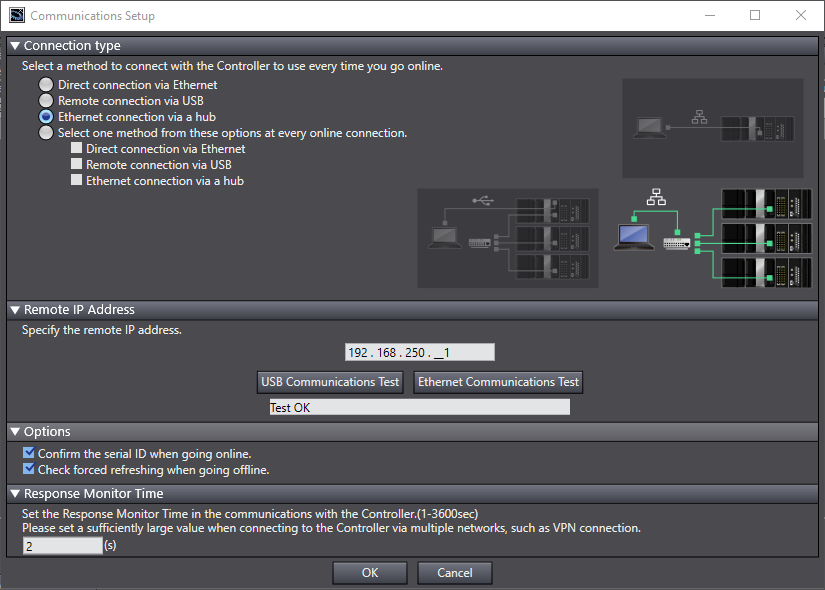
If communication with PLC is established you can download the configuration to the device.
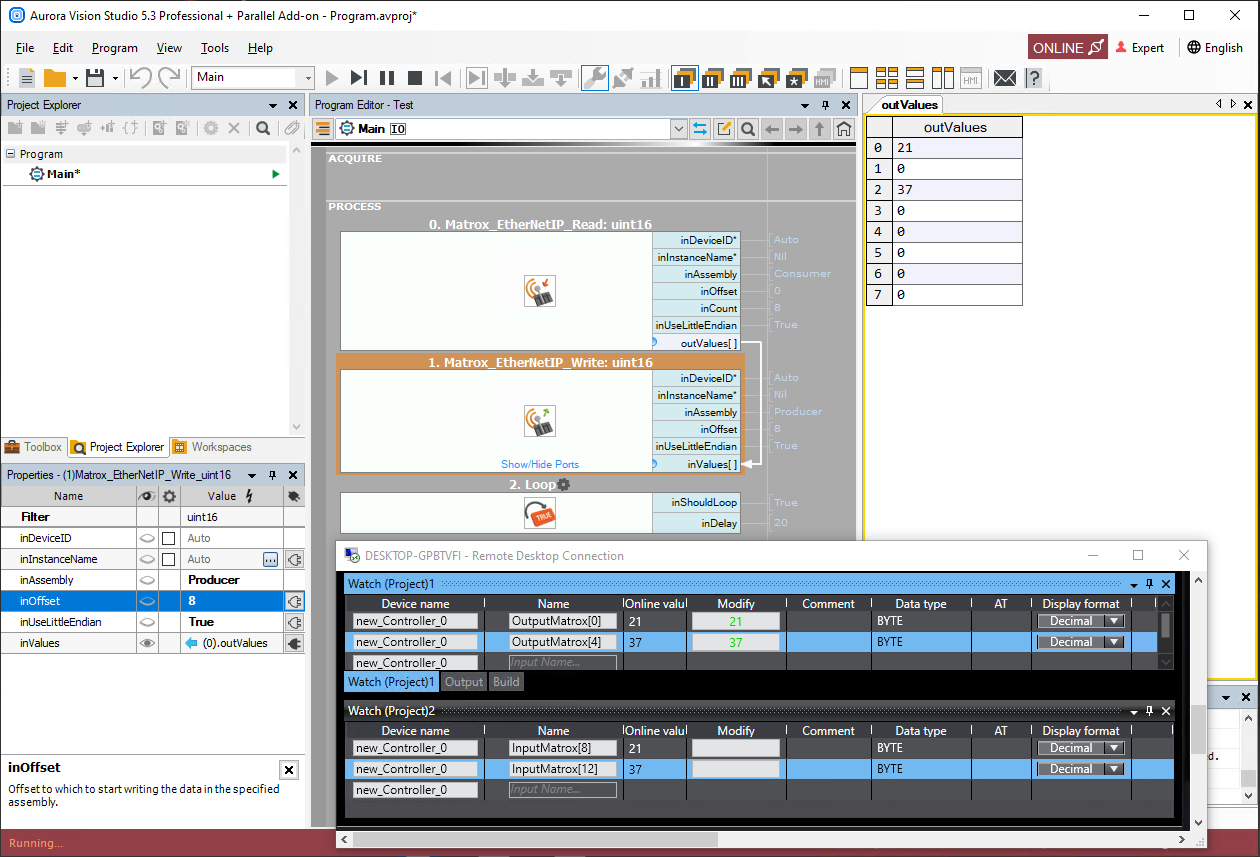
Configuring Aurora Vision Studio application
Once communication between PLC and 4Sight EV6 is established, you can create program in Aurora Vision Studio. Add watch tables to easily modify data in Sysmac Studio:
Troubleshooting
In case of any problem with 4Sight configuration, please refer to the MIL X manuals that could be found under:
%MIL_Path%\..\DOC\help
More detailed information could be found in Matrox Design Assistant help file.