You are here: Start » Application Notes » Interfacing Gocator to Aurora Vision Studio
Interfacing Gocator to Aurora Vision Studio
Purpose and requirement
This document explains how to interface a Gocator sensor to Aurora Vision Studio.
A Gocator is an advanced sensor created by LMI Technologies. It is purposed for 3D machine vision and processing point clouds. The Gocator has many functionalities including:
- Scanning objects and representing them as a point cloud or intensity images,
- Various representations of scans,
- Basic tools for 3D processing like: filtering, thresholding etc.,
- Tools for performing measurements.
Required equipment:
- Gocator Firmware Release 3.2 or later
- Aurora Vision Studio 4.10 Professional or later
Setting up Aurora Vision Studio with a Gocator for the first time
Each sensor is shipped with a default IP address of 192.168.1.10. So before working with the Gocator you must make sure that the IP address has been set correctly and is unique for each device in the network. You can verify that with the steps described below:
- Connect a Gocator to the PC running Aurora Vision Studio Professional.
- Power up the Gocator, connect it to the PC via Ethernet interface.
- Open Control Panel on your PC.
- Find Network and Sharing Center.
- Choose Change adapter settings.
- Right-click on unidentified network connection, choose Properties.
- In Ethernet Properties find Internet Protocol Version 4 (TCP/IPv4) and click Properties.
- In General tab, choose Use the following IP address and set:
- IP address to (for example) 192.168.1.5
- Subnet mask to 255.255.255.0
- Click OK and Close. Now you should be able to connect with the Gocator. You can verify this using your web browser.
- In a search tab, type 192.168.1.10 and click Enter.
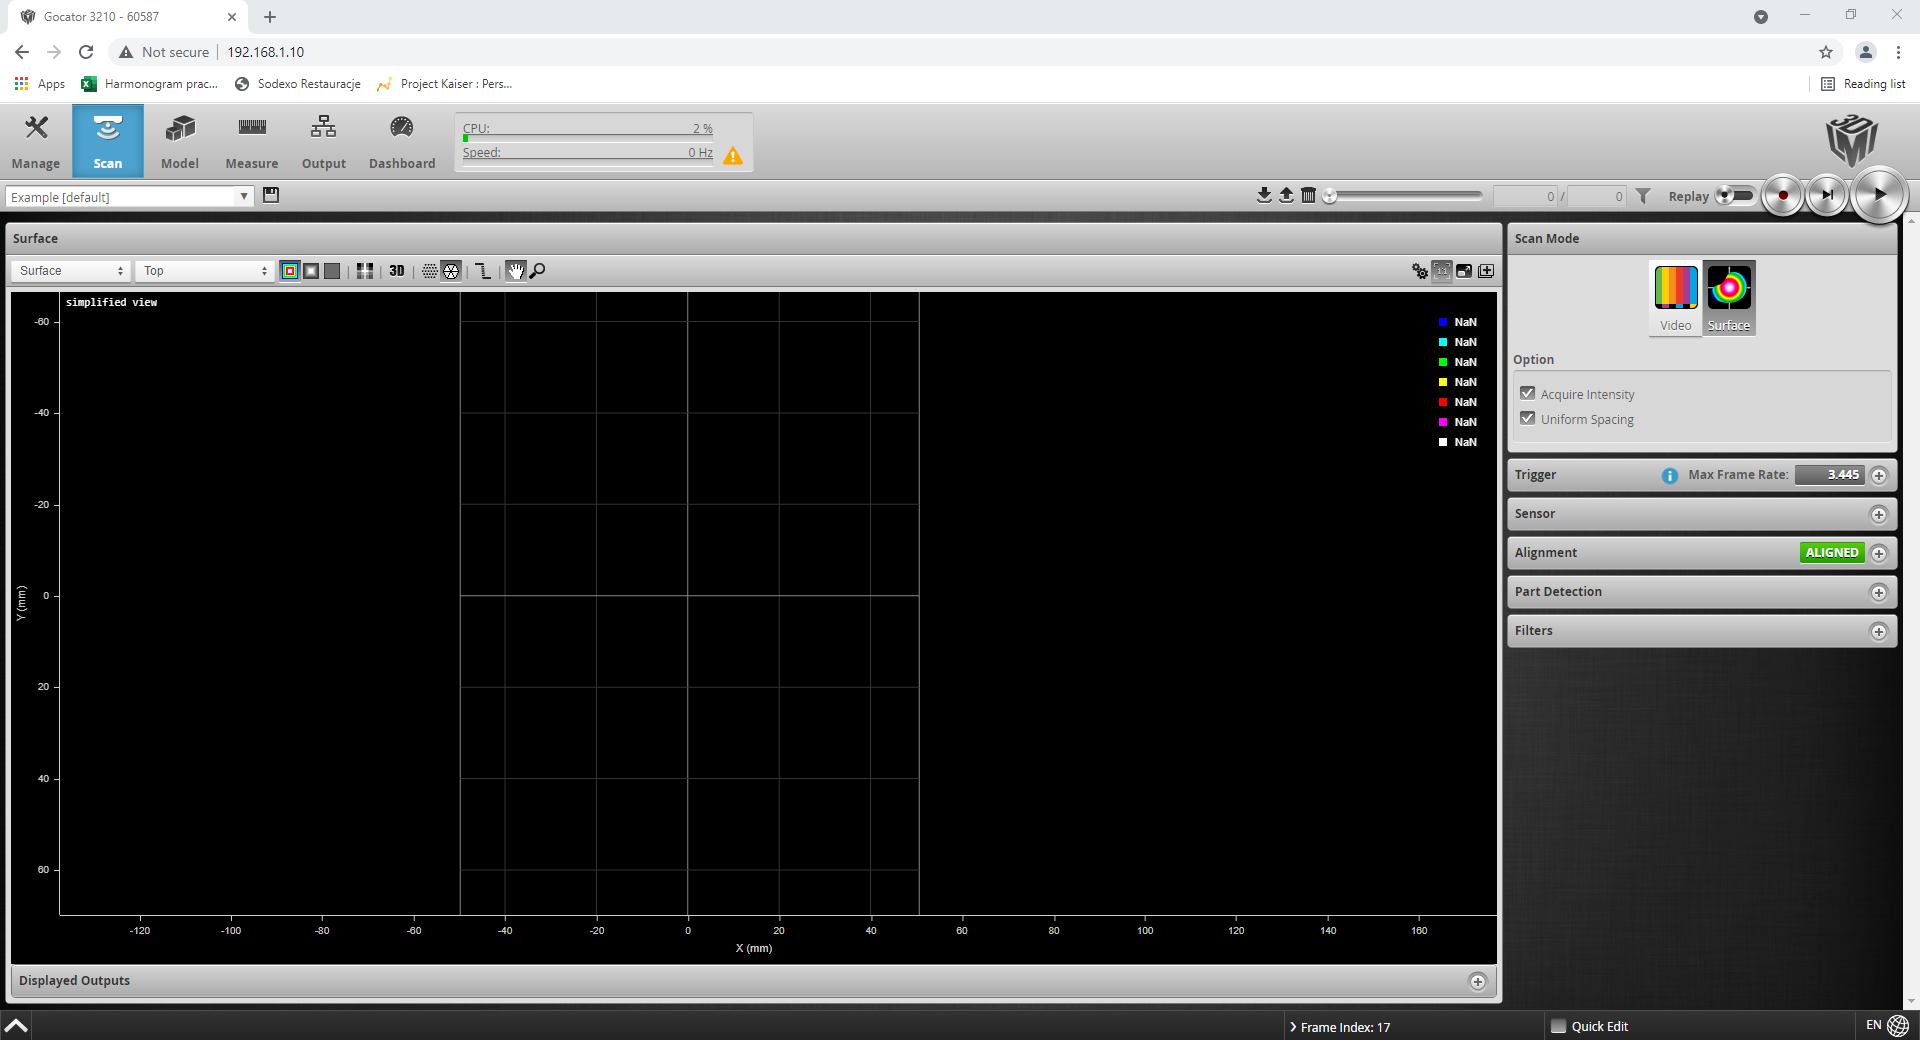
- You should see this user interface:
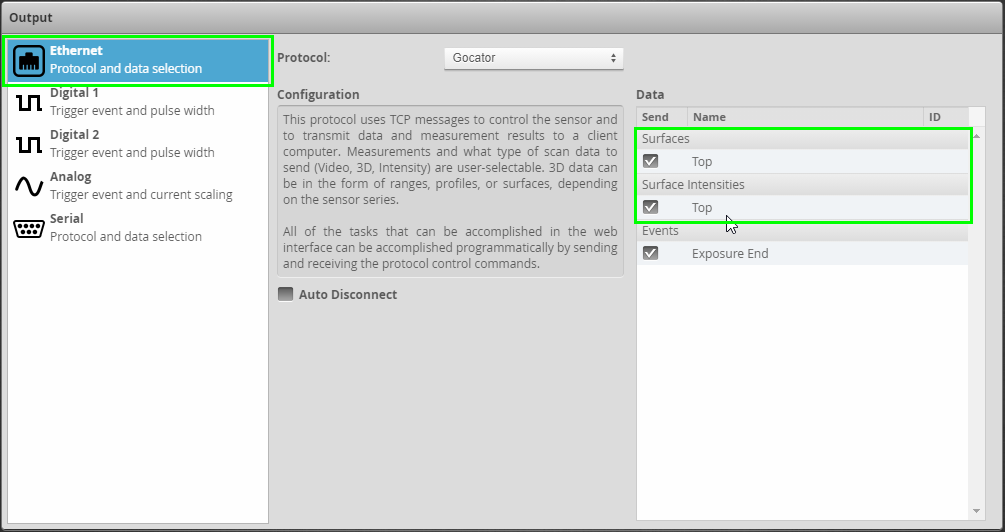
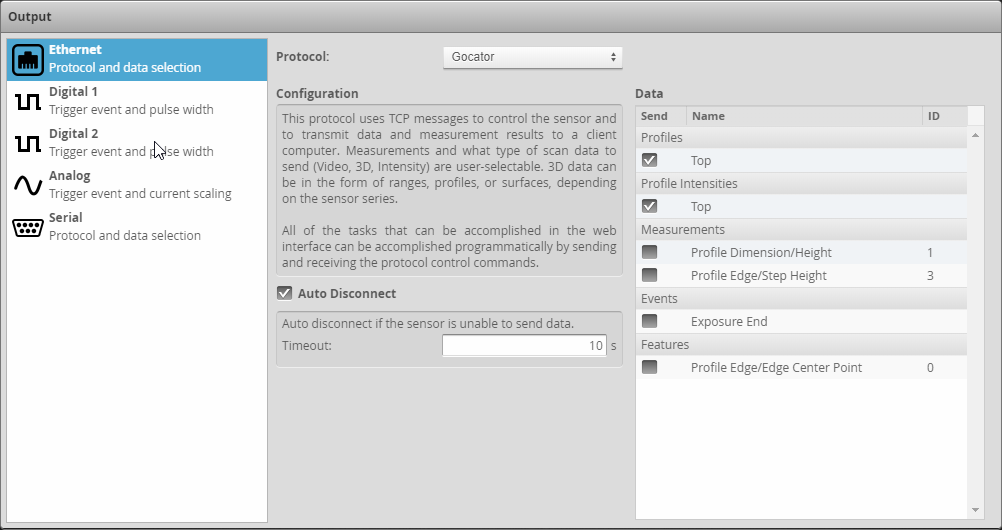
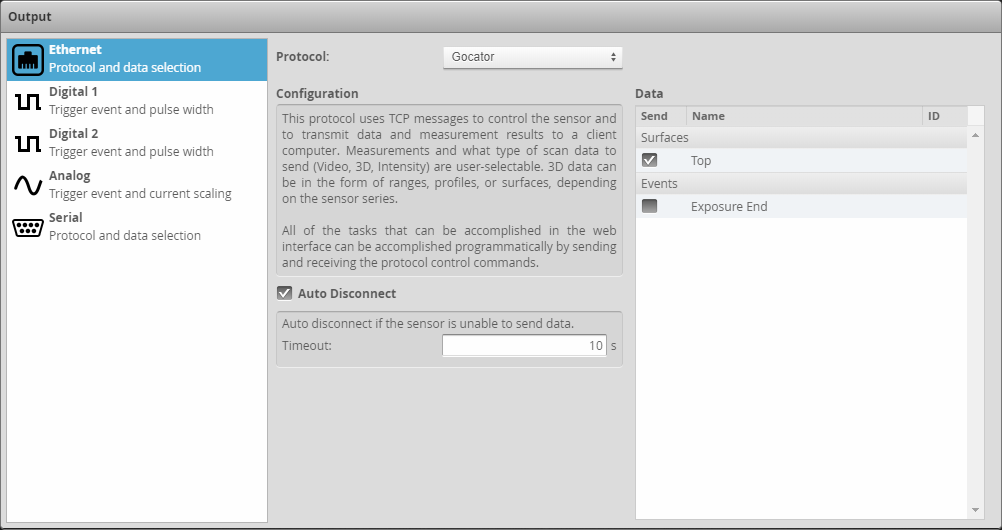
- The provided browser-based user interface allows you to configure the parameters of the Gocator sensor. Before working with Gocator in Aurora Vision Studio it is required to set parameters in the browser interface because from the Studio side you are unable to change them. In Aurora Vision you will see data the same as in the browser. To send specific data outputs to Aurora Vision Studio click on the "Output" tab and there select Ethernet output. Then you must choose the data to send. Note that marking all outputs is optional so it is possible to mark only these which are interesting for you. For example, with the setup shown below you will be able to acquire Surface and Surface Intensity in Aurora Vision Studio. For the outputs in the Measurement section there are also specified ID's. The same ID should be later set on the Aurora Vision side.
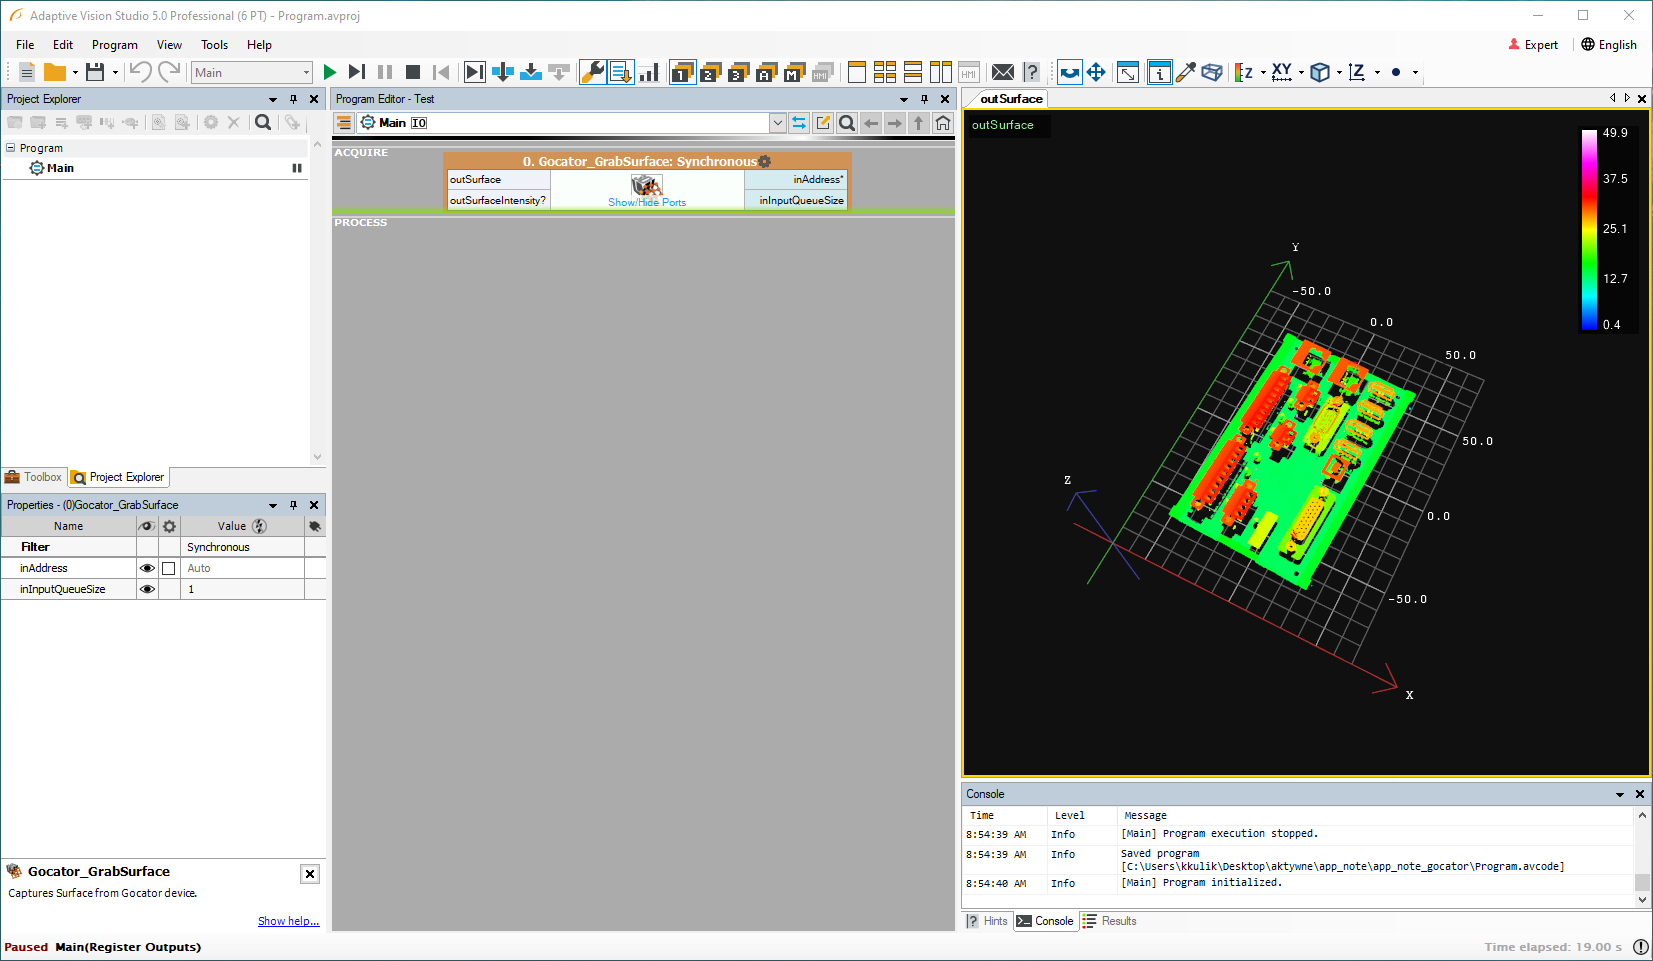
- Now go back to Aurora Vision Studio. In Image Acquisition (Third Party) section find LMI and double-click. Choose Gocator_GrabSurface to grab a surface or Gocator_GrabProfile to grab a profile. Run or iterate the program. It is recommended to use the other option for testing. If everything works fine you will receive the point cloud or the profile of the object from your Gocator Note that this filter has an input inAddress, but it is not necessary to use it if there is only one Gocator connected with your PC. You must set this input if there are more sensors.
- If no problems occurred as far, it means you have successfully connected Aurora Vision Studio with the Gocator.

Troubleshooting
If you had any problems during the connection process, you could find some solutions here.
- If you cannot connect with a Gocator, please verify your Ethernet connection. Unplug your Internet cable and plug the cable from the Gocator.
- Verify whether you have correctly set IP address.
- If the device cannot connect, use the Security button on your Master device.
- Make sure your browser uses the newest version of Flash.
- In the case that other page is displayed on the 192.168.1.10 address press Ctrl + F5 to force a cache refresh.
If you meet the problem we have not mentioned above, please let us know, so that we could investigate it and add it to this section.
Gocator filters in Aurora Vision Studio
Full list of filters intended to work with Gocator devices you can find under this link.
Working with Emulator
Gocator Emulator is a software that allows for running a virtual sensor instead of using the real one. Emulator's interface is identical as the one in a web browser. Thanks to that you can get acquainted with all functionalities that the Gocator provides. To start working download the proper tools package from: http://lmi3d.com/support. Then to run the application first unzip the package then find GoEmulator file and run it. The emulator lets you to change a language and select version. After launching the application start from step 12 according to the walkthrough in chapter 3. After starting GoEmulator, you must choose a scenario to be run. It is possible to display data from scenarios in Aurora Vision Studio. The connection between Aurora Vision Studio and GoEmulator should be set automatically - you do not have to set a specific IP.
Examples
In this chapter several examples are presented to help you understand how to use functionalities described above and to help you learn how to work with the Gocator's user interface and filters in Aurora Vision Studio.
Example 1 - getting profile
To grab profile from a Gocator (in this case Emulator) follow the steps below:
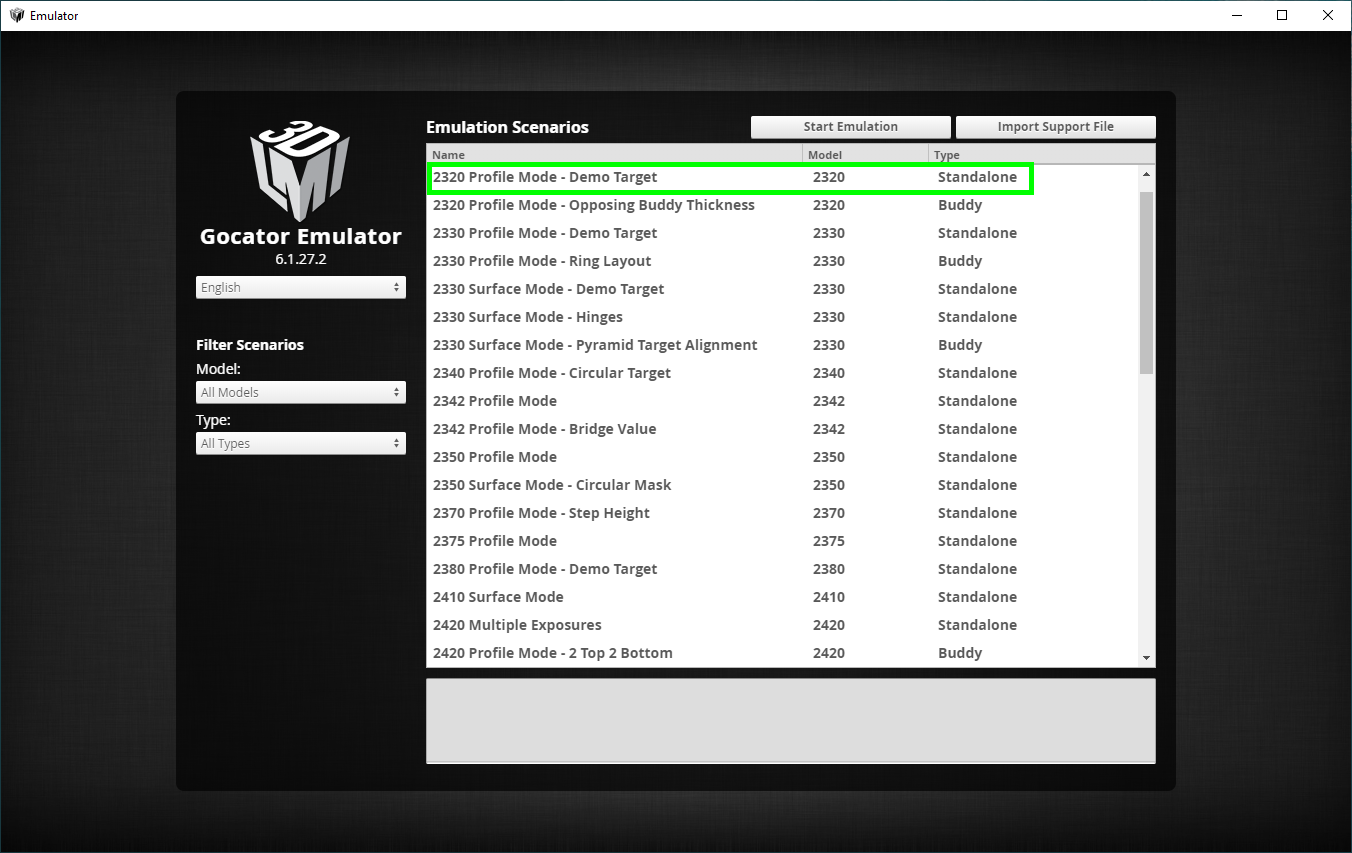
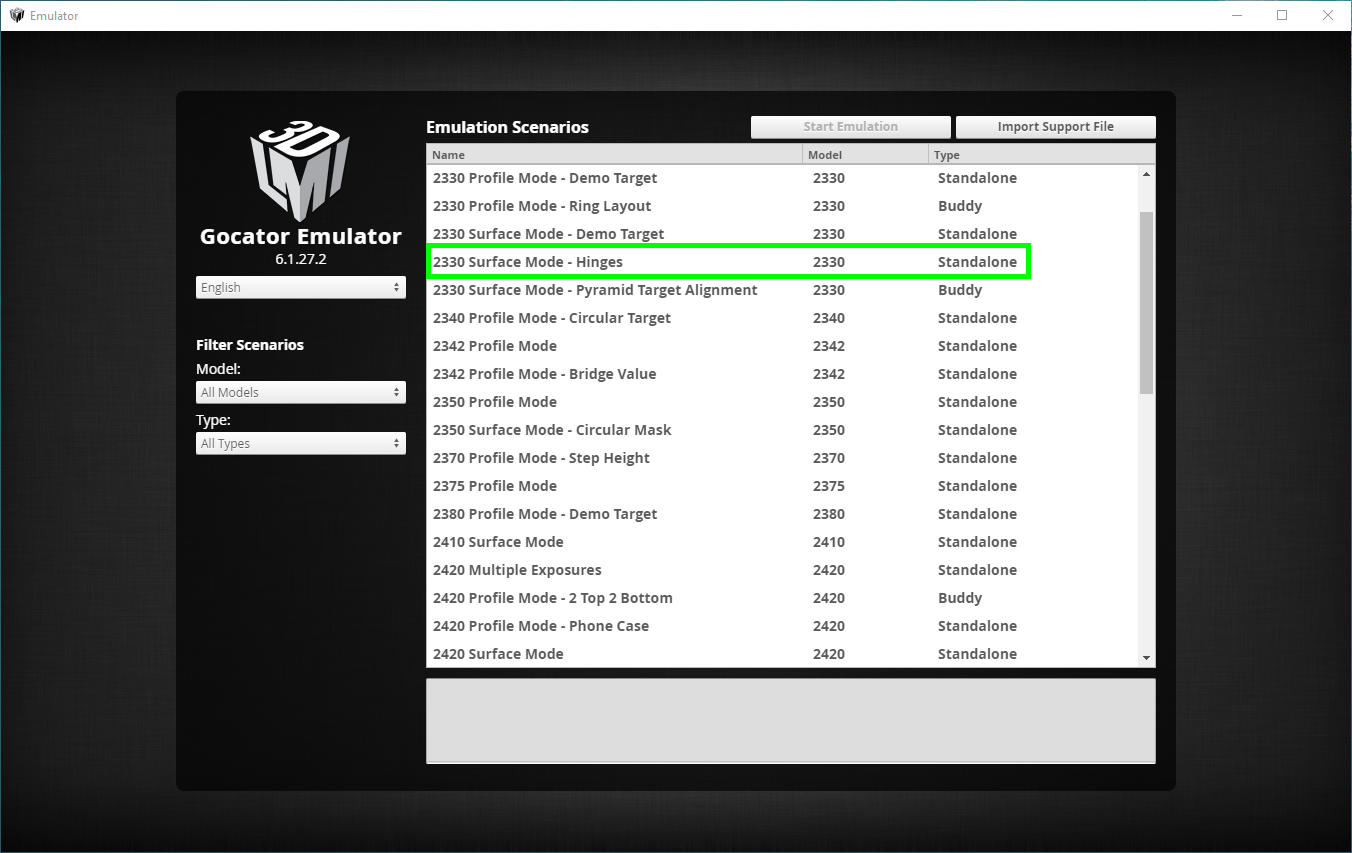
- Choose scenario:
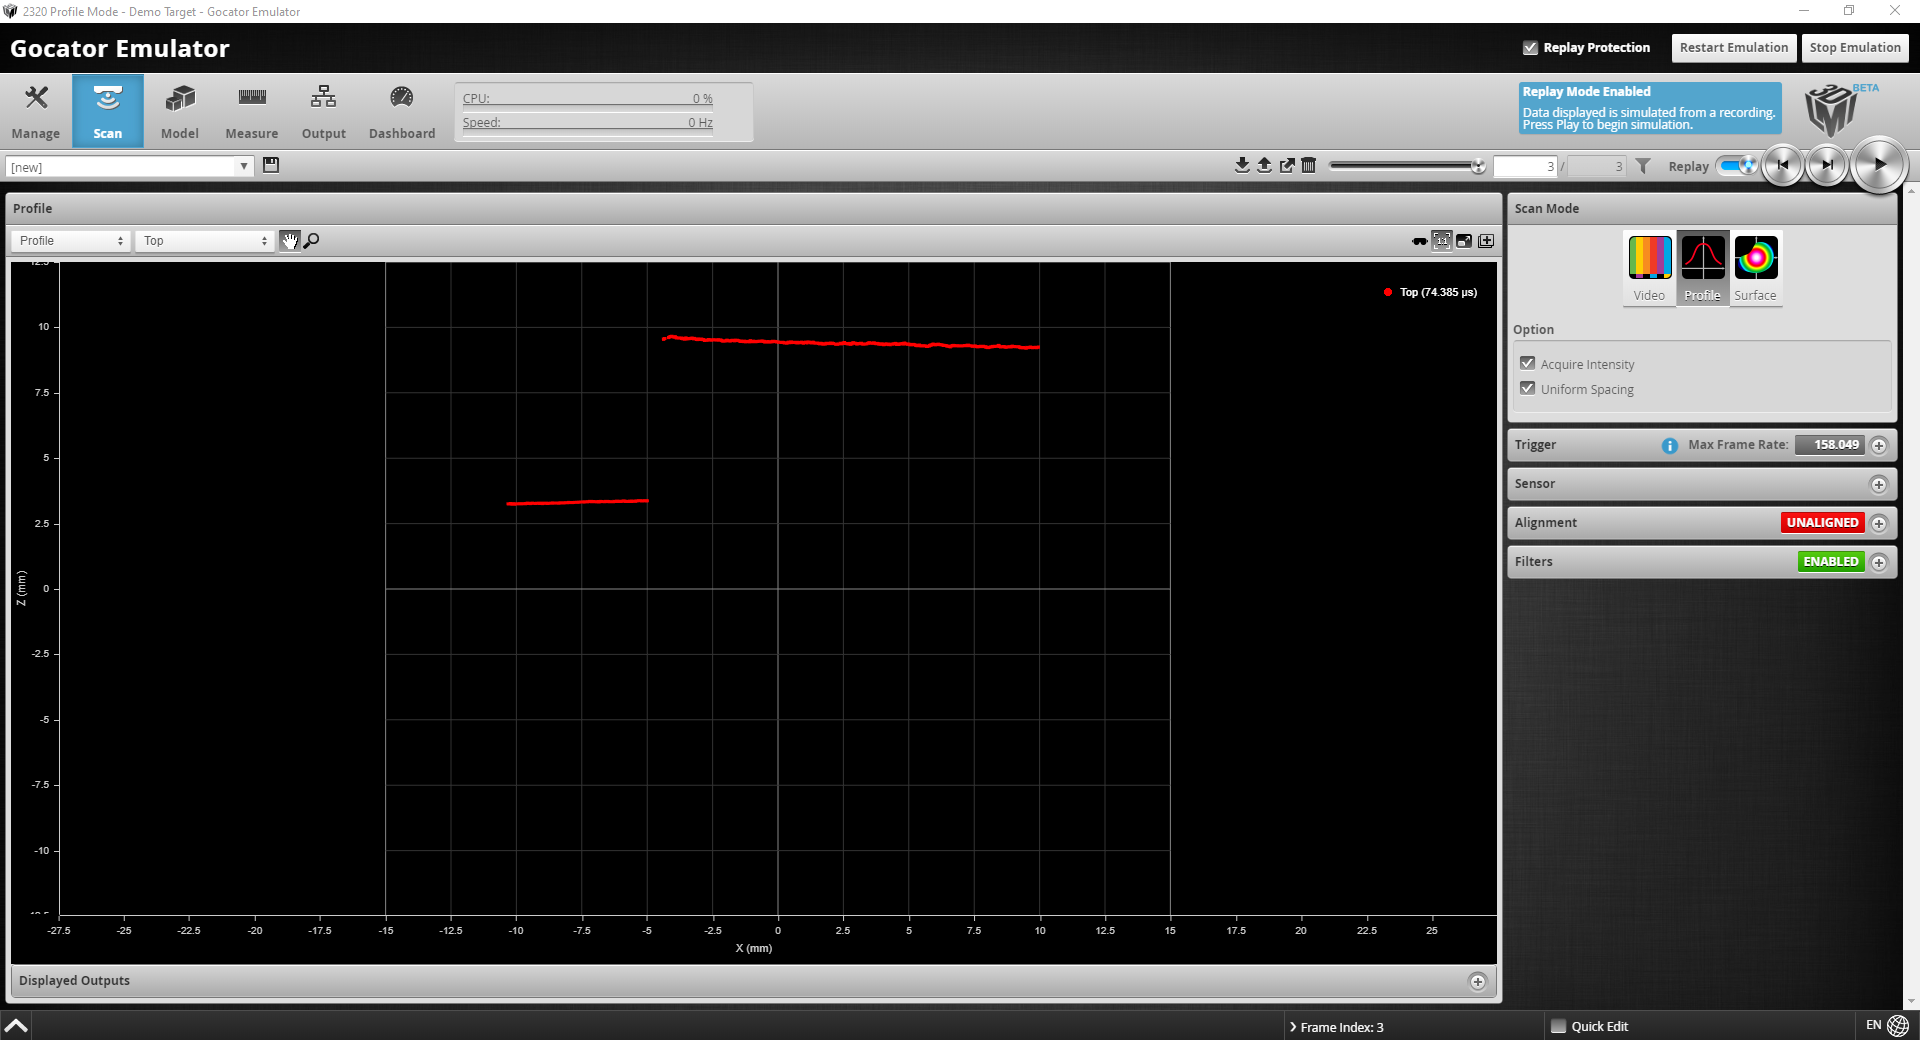
- In the "Scan" tab run the scenario:
- In the "Output" tab make sure that the profile top output is marked:
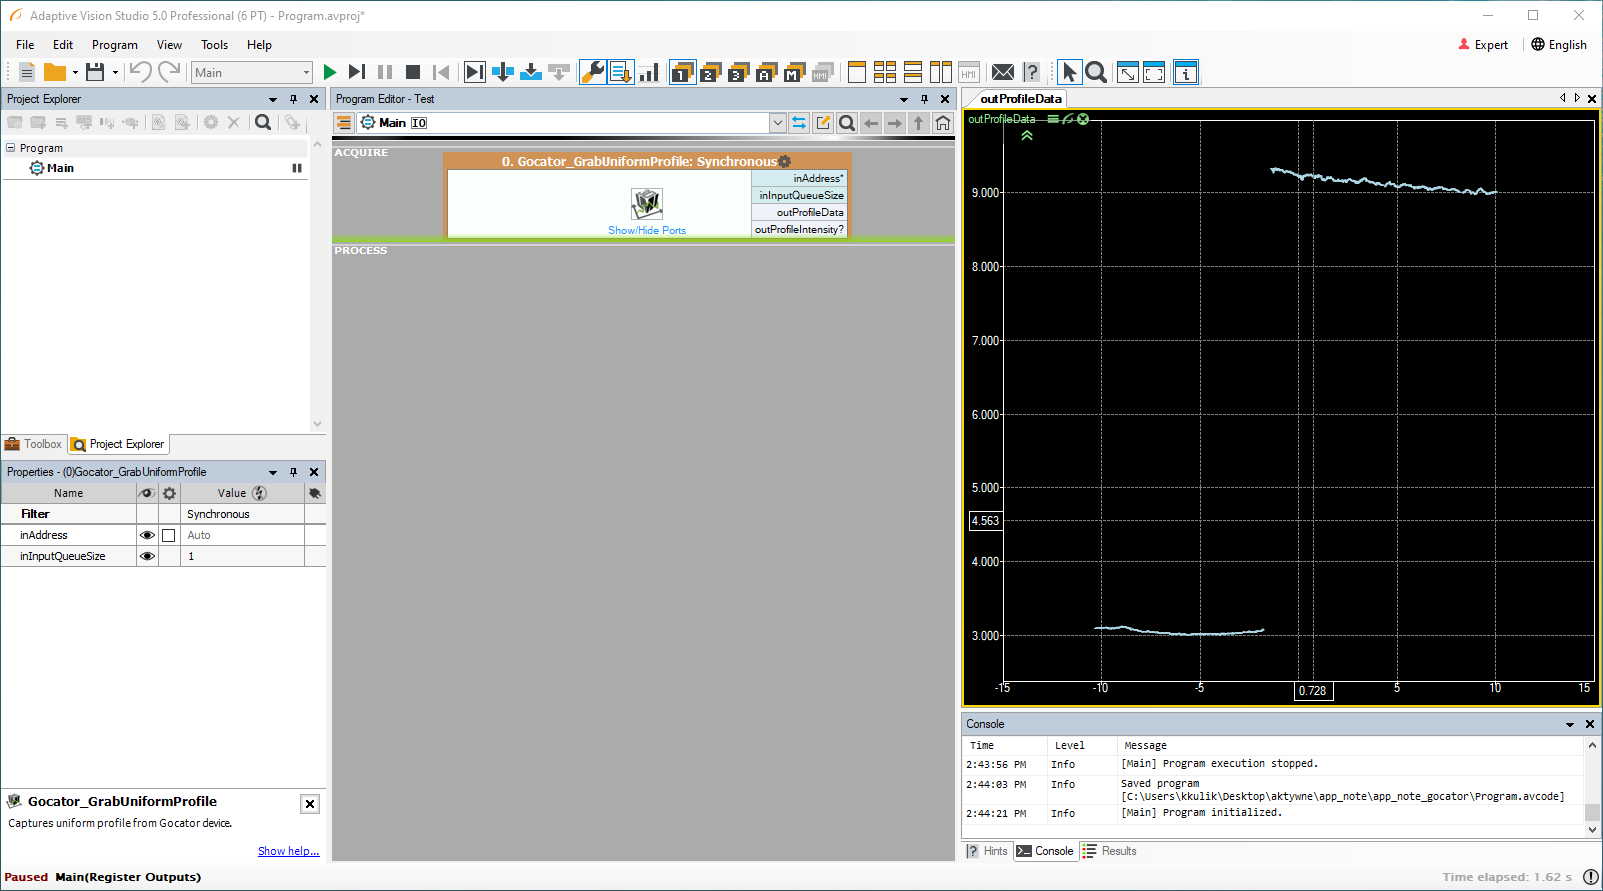
- In Aurora Vision Studio choose the Gocator_GrabUniformProfile filter and add the output outProfileData to a preview window:
Example 2 - getting surface
To grab surface from a Gocator (in this case Emulator) follow the steps below:
- Choose scenario:
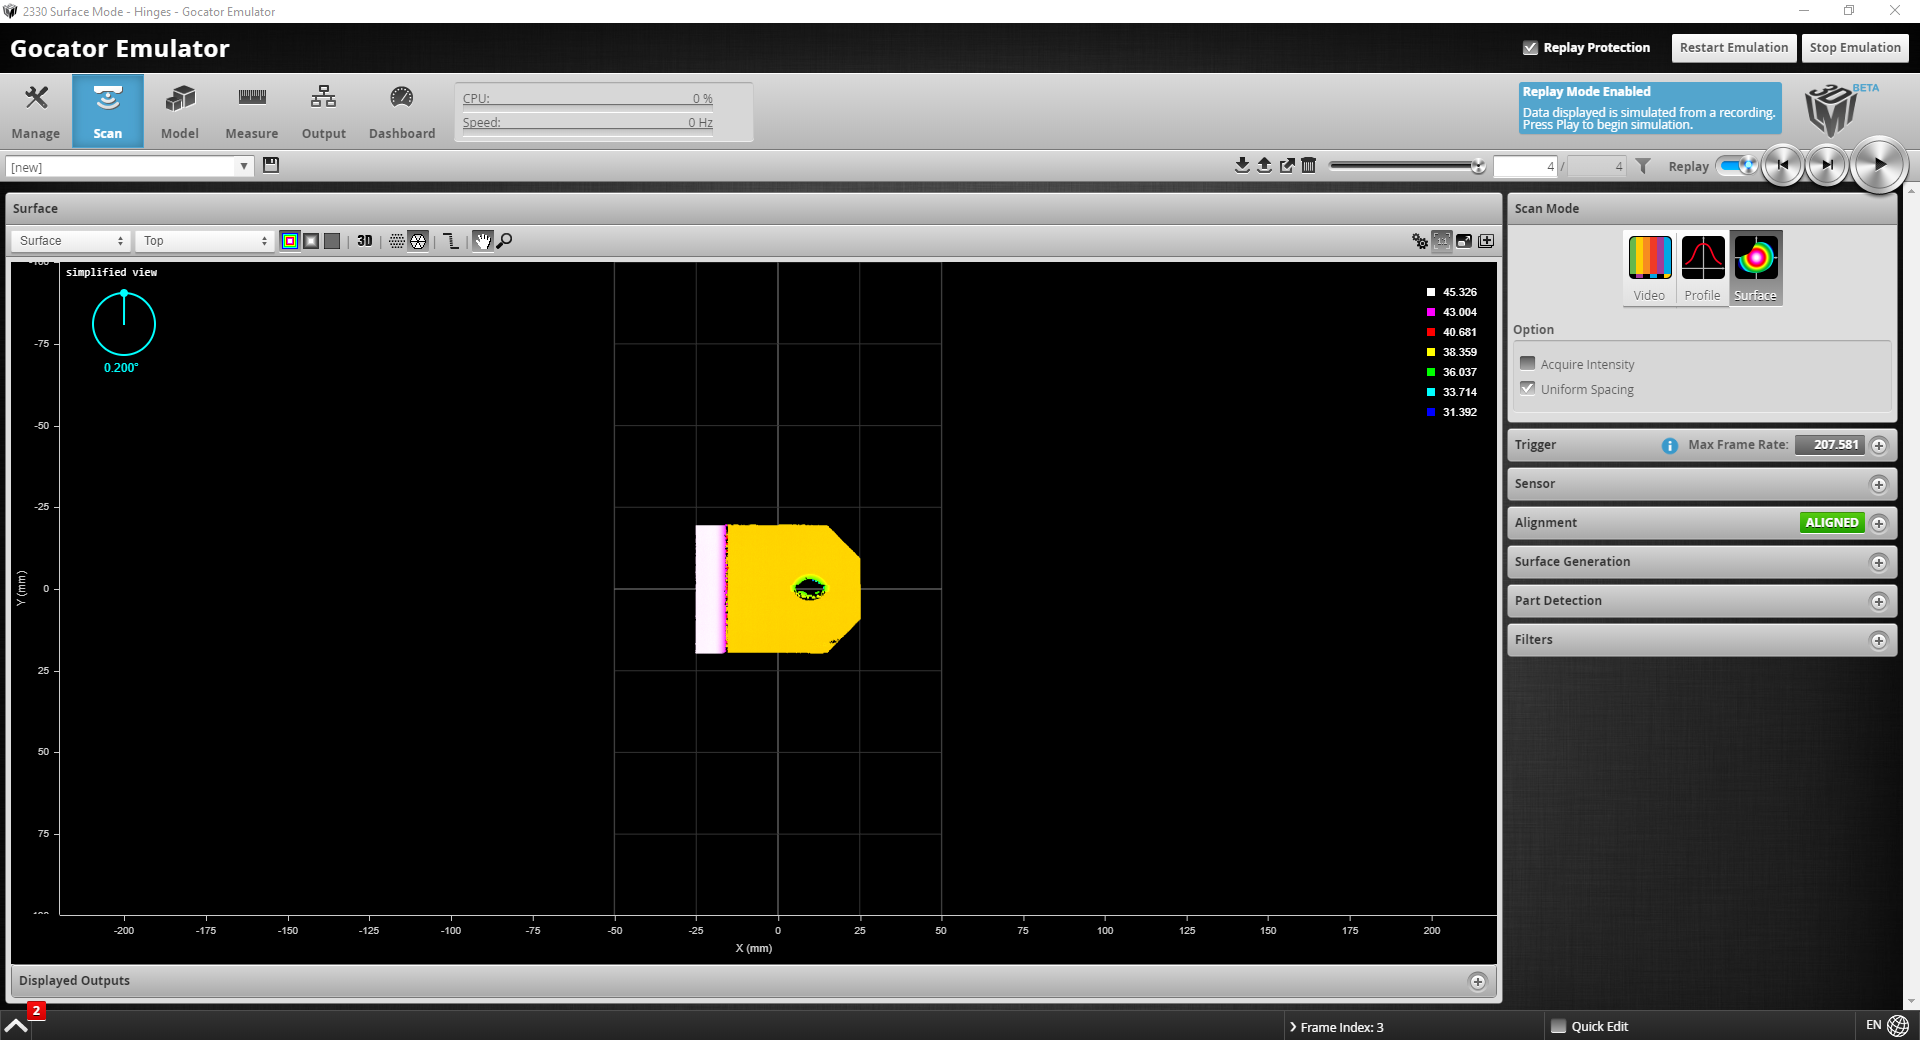
- In the "Scan" tab run the scenario:
- In the "Output" tab make sure that the profile top output is marked:
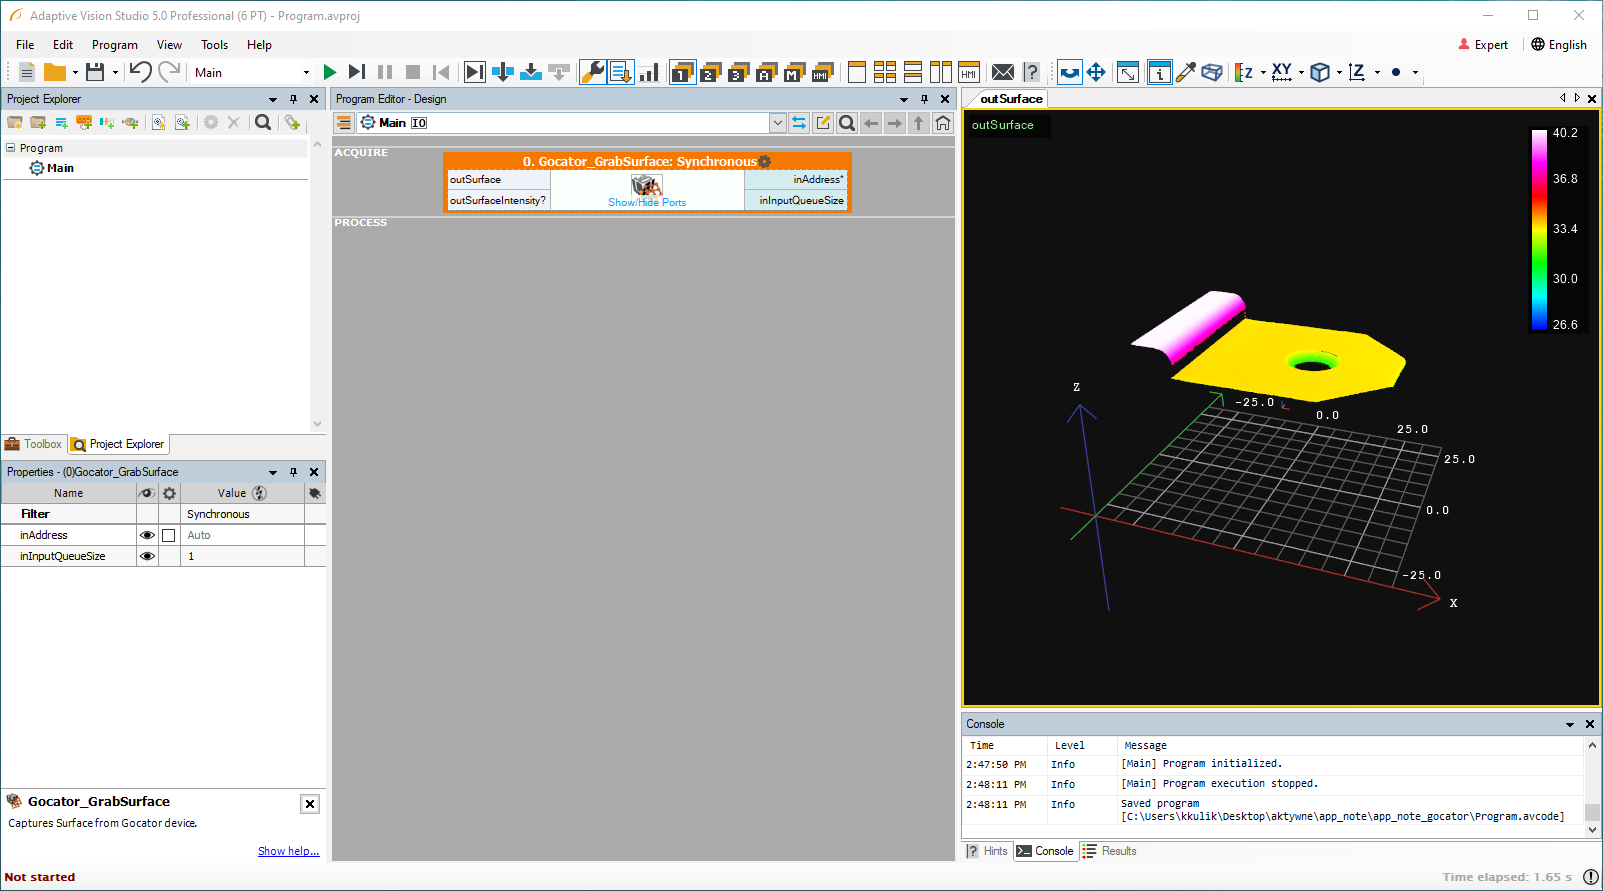
- In Aurora Vision Studio choose the Gocator_GrabSurface filter and add the output outSurface to a preview window:
Example 3 - getting measurements
To grab measurement from a Gocator (in this case Emulator) follow the steps below:
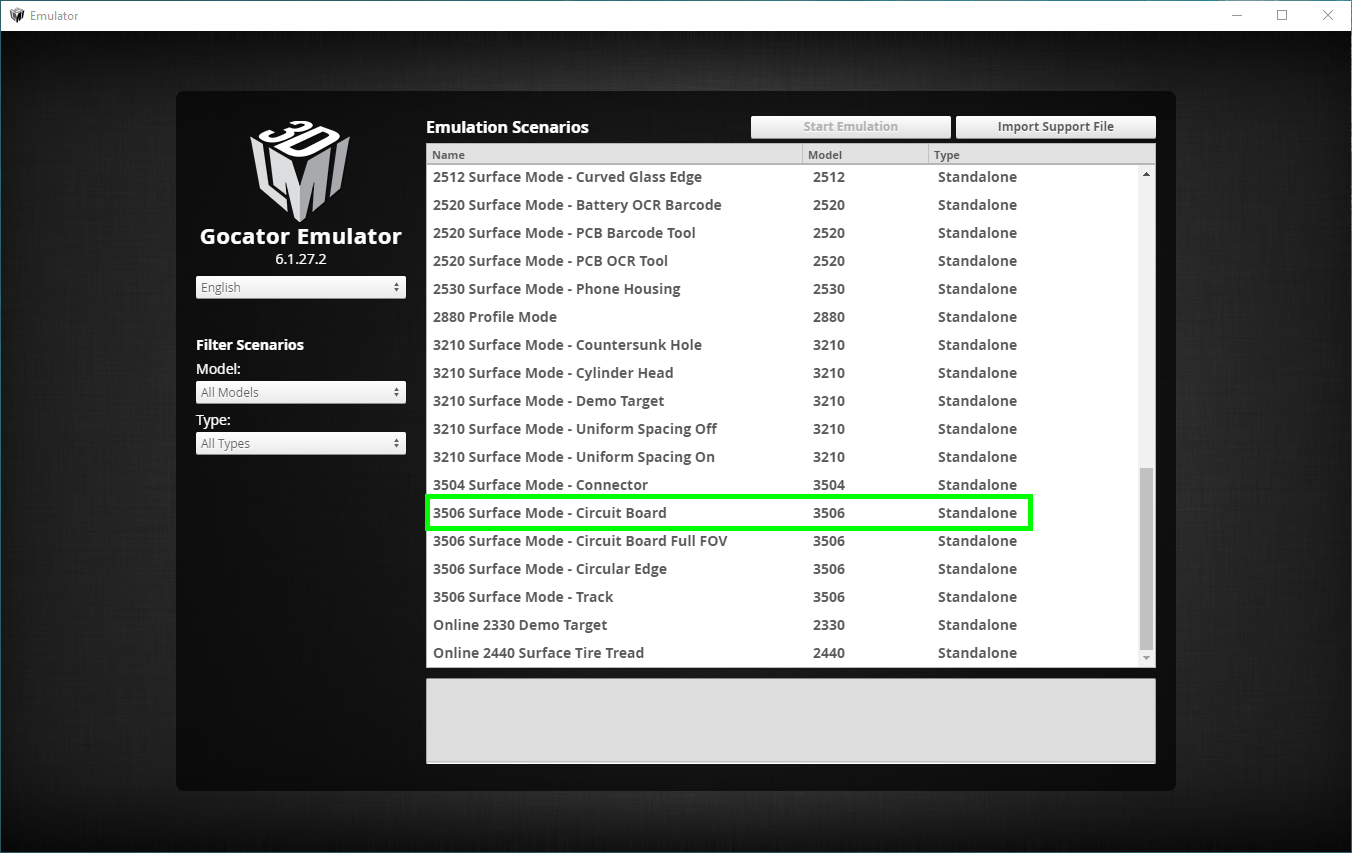
- Choose scenario:
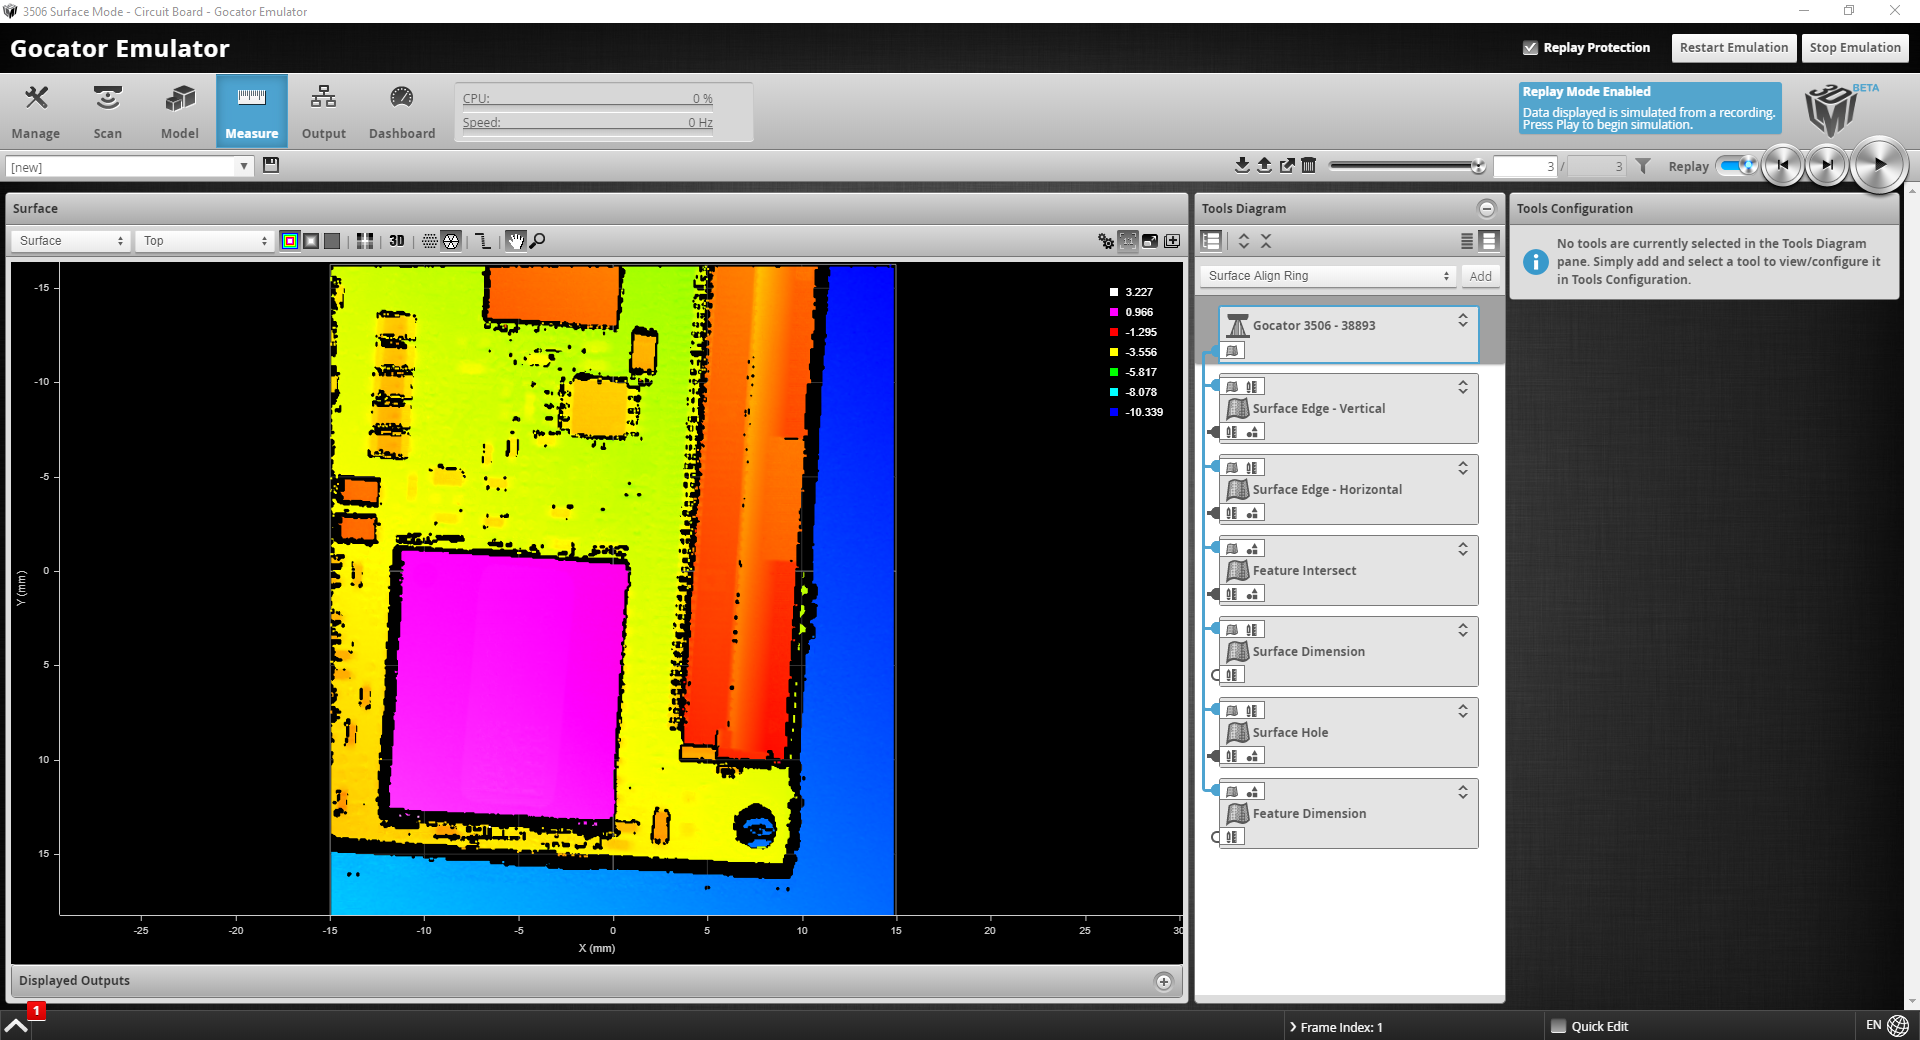
- In the "Scan" tab run the scenario:
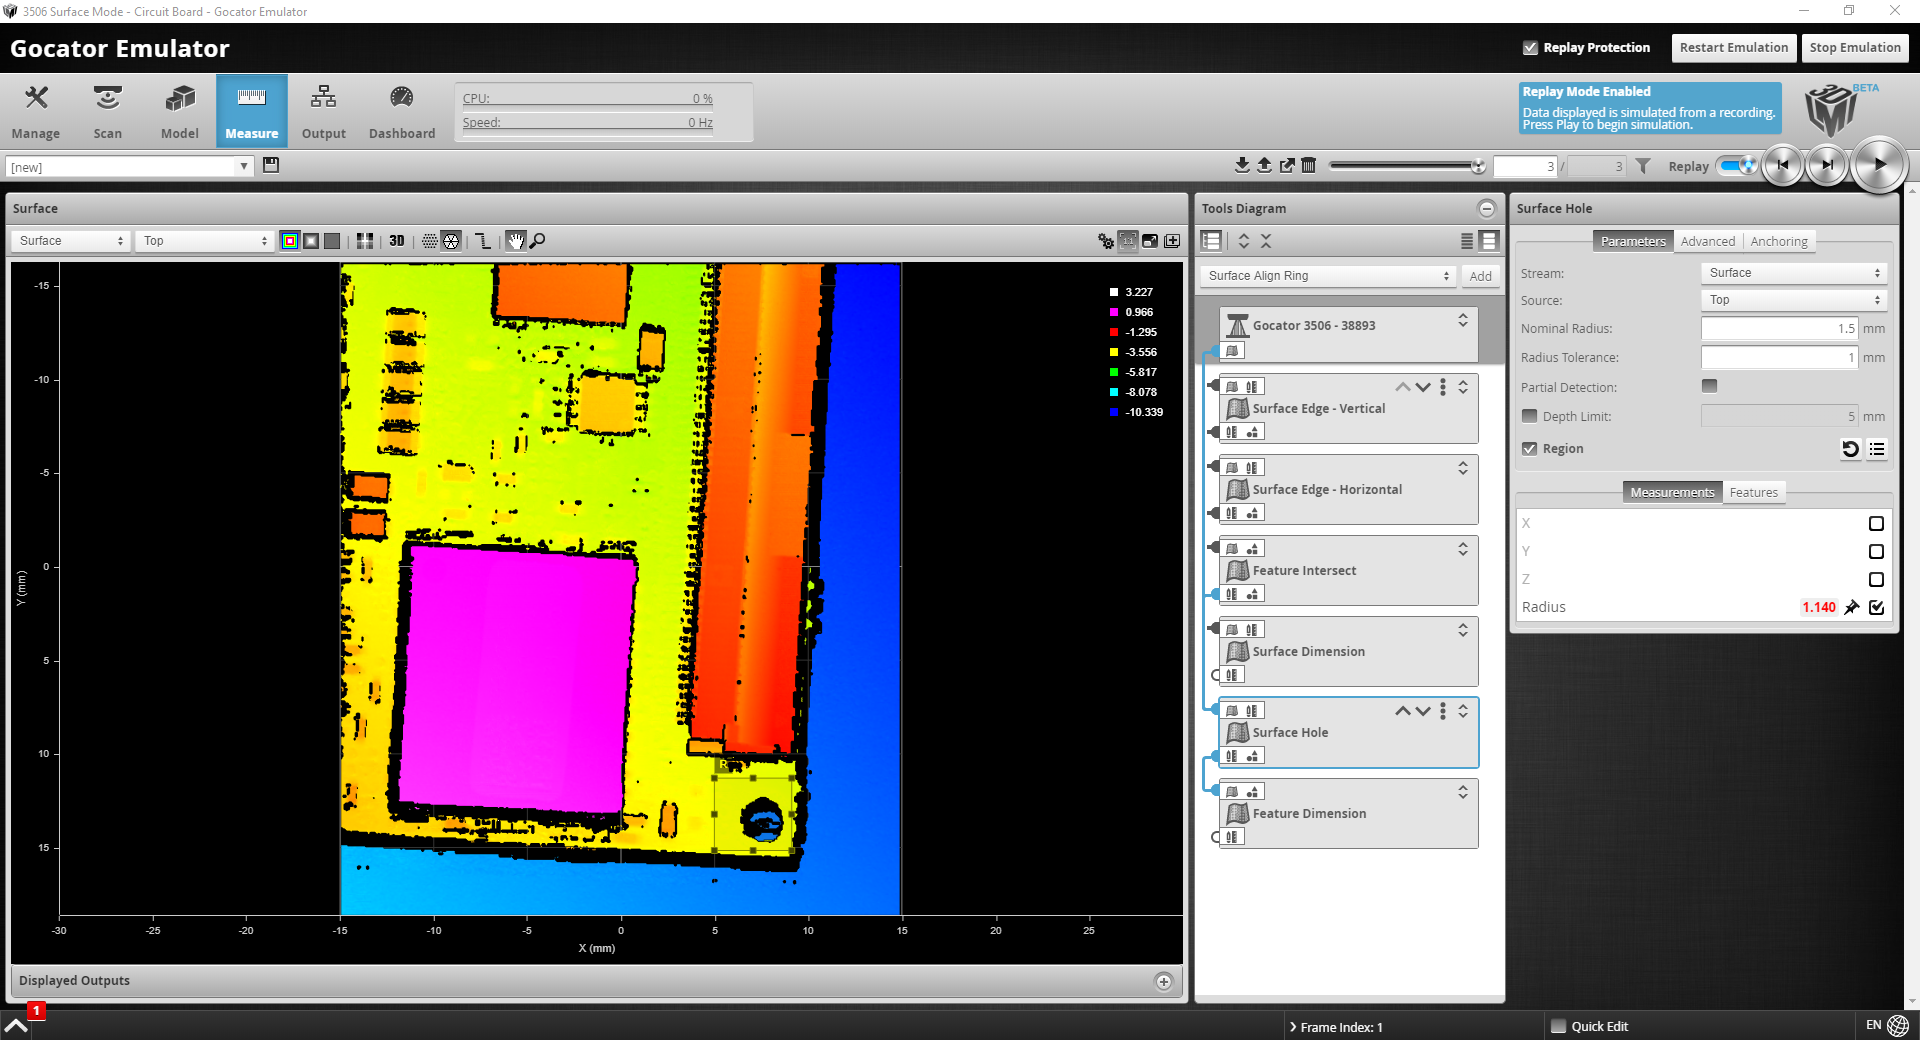
- In the "Measure" tab choose required measurements:
- In the "Output" tab make sure that the output data you would like to send is marked:
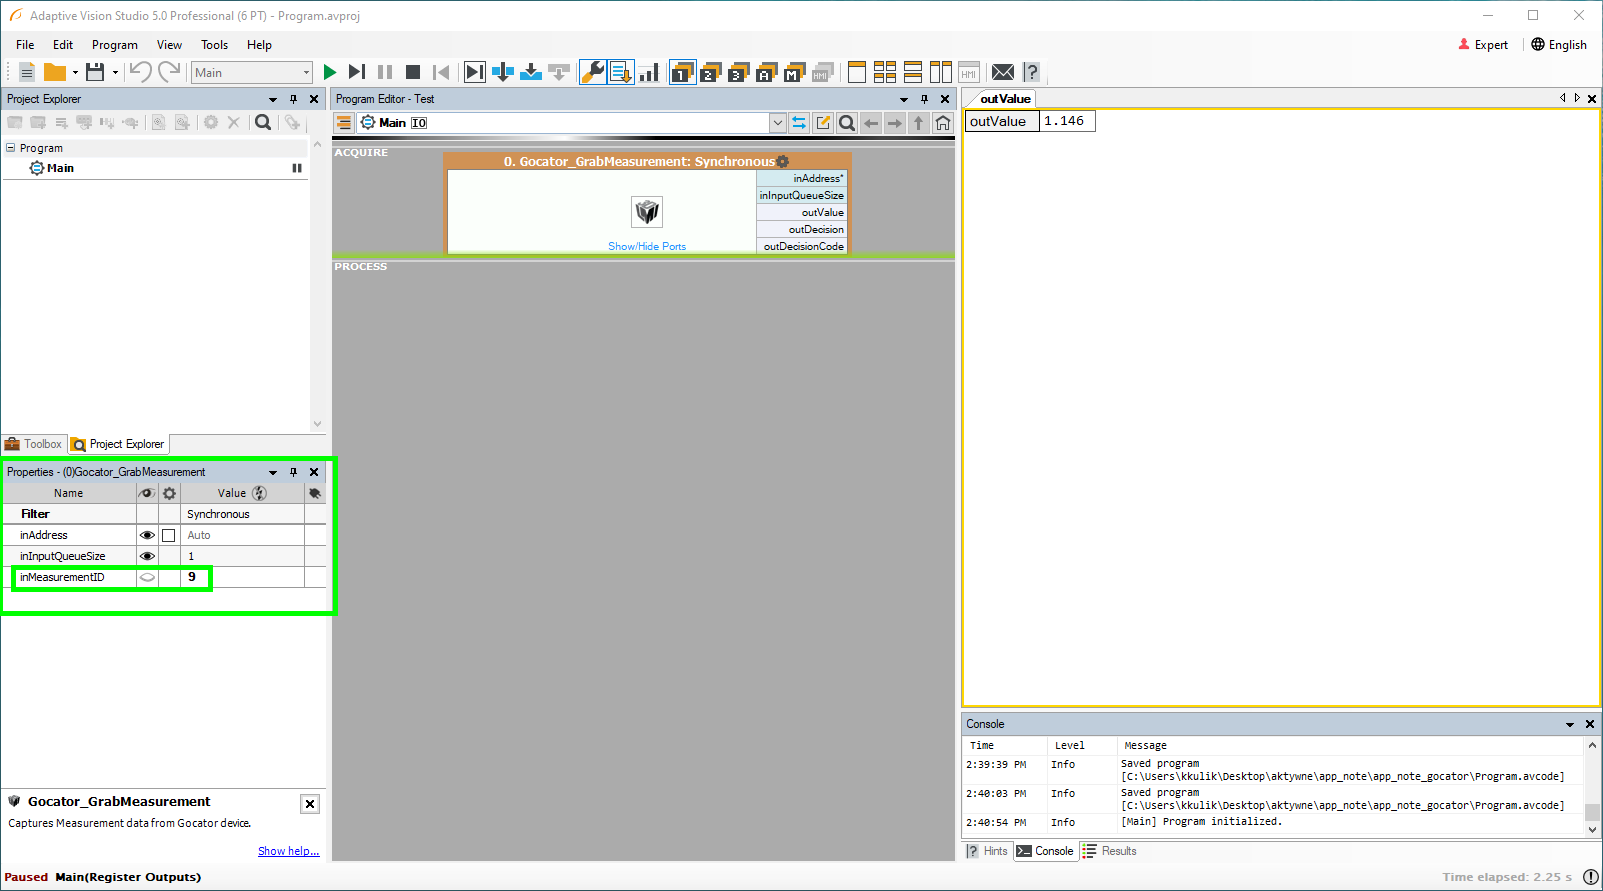
- In Aurora Vision Studio choose the Gocator_GrabMeasurement filter and add the output outValue to a preview window. Please note that the data output from a previous paragraph has a specific ID, so you must enter this value in Aurora Vision Studio - in Property window there is the parameter named inMeasurementID that should be set to 9, because our goal is to display the value of hole's radius: