
You are here: Start » Program Examples » WebHmi - Authorization
WebHmi - Authorization
Aim:
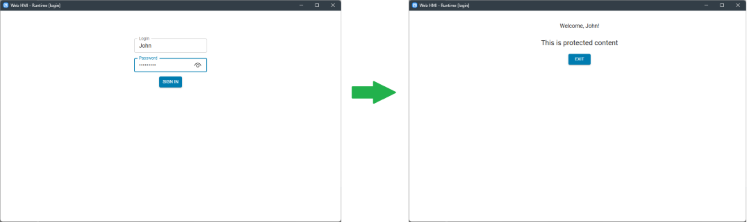
This example demonstrates how to build a password-protected WebHMI interface entirely within Aurora Vision Studio.
Note: This is a reference implementation for demonstration purposes, where user credentials are stored directly in a Global Parameter. In production environments, passwords must never be stored in plain text. Always use secure password hashing mechanisms (such as bcrypt, Argon2, or PBKDF2).
Output:
A fully functional WebHMI authorization system:
Hints:
For this task, use the official Login page WebHMI template provided in Aurora Vision Studio.
In the following articles, you can find more information about designing WebHMI and handling events:
Solution (AVS):
-
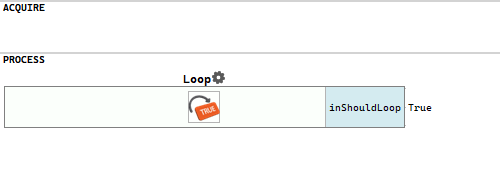
Add the Loop filter to the PROCESS section.
-
In the Project Explorer panel, create a new User Type named User of Structure type. Define two fields of String type: Name and Password, leaving their default values empty.
-
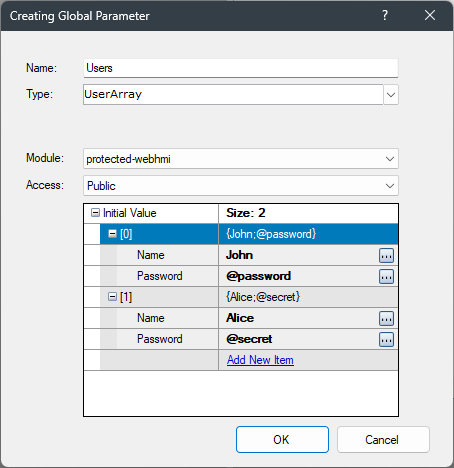
In the Project Explorer panel, create a Global Parameter named Users of type UserArray.
-
Set the initial value of Users as shown in the image below:
-
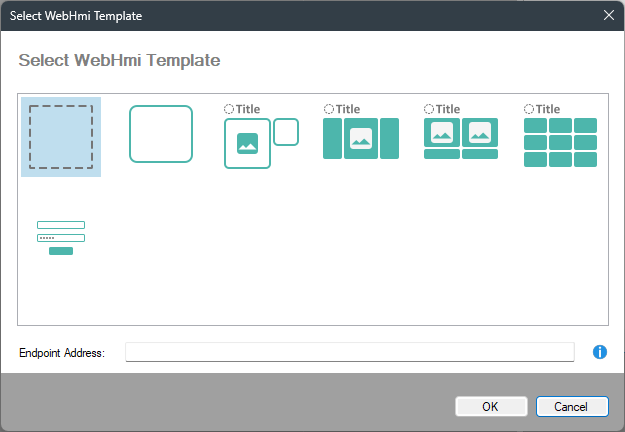
Choose Edit » Add Web HMI... and select the Empty template. Leave the Endpoint Address field empty:
-
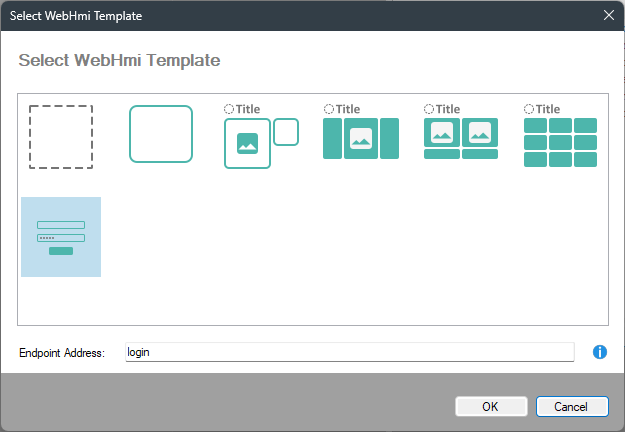
Choose Edit » Add Web HMI... again and select the Login Page template. Keep the default Endpoint Address. The LocalAuthProvider_AuthorizationRequested event handler will be added automatically to the project:
-
In the Project Explorer panel, navigate to WebHMI » /login and switch to the XAML view. Remove the following unnecessary elements:
<Divider Name="divider1" ... />;<Form Name="googleAuthForm" ... />and all its child elements;<Form Name="msAuthForm" ... />and all its child elements;<Form Name="githubAuthForm" ... />and all its child elements.
-
In the
<Form Name="localAuthForm" ...>tag, add theMethod="Post"attribute: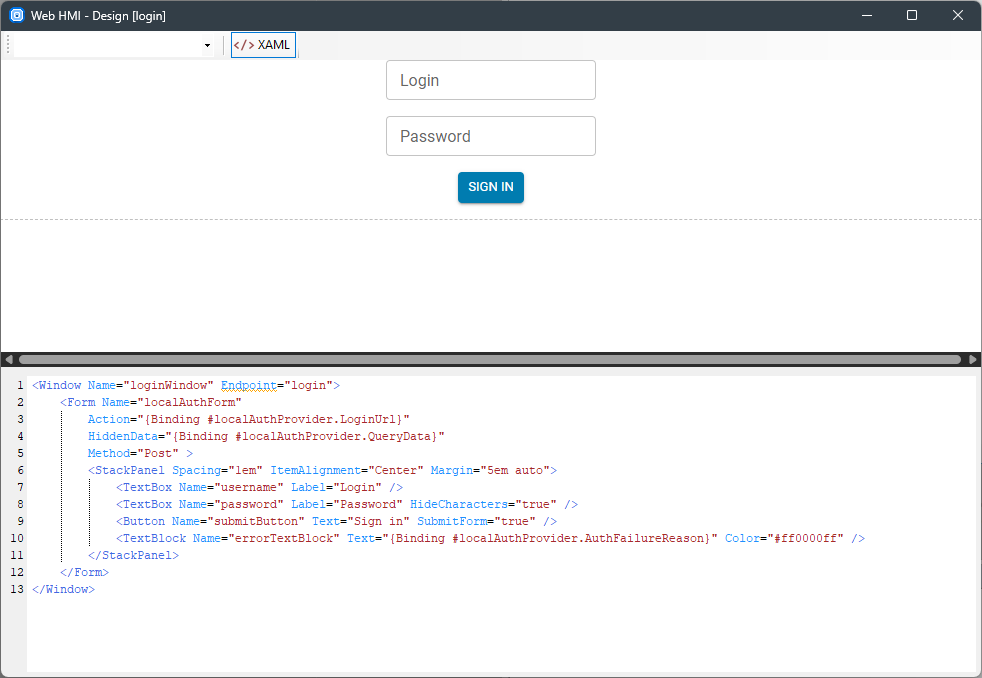
-
In the Project Explorer panel, navigate to WebHMI » WebHMI Settings and open the XAML view. Remove all
<OAuthProvider>elements. -
Change the Authorization Name property value to auth:
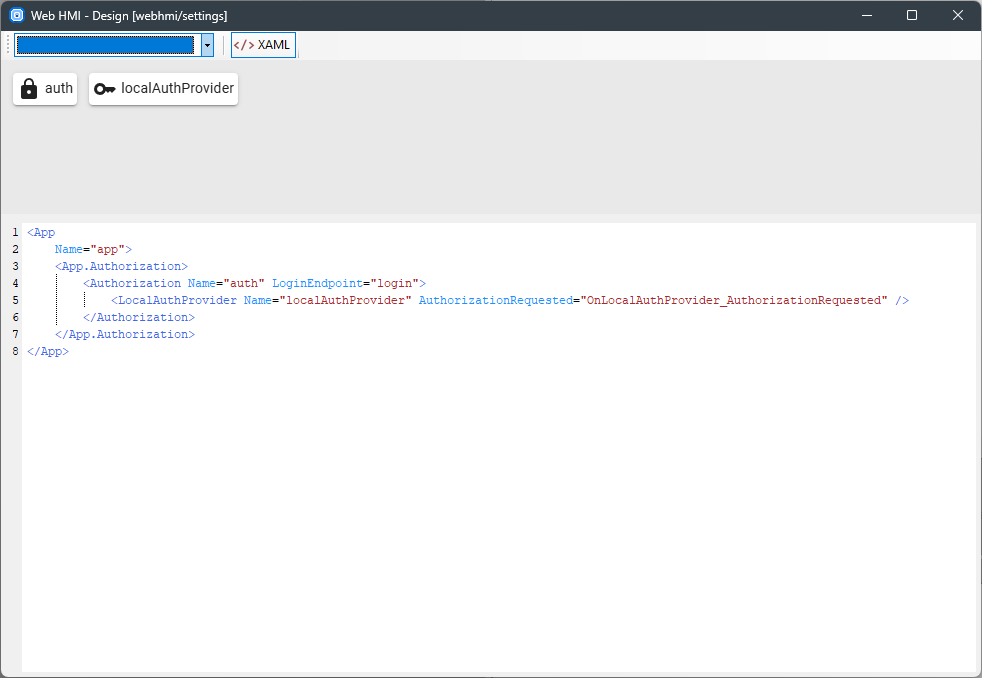
-
In the Project Explorer panel, navigate to WebHMI » / and open the XAML view.
-
From the WebHMI controls menu, add a StackPanel control. In the Properties window, configure:
- ItemAlignment to Center;
- Margin to 2em auto;
- Spacing to 1em.
-
Add a welcome message for the authenticated user: select stackPanel1, add a TextBlock control, and set its properties:
- Name to welcomeTextBlock;
- Text to {Binding #auth.CurrentUserName, StringFormat='Welcome, {0}!'}.
-
Select stackPanel1 and add another TextBlock control with the following properties:
- Name to protectedTextBlock;
- Text to This is protected content;
- Typography to H6.
-
In the XAML editor, add the logout form inside stackPanel1:
<Form Name="logoutform" Action="{Binding #auth.LogoutUrl}">

    <Button Name="logoutButton" Text="exit" SubmitForm="true" />

</Form>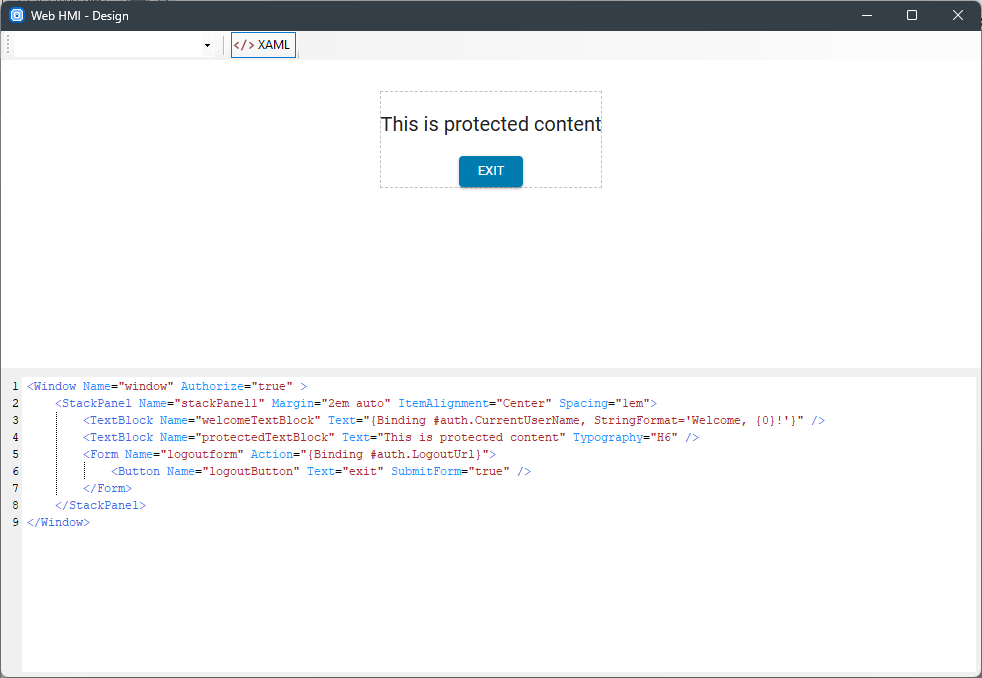
-
In the Project Explorer panel, open the LocalAuthProvider_AuthorizationRequested event handler.
-
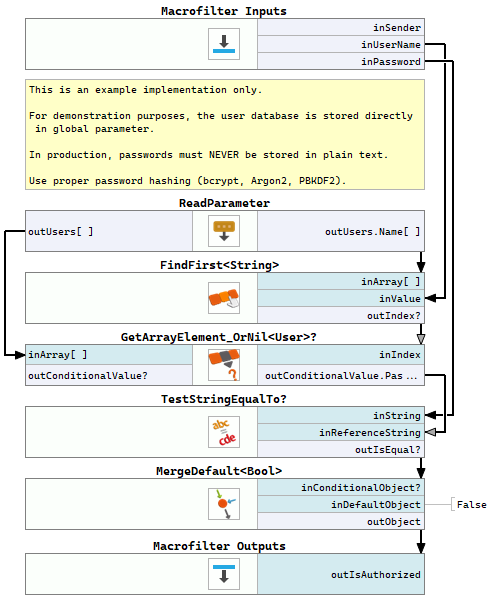
Load the user database by adding the ReadParameter filter. Select Users as the parameter to read.
-
Right-click the outUsers output, choose Property Outputs, and select Name from the list.
-
Verify whether the user exists by adding the FindFirst filter. Connect the inArray input to the outUsers.Name output of the previous filter, and the inValue input to the inUserName macrofilter input.
-
Retrieve the corresponding user entry by adding the GetArrayElement_OrNil filter. Connect the inArray input to the outUsers output of the ReadParameter filter, and the inIndex input to the outIndex? output of the previous filter.
-
Right-click the outConditionalValue output, choose Property Outputs, and select Password from the list.
-
Compare the entered password with the stored credential by adding the TestStringEqualTo filter. Connect the inString input to the inPassword macrofilter input, and the inReferenceString input to the outConditionalValue.Password output of the previous filter.
-
Add the MergeDefault filter. Connect the inConditionalObject input to the outIsEqual output of the previous filter. Set inDefaultObject to False, and connect the outObject output to the outIsAuthorized macrofilter output.
Macrofilter Main.
Macrofilter OnLocalAuthProvider_AuthorizationRequested
Further Readings
- WebHMI Controls - List of WebHMI controls.
