You are here: Start » Application Notes » Acquiring data from AT-C6 devices
Acquiring data from AT-C6 devices
Purpose and requirement
The following instruction provides information on how to interface a AT-Sensors device to the Aurora Vision Studio.
Required equipment:
- A sensor from AT-C6 Series (C6-1280, C6-2040, C6-3070, C6-3070W, C6-4090).
- AT SolutionPackage 2023.12.
- Aurora Vision Studio 5.4 Professional or later
- cxExplorer (for AT-C6 device configuration).
PC Network settings
In the delivery state, the DHCP of the device is activated and the camera obtains the IP automatically. In general, the usage of static IP addresses is recommended. For this the network adapter and the device must be set to the same IP address range.
In Windows OS, the network adapter settings can be accessed by following these steps:
- Open Control Panel on your PC.
- Find Network and Sharing Center.
- Choose Change adapter settings.
- Right-click on unidentified network connection, choose Properties.
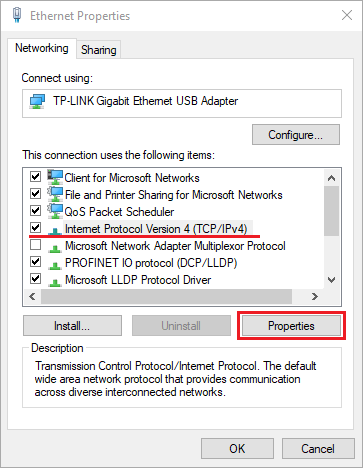
- In Ethernet Properties find Internet Protocol Version 4 (TCP/IPv4) and click Properties.
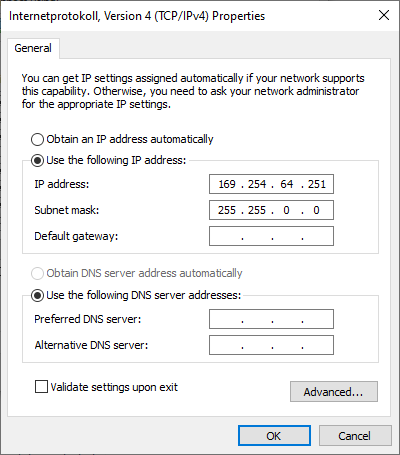
- In General tab, choose Use the following IP address and set:
- IP address to (for example) 169.254.64.251
- Subnet mask to 255.255.0.0
- Click OK and Close.
AT-C6 Configuration
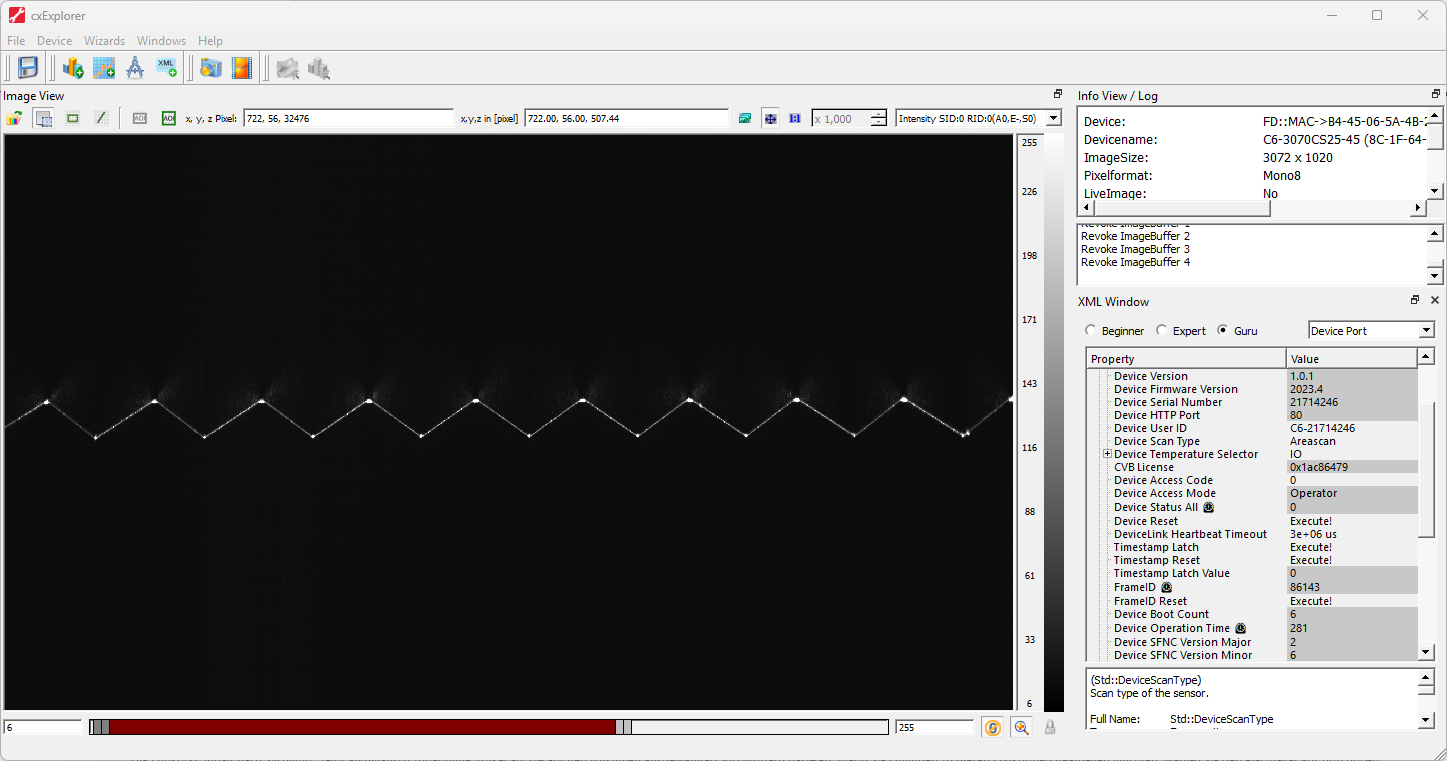
Configuration of a AT-C6 device can be easily done with the cxExplorer, which is a graphical user interface provided by AT Sensors. With the help of the cxExplorer a sensor can be simply adjusted to the required settings.
After configuring the device with cxExplorer, you can start with the Aurora Vision Studio software.
Using AT-C6 with Aurora Vision Studio
After all the previous steps restart or turn on Aurora Vision Studio. You can acquire data from the device and set its parameters using dedicated tools: cxCam.
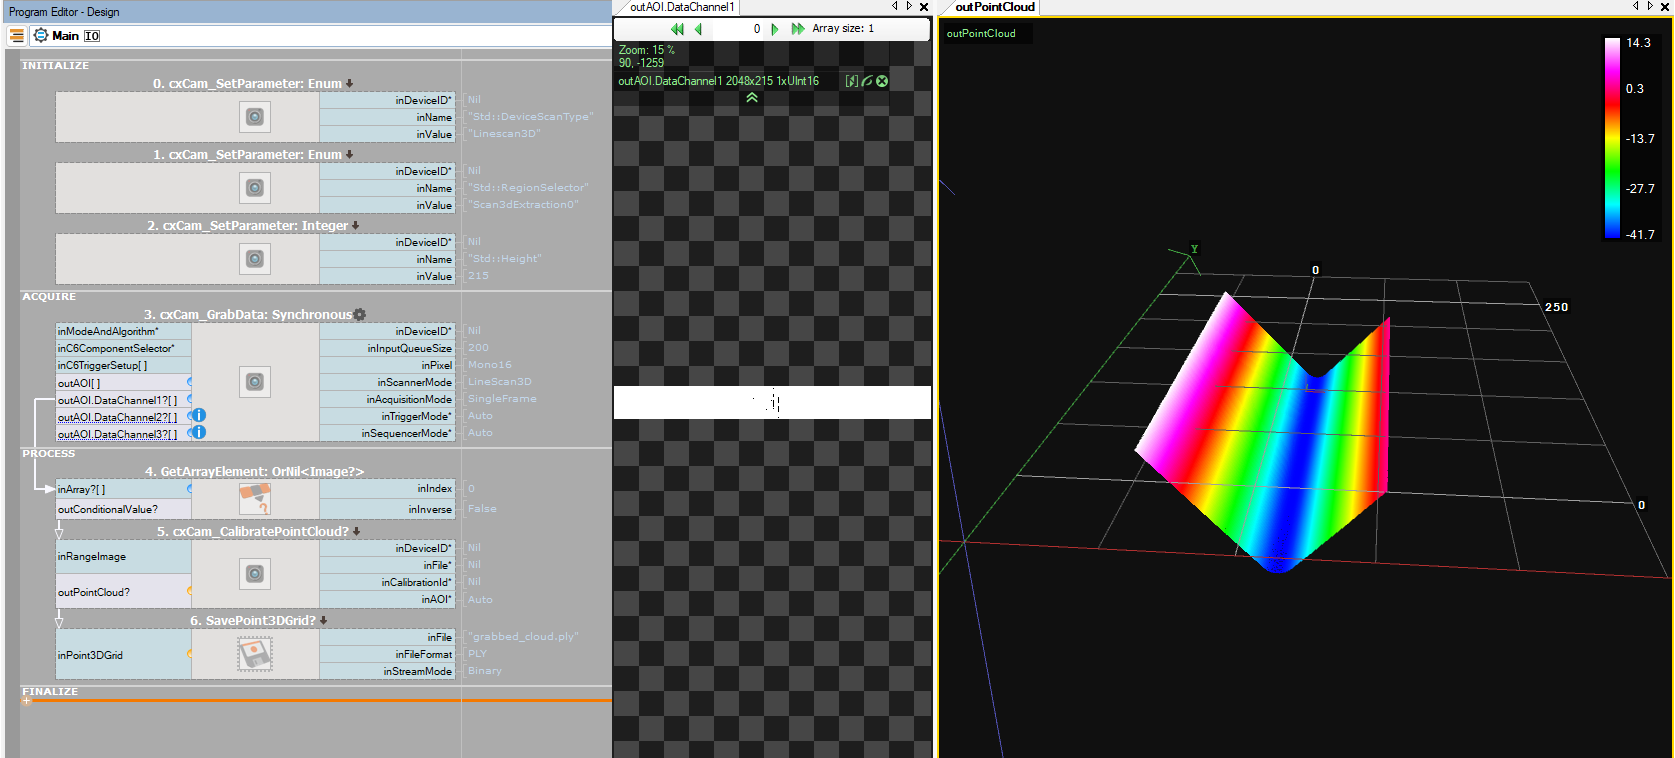
A simple program that grabs the point cloud from the device is presented on the image below.