
You are here: Start » User Interface » Creating Models for Golden Template
Creating Models for Golden Template
Introduction
Golden Template is an image comparison technique. It is based on the pixel-to-pixel comparison but uses multiple images and advanced algorithms to create a multi-image model. It is useful for finding general defects of objects that have fixed shape. In order to simplify the process of model creation a "GUI for Golden Template 2" was created. It is possible to access it by clicking on the  button at the inModel input in the Properties window:

Opening GUI for Golden Template 2
Image Preparation
To create a golden template model you need at least three same-sized images representing the same object. The object should be placed in the same way in all the images. Otherwise, the final model may not be accurate enough.
The first step is to prepare the images. To be sure that the object is always precisely positioned and have the same size - in both the model and the program - you can use the sequence of filters presented below:
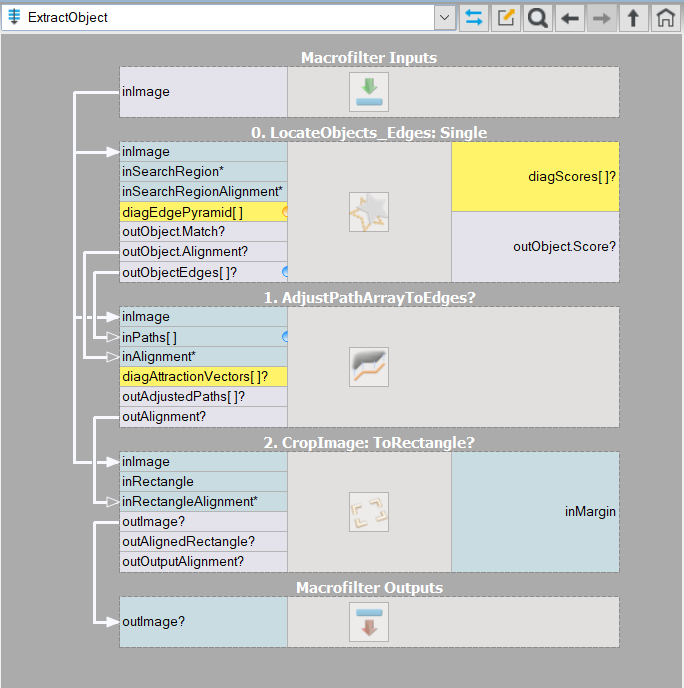
Image preparation process
Following steps were performed there:- LocateSingleObject_Edges filter was used to create a robust model able to locate the logo and remember its alignment
- AdjustPathArrayToEdges allows you to improve the template matching results
- CropImageToRectangle gives evenly-cut images of the object. You should specify the inRectangle input manually.
Model Creation
Add CreateGoldenTemplate2 filter to the program and press inModel in the properties window, as shown on the image at the beginning of the article. After that the following window will appear:
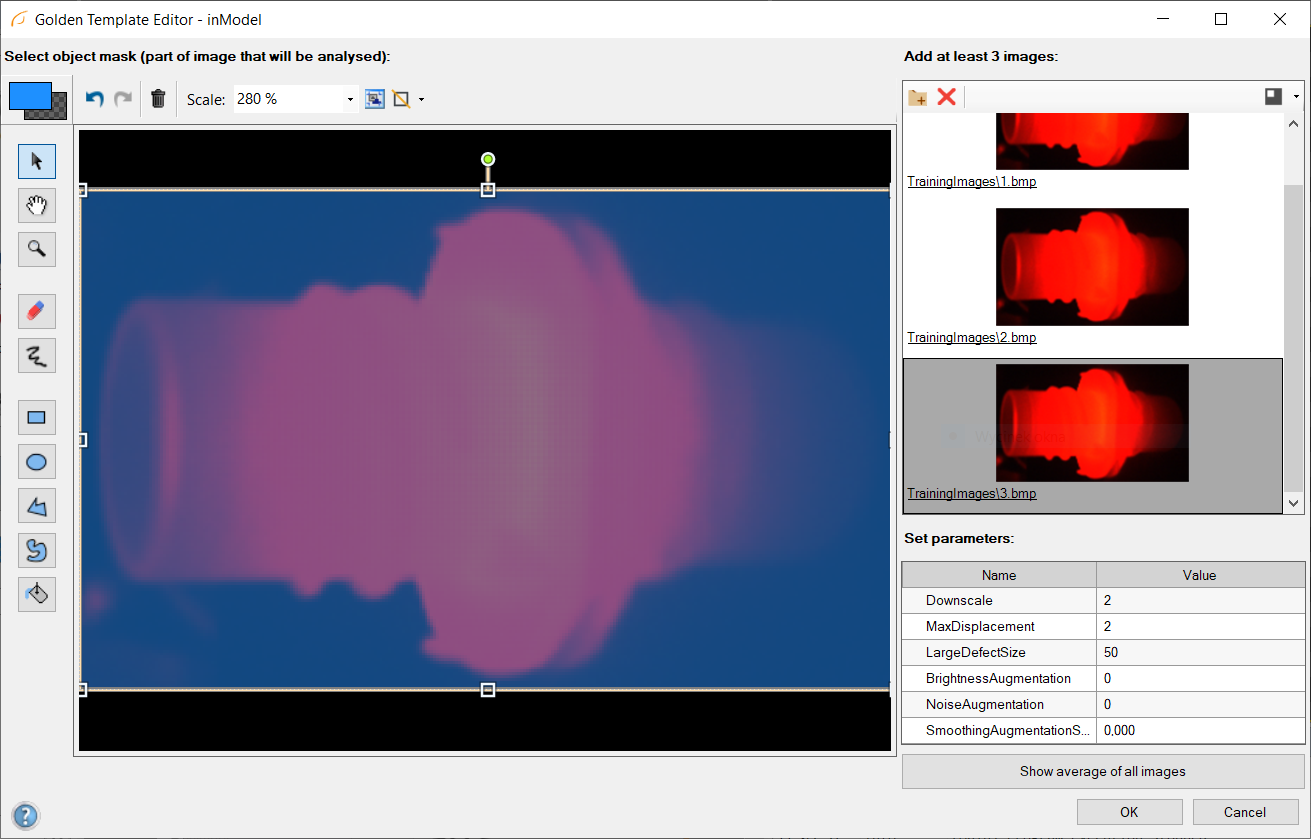
Golden Template Editor
Firstly, add images to the editor. It is possible to either use the drag and drop function or load images from the directory by clicking on the  icon. They will be used to create the Golden Template model, so there should be no defects in them.
After loading all the images, draw a mask that represents the object of interest. It applies to all the images in the editor. That is why it was necessary to properly position the objects on the images. If no mask is detected the warning will appear. If the object covers most of the field of view, please feel free to mark the whole image.
Now you can check the preview with the "Show average of all images" and adjust the training parameters:
- Downscale - resizing the image dividing by the value. It greatly speeds up the computing in exchange for the ability to spot pixel-size defects
- MaximalDisplacement - possible error in object positioning, high values may impair detection of small defects, especially near edges
- LargeDefectSize - expected diameter of largest, extensive defects
- BrightnessAugmentation - allows for additional brightness deviation
- NoiseAugmentation - allows for additional noise presence in the images
- SmoothingAugmentation - allows for additional smoothing in the images, uses gaussian smoothing with specified standard deviation
Pressing OK button will start the training. The editor will close itself afterwards.
The model is created and loaded now in the CreateGoldenTemplate2 filter. If you prepare the inspection images in the same way as during model creation (by positioning and cropping them) everything should work properly.
| Previous: Creating Golden Template Models | Next: Creating Text Recognition Models |